![]()
Scale Matters
.049s: Trust nothing
The Regionals, leadout positions, etc.
By Orin Humphries
October 2018
Trust nothing in your Cox engines and after-market components. Check them closely.
Back in April I got out my rod resetting tool and went through every Cox engine and after-market piston I had. I had come by 13 pistons and seven cylinders from Cox International. I also had maybe 10 factory engines acquired over the years. As a refresher from my .049s article Part 2, only one piston’s rod had the stated 0.002-0.003 inch end play in the piston socket. A few were around 0.010” and the worst was 0.040” with the typical being 0.020”. I used a small hammer on the punch and was a bit surprised at how hard the newer pockets were. I goofed up two older pistons whose pockets were softer. All of these after-market parts were never-installed hardware. Quality control at this vendor seemed absent.
In my factory engines I found rod looseness in about 50% of them. This was true whether the engine had been run or had never been started. There seemed to be no pattern. Trust nothing.
The day of this reworking hardware brought a NIB old Black Widow via eBay. The box said, “Cox Hobbies, Inc., 1525 E. Warner Ave., Santa Ana, CA 92705.” It was no surprise to find the head loose, but all of the tank screws were loose as well. I noted that the open ports cylinder was the full-length thick wall variety with bypasses in both. The bypasses did not have the later boost ports machined into them. This means this engine will always be on the no. 2 position on my multi-engine models as it will be a few hundred RPM slower than my No.1’s that do have the boost ports. I noticed also that the tank has the old spring clip reed retainer, but that it had the Mylar reed. This engine is transitional, then, between developing configurations.
This engine later threw its prop on its first run and burned up. I ran it a second time to see what it would be like. It tached in the low 16Ks, a significant drop; no surprise.
I next ordered two more Tee Dee cylinders and pistons from Cox Intl. for careful measure of the rod seating. Doing this as precisely as I could muster, one had a play of 0.004 inches and the other had a play of 0.006 inches. Again, 0.002-0.003 inches is the factory spec.
I again checked a website, coxengines.com, to see if I could get and alternate source of pistons and cylinders. It is clear to me that they deal a lot in reworked parts or used parts in some cases. This is not a good source for my own research.
By the way, I read the Frequently Asked Questions in the MECOA Mfg. website and found this about Cox .049s: “Don’t fly them with less than 20% castor oil.” This is regardless of how much synthetic oil is present.
Correction
The ancient model in Part 2 that Jeral is restoring is not an XF13C. It is an XF5B/XP-15.

Jeral Godfrey with the XF5B/XP-15. Orin Humphries photo.
Ben Stories
Several decades ago, the Boeing 247 landmark airliner had sat untouched for a long time. Boeing decided to get it back into the air for an airshow that would be about a year later on. Ben was a 23 year old mechanic who was just in the right place and time, and he was assigned to the team.
“I got the engines going right away, no problem,” Ben said, “and we got into the 247 over the winter, checking everything out. When it was ready, we were told to fly it up to Everett for the airshow.”
For a reason I have forgotten, the lead, a multi-rated pilot, wasn’t up to flying it that morning. He told Ben to take the left seat for the flight. “But I don’t have my multi-engine rating yet,” Ben protested.
“I do”, responded the project lead, “and I am right here beside you.”
“So I flew us up to Paine Field. I landed it okay, and when I taxied up to our spot and stopped,” Ben went on, “he said, ‘Quick! We gotta change seats.’ ”
In that time period, Ben had another friend, Jack, who was a master prankster. One day at the airport, either Boeing Field or SEATAC, Ray Charles had a charter flight scheduled out of there. For kicks, Jack got Ray to put on a pilot’s uniform. Can you see where this is going? In full view of passengers inside the terminal, Jack led this blind ‘pilot’ with white cane by the arm across the ramp out to the airplane! This later was only one of many chewing outs that Jack got for his antics.
2018 Regionals
It was noteworthy, indeed, as stated by Walter Hicks, the ED, in his write-up of Scale: “On an interesting note, all 1/2-A planes were multi-engine and got the bonus points for having both running during the flight.” A small bit of modeling history was made here, apparently having turned a corner. We had 12 airplanes altogether entered, and this was double the turnout we saw at the 2016 Regionals in Scale.
When I had arrived at the site for the Regionals, several people recognized me from the photo of me by the Wright Bros. monument at the head of the Scale Matters section. As I talked with one of them, he offered, “Nobody practices Scale.” Then he added, “Except YOU.”
Leadout Guide
One very interesting entry was a twin-engine DeHavilland Dragon Rapide, DH-89. This is an art deco design from the 1930s, very eye catching. Its engine thrust lines are at the level of the lower wing, and the landing gear with extensive leg pants lower the CG significantly. Pilots just don’t seem to appreciate the effect of the landing gear on any model on the vertical location of the CG. I know I did not. As I walked by, I noticed that the bellcrank was two or more inches above the lower wing. That raised my concern based upon all I have published about hanging a model from its leadouts in the shop. I asked the pilot if he had done that and he stated that he had per my articles. I asked him if his leadout guide was also the same height above the lower wing and he said, “Yes.” This placed it above the CG. Again, it doesn’t matter where the bellcrank platform is, so long as the guide is properly located relative to the vertical height and lengthwise location of the CG. The photo of the plane’s crash upon takeoff in Flying Lines’ report of the contest seems to show the guide the same height above the bottom wing. This would cause the plane to roll in on the pilot upon takeoff. Being this was my first time back in competition in 25 years, I was not forthright in challenging this setup, and I had my own program to get going, having flown two of my three entries only within the previous two months.

Top and bottom views of Orin's F2G. Orin Humphries photo.
My pitman, former student Gary Dowler of Spokane, watched the takeoff of the Dragon Rapide. A small gust of wind came up blowing toward the pilot. I and Gary felt this along with everyone else. Gary stated, “The model never was under control from the moment of release.” The model came in on the pilot, and he literally had to squat way down to avoid being struck by it. Others concluded that the gust had been responsible for the crash. Gary and I strongly disagree. A properly rigged model should have shrugged the gust off, perhaps with a step or two back at the most. The gust, then, only aided and abetted the situation with bad timing. Corsair models are notorious for rolling in upon release when the builder succumbs to habit and brings the leadouts out through the wingtip. Orin Humphries photo.

Orin doing the hang test to check for leadout rake (left) and roll. Orin Humphries photo.
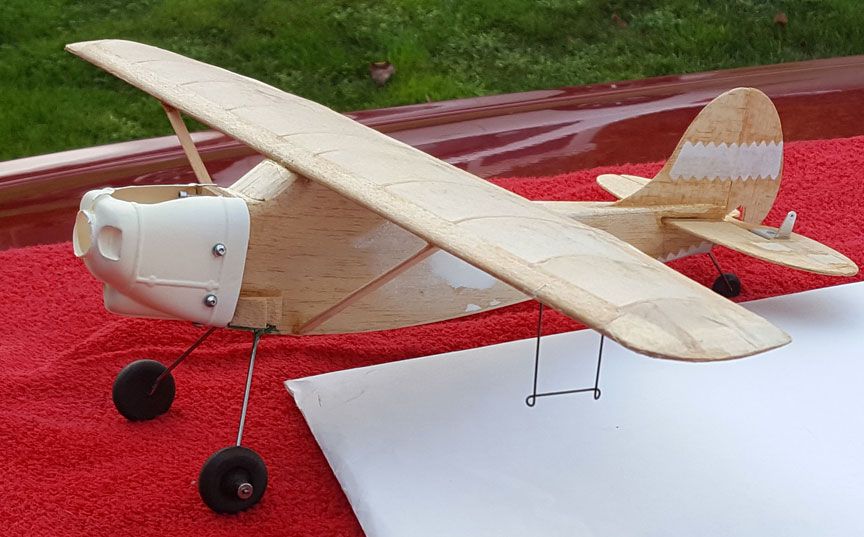
Orin's unfinished L-19 Birddog shows a proper leadout guide for a high- or mid-wing model. Orin Humphries photo.
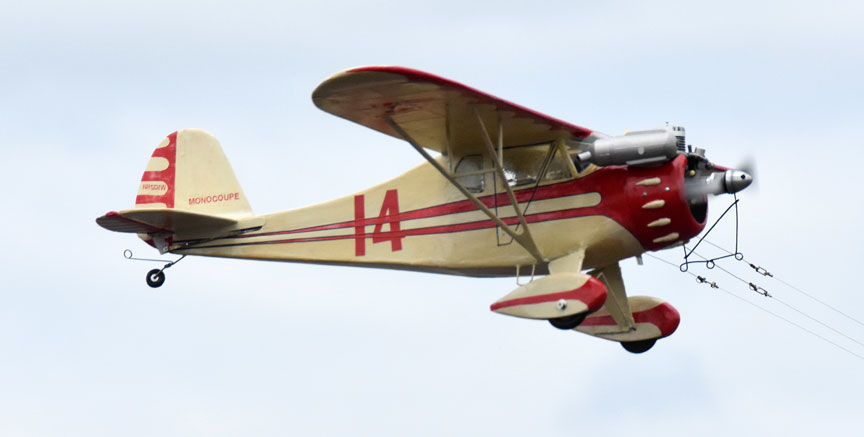
Orin's Monocoupe flies at the 2018 Northwest Regionals, using the leadout guide for a high-wing model with throttle control. Flying Lines photo.
The cause of the Dragon Rapide’s crash was the leadout guide’s being above the CG. When the pilot had hung the model in his shop, he apparently got the rake angle right, but he totally missed the roll angle. The model must be rolled a little bit away from the lines/pilot when in flight.
The same builder entered a really nice looking General Dynamics COIN Charger. This submission to the Defense contract competition lost to the Grumman OV-10 Bronco. Check out the leadout exit in the below photo from the Regionals Scale entries.

Al Culver's COIN Charger, seen at the 2018 Northwest Regionals. Flying Lines photo.
As you see, the leadouts emerge from the wingtip, and this is a high wing design. The guide on this model lies well above the CG and it will forever have low line tension with the plane’s being rolled in on the pilot. It will fly on calm days, but it will forever be vulnerable to any gust that it could have shrugged off with a much lower leadout guide.
Why do a lot of modelers still have trouble wrapping their minds around locating the leadout guide as above? Because we all are human. We have spent a lifetime doing this one way and that established a hard and fast paradigm. Breaking a paradigm is one of the hardest things we can do. Creating this style of leadouts through the wingtip was given us half a century ago in kits from the factories. I offer the below example of what NOT to do. This is on the plan for a Sterling F4U Corsair that is popular in Carrier and Scale events. Please note carefully that the factory is telling you to bring the leadouts out above the tip rib! Corsairs rigged this way were largely hated by their pilots who had the model frequently try to roll in toward them on liftoff.

Orin's T-34 with the leadouts coming ouit below the wing. Orin Humphries photo.
Blacktop vs. Grass
At home, I and my pitman have only grass to fly on. At Roseburg, my pitman placed my T-34C on the blacktop for starting with neither of us having flown on blacktop in this century. In retrospect, the model was sitting pointed a bit to the right of tangential to the circle. Upon release, the model headed away from me at an angle, the direction in which it had been pointed. My pitman afterwards stated that the nose wheel tire was trying to scrub off the hub to the right. The tri-geared model tipped left wing down and shortened the prop. We took it back to the pits.
On grass, the friction between the tires and grass is low, and if the model isn’t square with the circle and the lines, the line tension at the leadout guide will usually reorient the model to the circle. On blacktop, we found to our mutual woe, the friction is way too high for self-correction by the model. The tri-geared model will only go in the direction it is pointed, period.
On our second attempt, the model was placed on the pavement slightly nose toward the center of the circle. As I picked up the handle, I spotted this and relocated myself five or six feet to my right. Now, I was square with the model. Upon release the model rolled normally, and before liftoff I moved to the center of the circle. We learned the hard way that when placing a tri-geared model on a paved circle, the wing MUST be pointing toward the center of the circle with high accuracy.
After quarter-century layoffs, comebacks are tough.
Contest Pressure, the Mental Game
After having published so much about .049 operations, I felt a great deal of self-imposed pressure for my Blackbird to perform well at the Regionals. Four days before leaving for Roseburg, I test ran the engines in my garage. They were naturally a little balky after not having run for a couple of months. I ran them again the day before leaving, and again they didn’t just fire off smartly on 25% nitro. That is where I blew the mental game. I “said” to my model, “Don’t you embarrass me” at Roseburg! I thereupon broke my own published rule: Use no higher than 25% nitro when the temperature is at or above 48° Fahrenheit (that’s 7.1° Gibeault for our Canadian friends.) Use 30-33% for cooler temperatures only. With the slightly balky starting I then planned to take 33% nitro fuel to Roseburg to ensure quick starting, knowing the temperature would be above 48°.
Last year I had determined, as reported in Part I of .049 Operations, that if you start sport 1/2As with a chicken stick above my published limit, the sport engines (I don’t know ANYTHING about competition engines) will only go backwards. At Roseburg this year, I used my starter on my Blackbird’s engines, Black Widows. They started fine and ran frontwards in the warm air.
Everything was fine for the bulk of the flight. The engines unloaded in the air and grabbed another 1,000 rpm or so. With the outboard engine propped to run 500rpm slower, the buzz and high pitch around 18,000+RPM made it impossible not to notice for people quite a ways down the line at the airport. I got several comments from them on the flight later.

Orin's twin-Black Widow-powered Blackbird.
The outboard engine finally ran out of fuel and died. The model will mush along on the inboard, and I was bringing it down on final approach. This took more than a lap. I was four feet off the ground when the inboard engine suddenly ran backwards. This was caused by the slower flight’s not cooling the engine sufficiently with 33% in that ambient temperature. A charge in the cylinder detonated, throwing the engine into reverse rotation. Gary was making a video of the flight and in one frame you can hear the detonation.
This only engine still running, and being backwards, this literally stopped the airplane in midair four feet off the ground. The nose pitched up gently about 10°, and the model started a gentle yaw nose toward me. Both actions were because the thrust line was a hair above and left of the CG. The plane dropped straight down to the ground, level, producing three minor cracks that later repaired easily. On the ground, the plane continued a gentle left yaw until Gary reached it. At the moment he grabbed it, the engine finally starved.
Note to Self: “Obey your own rules!” And “Prime with lighter fluid when needed.”
Gary later commented, “You could have claimed an option of vertical landing…”
“Yes”, I replied, “ but that capability for the Blackbird is classified, and I would have had to kill the Event Director afterwards.” ( Can you tell when I am not exactly serious?)
I need to point out that both unusual behaviors that my Blackbird has experienced in the previous 12 months were not the fault of the choice of the full-size subject. There is nothing inherently wrong with it. Both incidents were only pilot error.
Please take another look at the latest leadout guide for my Blackbird. Originally, I had guessed that a single loop might work. At the time, I did have reservations about the possibility of line connection entanglement. This hadn’t occurred in practice flights before Roseburg. However, Murphy’s Law got me at the Regionals. When I was on final approach to landing, the connectors did lock up. I had no elevator control! The properly located CG saved my bacon, and the model continued on the glide slope. Then, the inboard engine reversed and the rest is history. Now the model has separated guide loops.
“You only get one chance to do it right the first time; anything else is later rework.” – OLH

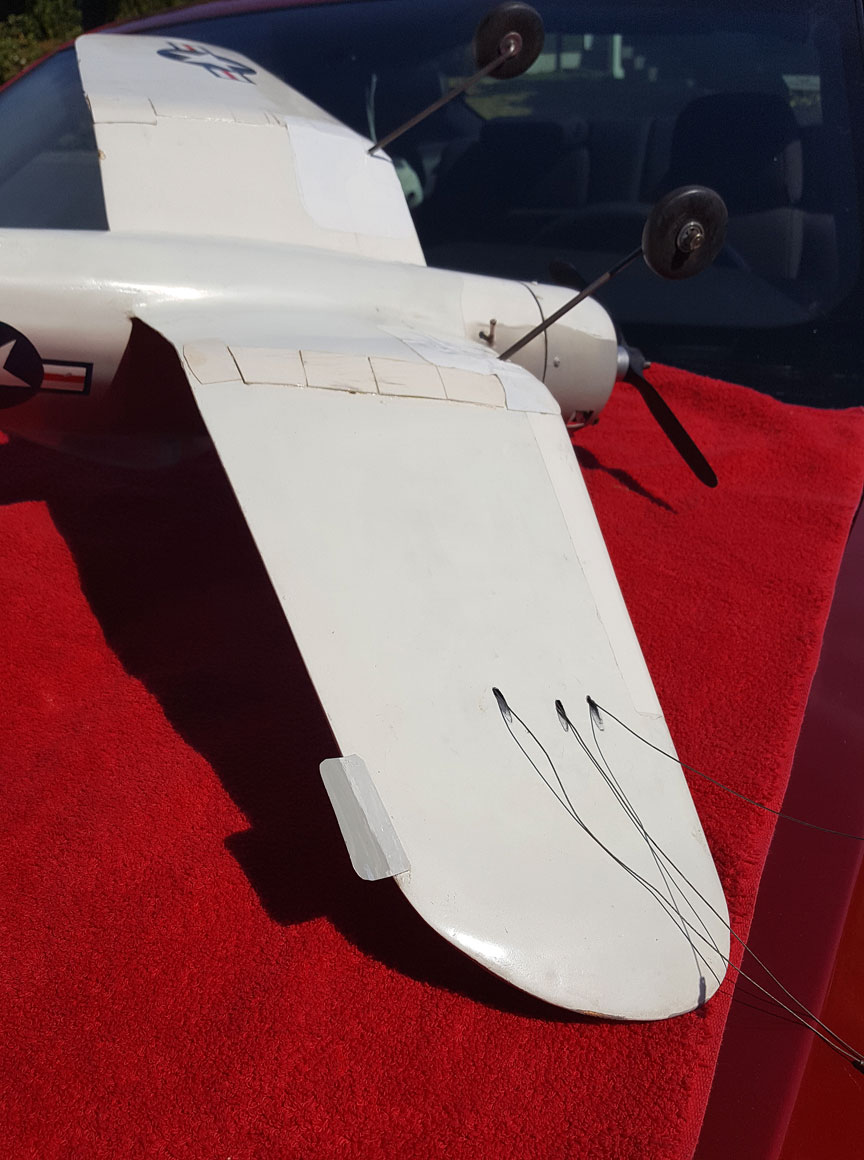
New leadout guide for the blackbird, designed to present clips snagging. Orin Humphries photo.
Flying Lines home page
Back to Scale Matters column main page
Back to Scale main page
This page was upated Oct. 31, 2018