Scale Matters
1/2-A Operations
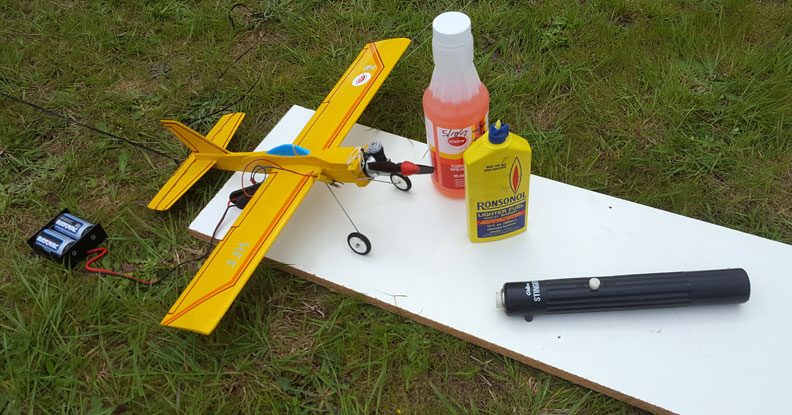
A Little Wizard all ready to fly -- with battery pack, fuel, starter fluid and electric starter. All photos by Orin Humphries.
By Orin Humphries
July 2017
I read the Model Aviation CL Scale column about the 2016 Nats Scale events last fall, and Fred Cronenwett said 1/2A turnout had dropped since 2015. He also said that twin engine 1/2A was down from then. The pilots were having trouble with getting reliable engine runs, particularly in their twins. I am lucky in this regard owing to my 20 years as a teacher with an after school model club. Over the years we figured out these little engines. I have the three twin-engine 1/2A birds you see in the photos, and I don’t recall having problems with twin operation once we got things squared away. There is something you have to know, there are two techniques, and you have to have the right fuel and the right priming fluid.
Back in the early 1980’s, there was a local fellow, a close friend, who built the best-looking twin 1/2A model you ever saw. In two competition seasons, I never saw him get a flight. At best he got the handle picked up just as one of the engines died. That trouble he suffered was a sorrow to witness and a mystery to me for several decades until I read an article in a full-size airplane magazine last winter. Then a light came on.
Key knowledge
What you need to know is that all engines, from our 1/4A .010’s up to full-size P&W R4360’s with their 28 cylinders, depend on striking a balance between heat production and cooling ability. None is excused from the right ratio between these two factors. That article opened the door. It said that the heat production of an engine depends upon the volume of any cylinder. Volume is a cubic function, as the math people say. Volume is a cubed entity, as in cubic feet, etc. Cooling ability, however, is a squared function. It depends on the surface area of the cylinder. Surface area is in square feet or some such. Something squared. So we are limited by the ratio of cubic inches to square inches, heat production to heat dissipation.
As an engine designer upsizes cylinders for bigger engines, the volume of the cylinders grows much faster than their surface area. The ratio of volume to surface area gets out of hand at some point. The cylinder will make more heat than the cooling fins can dissipate. We see this practical limit, I think, in the Wright R3350 in the Douglas Skyraider and the Boeing B-29. No such larger American engine made it into mass production with 14 or 18 cylinders. Pratt & Whitney, in going to their 4,360-cubic-inch engine opted for 28 smaller cylinders, thus keeping each one within the allowable cooling limits.
Our .049s are on the wrong end of this ratio. They don’t have the volume to make enough heat for the surface area that they have. The heat goes away too easily. That is one of two reasons these engines die on us. The way you get around the first reason is to increase the heat produced by the fuel. That means never attempting to operate 1/2A engines on less than 25% nitro in warm weather and 30-33% in cooler weather. I find that the break point between these two nitro contents to be 67-68°F in humid air. Dry air will shift that point somewhat. Be watching for it, as I don’t have dry air to fly in and find out. I think this temperature will drop a little due to more oxygen in dry air.
Technique No. 1: Priming
I was practicing with my 1/2A’s today at the Arlington, Wash., Airport CL field. Two days before, the temperature was 8° cooler than today. Half the time then the engines would start by flipping the prop and half the time I needed to use my Glo-Bee Stinger starter. Those times, though, were mostly when I had over-primed the engines. Back in my model club days, we learned that you must never prime the engines with the piston down and the port wide open. You will flood the engine.
ALWAYS block the port by having the piston up enough. Then prime it. Just the right amount of fuel will seep past the piston into the cylinder and it will usually fire on the first flip. That’s the first of the techniques I mentioned at the start.
This spring I have been breaking in newly assembled .049s in my garage when my neighbors are at work. As you know there are two styles of exhaust porting, the older, large port, and the newer double thin slits. These sessions led me to think the new slit style ports didn’t mind if the piston was blocking the port or not. Once or twice, I did flood the engine with the piston down. At the field, however, I affirmed that the piston must block the port during priming for both styles of porting. It does matter. Everything started and ran fine in the low 60s temperatures.
Today, however, the temperature was heading toward 70° and the engines wanted to run backwards. The engine in my Super Corsair simply would not run the right direction when propping by hand. I had to use my Stinger on it to make it run the right direction. Other symptoms told me the 33% was too high for this temperature. I resolved to pick up a quart of Cox 25% nitro at Galaxy Hobby in Lynnwood the next time I pass by. Still, today, all the engines at least flipped by hand with 33% fuel priming. This fuel, Traxxas brand, by the way, I got at Hobby Town USA in Everett, Wash., and it is listed as a racing fuel for cars. I do notice, however, that I had to add a little castor oil to it. My engines sagged a few times after mid tank. This is at both temperature ranges. They were getting hot from insufficient castor.
(Say, before I forget, I bought a glow plug-adapted head for one of my Cox engines online. That head did not produce enough compression, however. The engine wasn’t going to start, in my opinion, and I threw it away.)
But something was still not right; something was missing. It simply could not be that 100% of the pilots who were having troubles would be using the wrong fuel. No way. Stay tuned for the missing link in TECHNIQUE No. 2. But first, the following is offered.
Sidebar: Nitro blushing
We know that butyrate paint finishes blush ugly white with higher nitro fuels when there is any humidity around. I asked the Klass Kote epoxy people if we can protect against this with a clear coat of KK epoxy over the butyrate. They replied, first, it has to be a fresh paint job, natch. They said to let the butyrate dry for one month to finish its outgassing. If you don’t wait this long you can get poorer adhesion. Finally, second, lightly sand the butyrate to break surface tension. Then you can apply the epoxy clear overcoat.
Speaking of butyrate paint, on both my A-26, now in the Oregon Air and Space Museum at the Eugene, Ore., Airport, and on my son, Rick’s, Mustang, after several decades, the butyrate has released some of the covering. It was silk on the A-26 and silkspan on the Mustang. On the other side of the coin, my T-34C was finished in 1980 with K&B Superpoxy. It looks just as good today as it did then. Epoxy holds up. Okay, TIME IN.
Priming: Lighter fluid
Half a century ago give or take, I discovered that lighter fluid, naphtha, is a great priming fluid for all glow engines. I use Ronsonol brand. It is commonly available. I absolutely had to use it to get the Enya .29 IV’s on my A-26 to fire. They had too low a compression by design at the factory and required 30% nitro fuel to start at all. Don’t be afraid of this liquid; I have used it to prime for many decades. (IT IS NOT A FUEL. It has no oil, remember? Don’t add oil; it is too energetic for our engines. It is for priming only. I and Flying Lines assume no responsibility if you don’t heed this warning. Ask yourself how much you like the skin you were born with.)
Priming sequence
Note that there is a sequence to be followed when priming with naphtha. You must use fuel, which contains oil, for your first prime. The next one or two primes will be with naphtha, and that usually does it. Should it be necessary for further priming, repeat this sequence, one with fuel followed by two with lighter fluid.
Technique No. 2: Tuning
I was rusty after 35 years away from the little birds. This came to light when I flew my Wizard and my Cox J-3 at Paine Field Aviation Day (Everett, Wash.) giving the model flying flying lessons. It happened that two men who in the 1970s were students in my Libby Jr. High Model Club came to the circle for a reunion and to watch the huge airshow. (They were Gary Dowler of Spokane, Wash., and Peter Fong of Bellevue, Wash., both in their 50s. I was starting the engine while one of them set to hand-launch for me. When I reached the handle, the engine died. This happened maybe 80% of the time. Shades of the trouble my good friend had decades ago. Finally, Peter, who is brilliant, noticed the pattern. The engine died upon my reaching the handle when I had tuned the engine with the clip still on. "Tune it with the clip off," advised Pete. That was the final missing link! I believe we have these troubles corralled, now!
Note: Refueling
I noticed that many times when I refueled any of my active .049’s, they were found to be in a flooded condition upon starting attempts. When did this condition come to be? It may happen when the tank is filled for some reason, because the engine dies from fuel starvation, right? It can’t happen then. Is the cause of flooding the nature of the present reed valves’ being different from the original ones? The present varieties don’t seem to seal in a breath test as positively as the brass petal design did. Cox International in British Columbia claims that the Mylar ones are the best ever. Hmm.
Back in the days at Libby JH, someone got me connected with a Glo-Bee Stinger 1/2A starter. It wouldn’t charge up usably. I left it dormant in that time as hand-flipping was all I needed. I had to replace the batteries, now; one was dead from that time. Today I use it to clear the initial floods. Stingers are not generally available, of course, but maybe you could watch for them on eBay, etc. Does someone make a starter that works for 1/2A now? I find that none of the rubber spinners for the engines available today are up to the wear and tear of the electric starter. I am forced to switch to aluminum spinners from Cox Int’l.
Finally, I believe we have all the pieces of the puzzle.
After the last flight
When you are done for the day, you really need to treat the engine with after-run oil so it won’t dry out and lock up if you don’t get out again for some reason. Always assume it will be stored and inactive and use the after-run oil. This will prevent the oil plug from forming in the carburetor. DO NOT BE COMPLACENT AND FORGO THIS STEP.
Summary
You see the pictures of some of my single-engine birds and my twin-engine ones. I don’t have starting problems or sustaining problems with them, now. The procedure is to:
- Use 25% nitro fuel above 67°F and 30-33% nitro in colder weather.
- Prime with the piston blocking the port to avoid flooding.
- Your first priming is with fuel to oil things.
- Your next two primings, if necessary, are with Ronsonol lighter fluid.
- Repeat in this whole sequence if necessary.
- Tune with the clip off.
- Watch for a flooded condition after refueling.
- Use after-run oil when you are done for the day.
Flying alone
Most of us older hands know about using a “ground stooge,” or just “stooge,” to hold our airplane for us when there is no one to do that. For anyone else who is curious, you have a loop attached to the tail wheel or whatever on the plane. There is a double loop on the stooge anchor. I use a piece of bent coat hanger to hold the anchor line in place. The actual stooge line has a long pin also made from hanger that keeps the two loop pieces together.
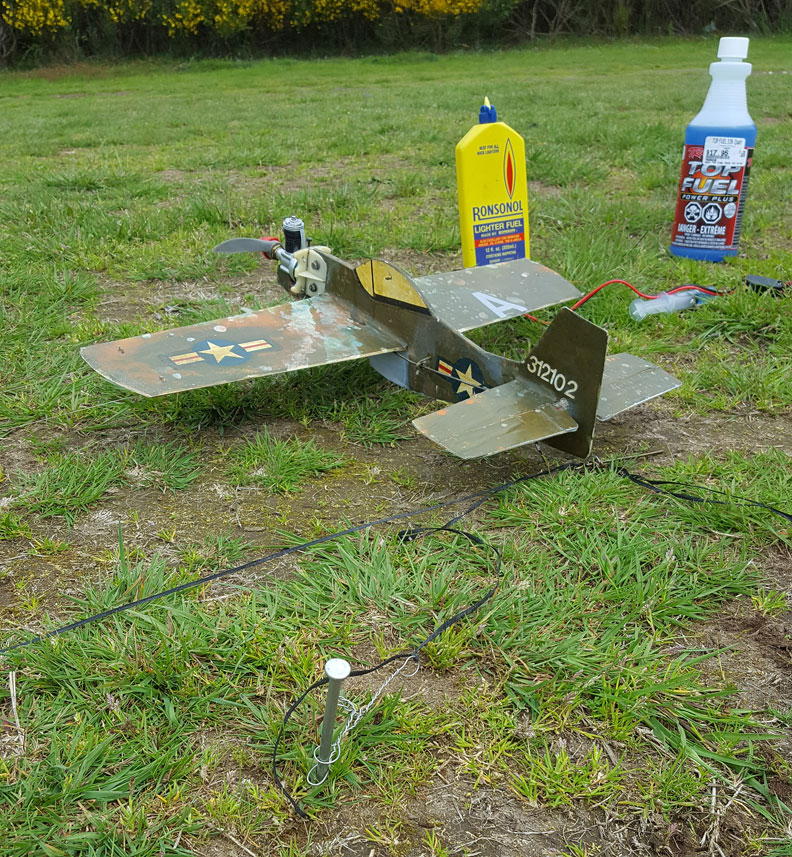
Orin's plane ready for a stooge-launched flight.
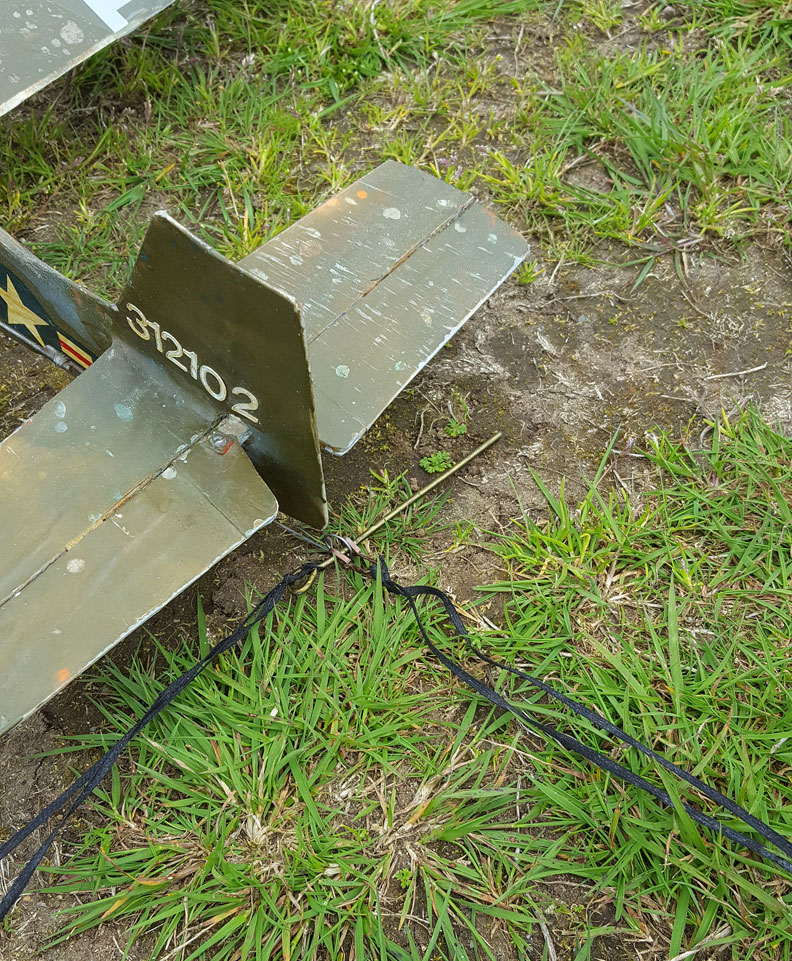
Close-up of the stooge attachment.
I safety anchor the stooge line at the airplane end with a short length that allows the pin to be pulled, but the line cannot become totally free to wrap around an errant foot out at the center. Out at the center, the stooge line should also be tied down to prevent tangling around your feet. Be sure that your flying lines lie on top of the stooge line so they won’t tangle upon release. That is, the stooge line will cross underneath the control lines, for right handers.
You hook the plane to the stooge and start the engine. You walk out to the handle and pick it up, checking for right side up. If the field is clear, you pull the stooge line and the pin comes out of the two loop connections. The plane is rolling now.
Comments on the models
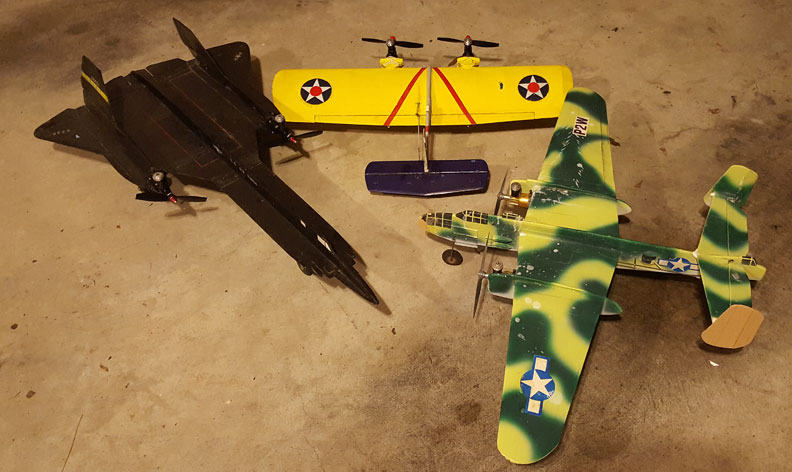
Orin's fleet of twin-engined 1/2-A Scale airplanes.
On some models, I like to install the Li’l Wizard style mountings for the engines. That’s where the engine is screwed onto a 1/4”t. plywood piece. This then is rubber banded onto a mating firewall of the same shape and thickness. Thinner mounting pieces will get their ears broken off in rough landings.
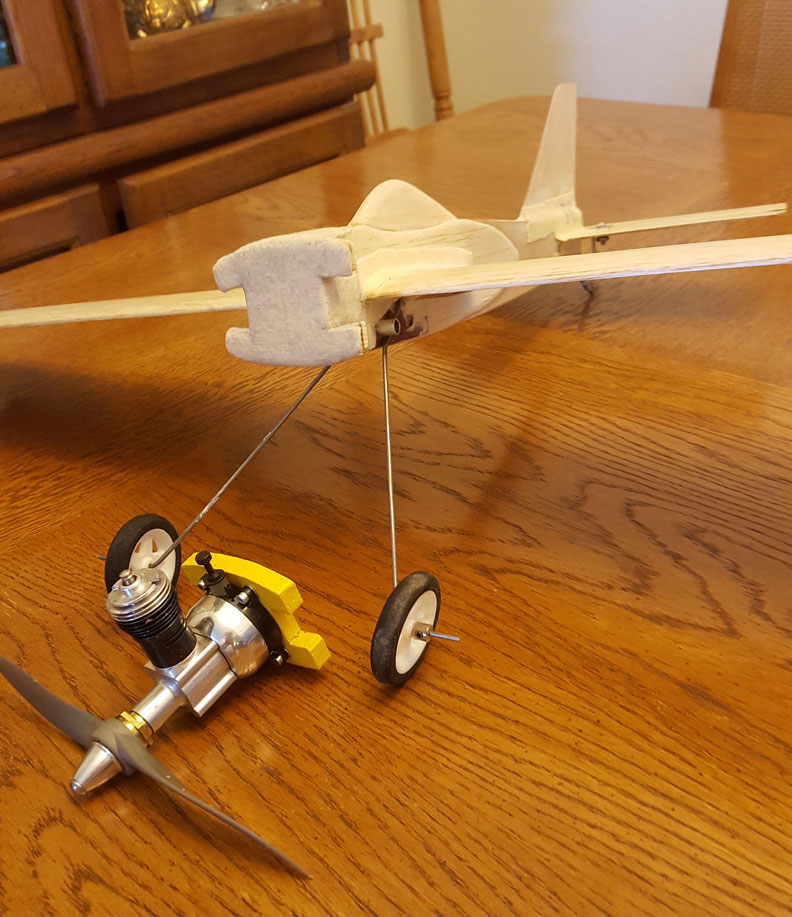
The Little Wizard motor mount.
Blackbird
This is a good airplane if you don’t cant the vertical tails inward 11° as in scale fashion. With the original scale arrangement of the verticals, the model would suddenly drop seemingly straight down on the upwind side of the circle. The wind would hit the outboard, leaning-in tail and swat the plane downward three or four feet so fast all I could do was blink. It once or twice crashed on a really windy flight at the Regionals. This spring I reset the tails straight up and am waiting for the paint to dry before applying a top coat of clear epoxy to ward off humidity blush.
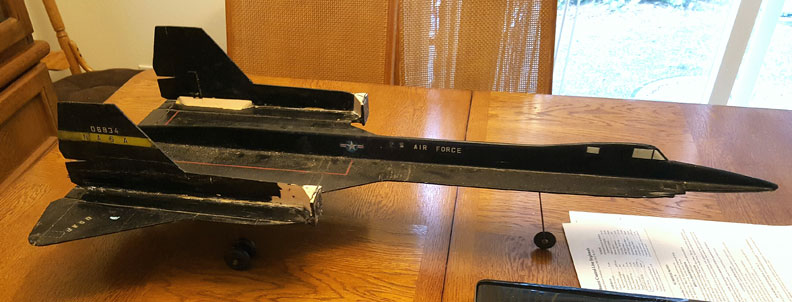
The SR-71 in the process of being refurbished.
When I get back to the Regionals hopefully next year, I will enter my YF-12A Blackbird in 1/2A Scale if the event is offered.
Cox second generation J-3 Cub
This plane from the factory is a turkey. I got mine on eBay. On its first flight, the CG was too far aft and it was almost uncontrollable. It wandered all over the sky in an unstable mode. Also, the leadout guide was below the wing instead of up on the tip, that was a good start, but it was still above the CG and the plane wanted to come in on me. I don’t feel any kid was likely to learn to fly with this iteration of the Cub. And that Cox line handle with the sloping bottom of the frame: what a failure in design. The wrapped up lines slip off the rounded end. This handle’s problems likely spawned Sig’s great 1/2A handle. I just ordered four of them
Sig’s only weaknesses are the short screw for anchoring the line adjustment and the lack of enough space between the plastic hold-down washer and the frame. It is hard to wrap a line around the anchor when adjusting. I put longer screws in my handles and cut away the frame near the anchor to make space.
I added 3/8 oz. lead ballast to the inside of the cowl as a trial amount of for better balance. It still wasn’t enough ballast. I finally had 2.0 oz. of lead in the nose, making some clearance for the pieces. This put my CG at 17%, and the plane tracked very smoothly, proper for student pilots. I then used a nylon tip skid attached to the factory leadout guide to get the leadouts below the CG just a bit.
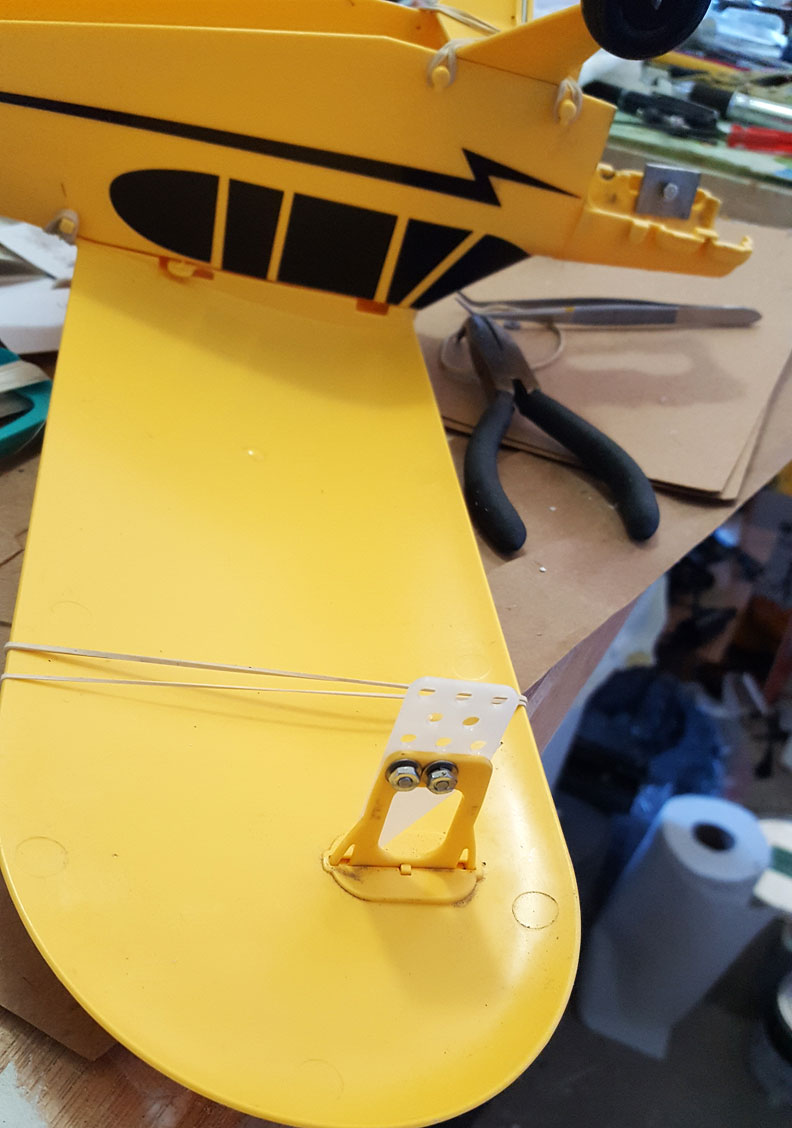
Orin made several changes to a Cub to improve its flying; this shows modification to the leadout guide.
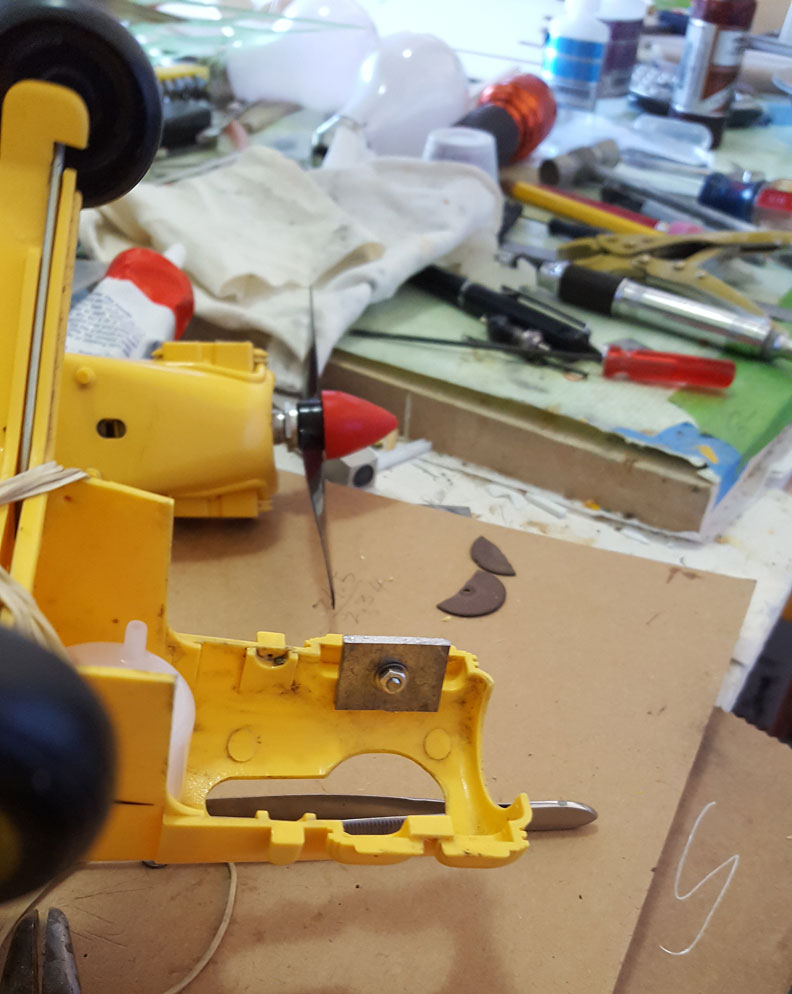
A little ballast up front to move the CG forward.
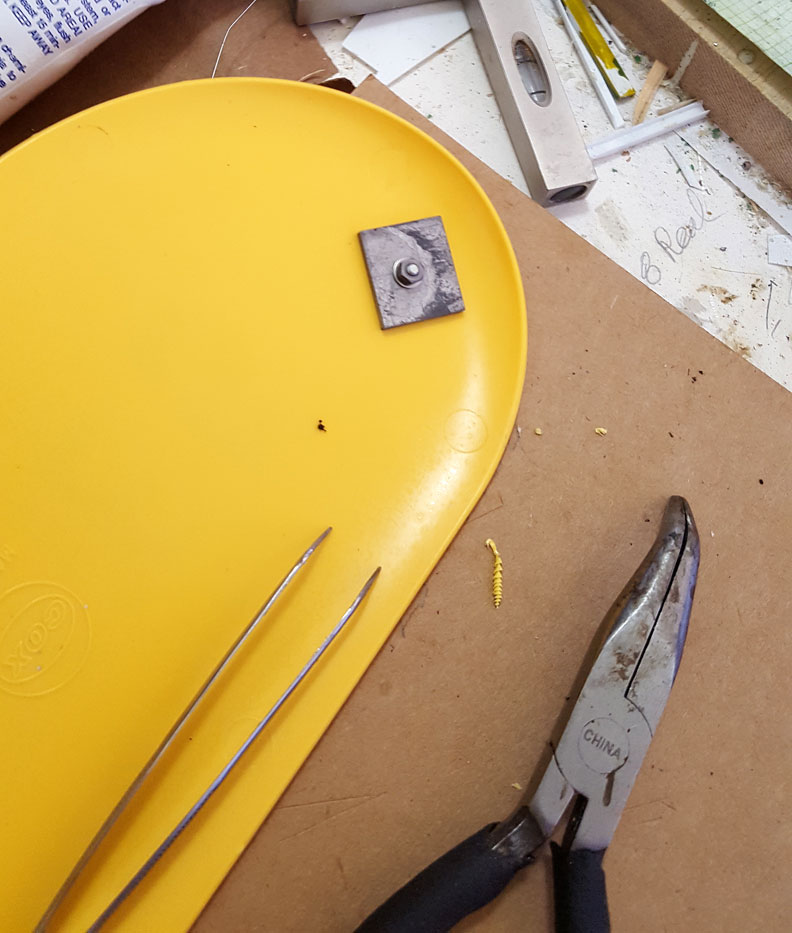
Tip weight!
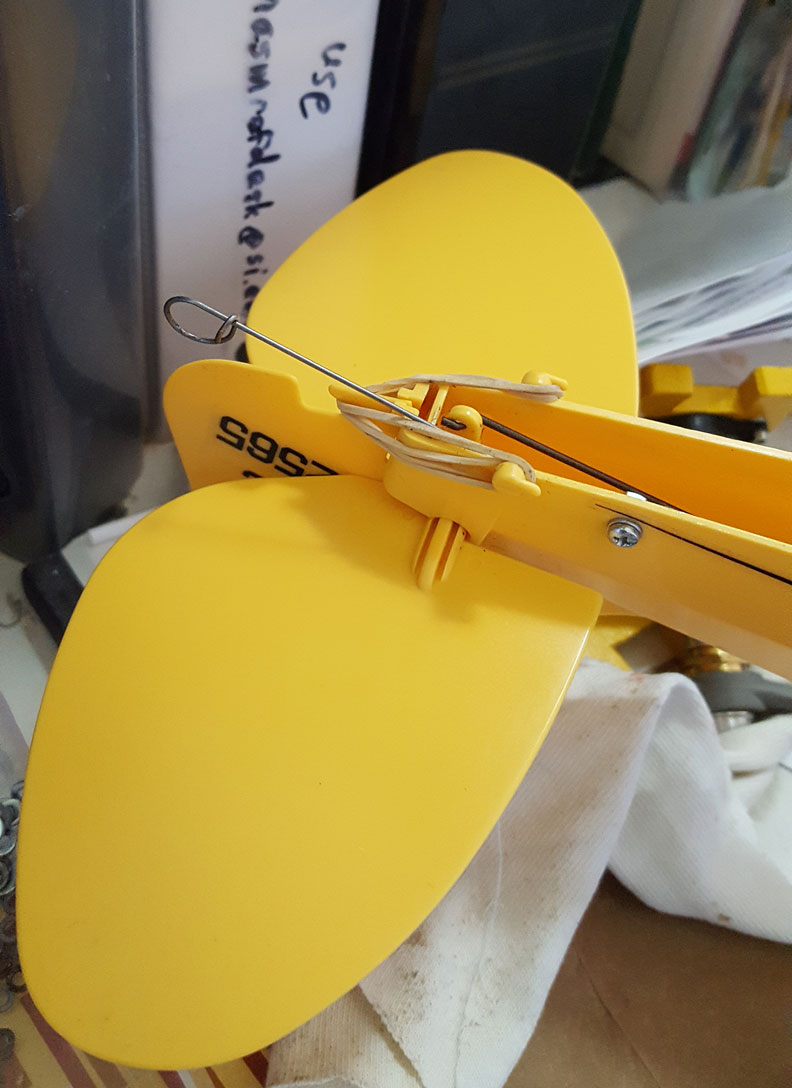
Addition of a stooge wire.
The plane didn’t have a tip weight so I added a half oz. of lead, wondering if that might adversely affect the CG. It did make the plane less stable to the point of necessitating the tip weight’s removal.
The reason I am doing 1/2A right now is that I gave flying lessons to kids in the crowd on a Wizard on Paine Field Aviation Day, PFAD, May 20th. It is a LARGE full-size airshow at Paine Field in Mukilteo, Wash., as the season opener. I am a docent at one of the four airplane museums on the field, the Historic Flight Foundation, and our office manager thought it would be a great addition to our list of activities for the public.
Well, people, reap the benefits of this 1/2A knowledge gained in my old model clubs.
Flying Lines home page
Back to Scale Matters column main page
Back to Scale main page
This page was upated July 8, 2017
