![]()
A View from Broadway
How to make a venturi for Combat Graffiti
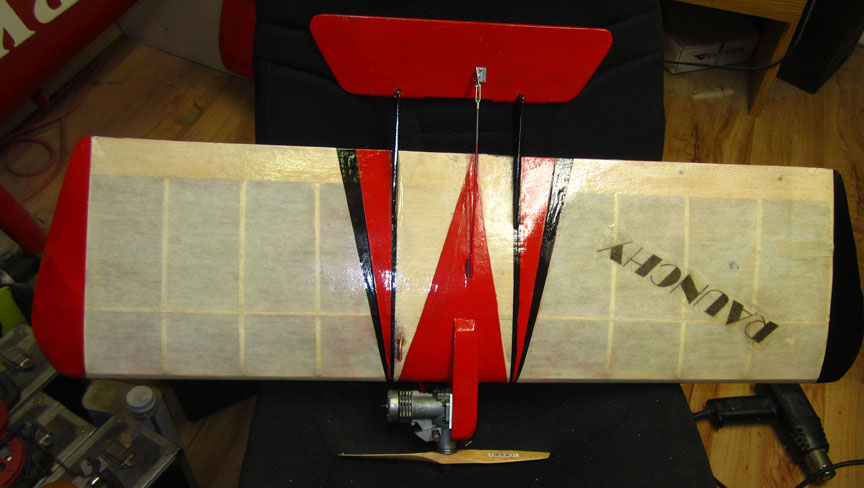
Vintage Raunchy plane for Combat Graffiti. All photos by Ken Burdick.
By Ken Burdick
Yes folks, it's true.
Combat Graffiti is coming to a field near you. June 10, 2018, in Mission B.C. See the "NS with BS" fun fly listing in Where the Action Is.)
The usual rules will apply and you, too, can be the first on your block to win scale and finish points while getting cuts with your very own pre 1964 Combat wing.
Combat Graffiti has well-thought-out rules, one of which is the under-75 mph speed limit. This keeps lawyers away and prevents the use of shutoff’s in the event. However, these present other issues like back in the day when these old birds were meant for Combat, speed was much more than 75 mph.
In the days of yore when Voodoos and Omegas roamed the earth, warnings were on the plan sets about how over 100 mph was easily obtained by these tools of destruction. All true, but then some fool comes along, invents Combat Graffiti and sez they cannot go over 75 mph because they should be beautiful and we want to keep them around. The question now becomes, "How I slow these engines down?” There is only so much you can do with fuel and props for an engine that used to run 100+ mph.
Modern engines have spoiled us and we easily forget how darn hard this old iron was to start and make run well. Try to get a Johnson 35 Combat Special to run slow and not flood out, or a Fox 36x to run slow enough to pass the test. One solution is to run suction tanks. The typical 1960s Combat engine was not made for this due to ever increasing performance demands. So how do I detune an engine for this event and have an original engine to gain maximum graffiti points? (You get bonus points if you have an engine from that period.)
This sucks!
Mel Lyne of British Columbia promoted Vintage Diesel Combat and we all bit. The real trick to getting speed out of THOSE antique engines was a reliable uniflow tank and proper fuel draw on suction.
It seemed easy enough, but like everything else in D-Bat, it wasn’t. Too much air and they sputter, not enough and you have a real dog. We worked at it until we had a formula for each engine.
The same can be said for getting a antique Combat engine to run slowly on suction, getting that right amount of suction for a steady run, so let’s borrow from what we know. Run the engine on a uniflow tank.
Now comes the hard part, finding a 50-year-old suction venturi (in my case) for a steel-finned OS 35
If the intake is a cylinder, you can make one out of plastic, if it’s square, as in a Fox Combat Special, you can make a rectangular thing and drill a hole in it. But what if it’s bell-shaped? This was the problem I was faced with if I wanted to use the eBay special I bought -- it’s a much coveted OS Max steel-fin .35 that someone had bored out to 11 mm for free flight. Fast, but too fast for our meager 70 + mph event.
Here’s what I did.
I know that for a .35 engine, I want around 6 mm or less diameter of air intake with a .125-.150 spray bar running through it. This is hard-fought knowledge and had many trial runs to prove itself.
The ideal material is a K&S 7 mm O.D. aluminum tube from the hobby shop. The internal diameter measures just under 6 mm (5.94). All I need to do is make a plug to hold the thing in the engine.
The Blob!

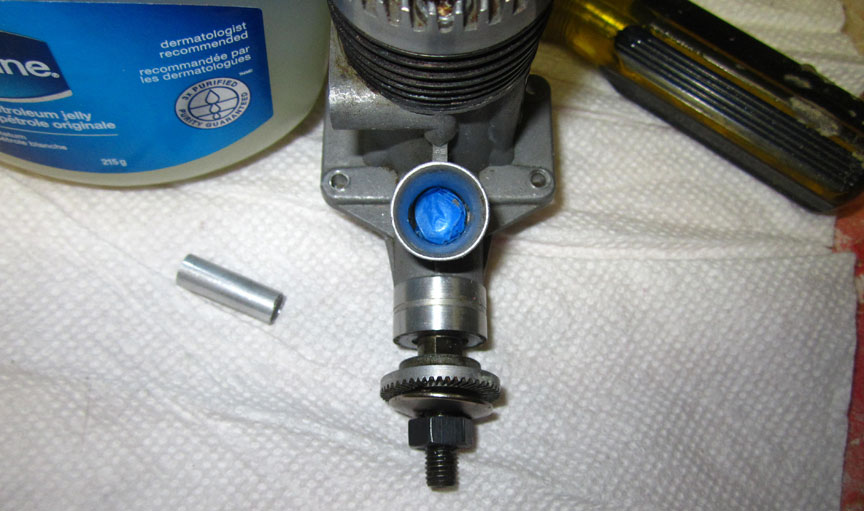
I have been using a lightweight polyester auto body putty for a few years now. It makes great fillets, kicks off in 5 minutes and is inexpensive. So basically, I cut a length of the tube, glopped on the bondo, and coated the inside of the venturi with Vaseline. Next, I put a plug of masking tape at the bottom of the venturi and shoved it all in there. The result was a 6 mm venturi that popped right out after the bondo had cured. Mark and drill the venturi, clean it up with some sandpaper to remove flashings and you’re all set.
Pictures in order of build:
The masking tape wad.
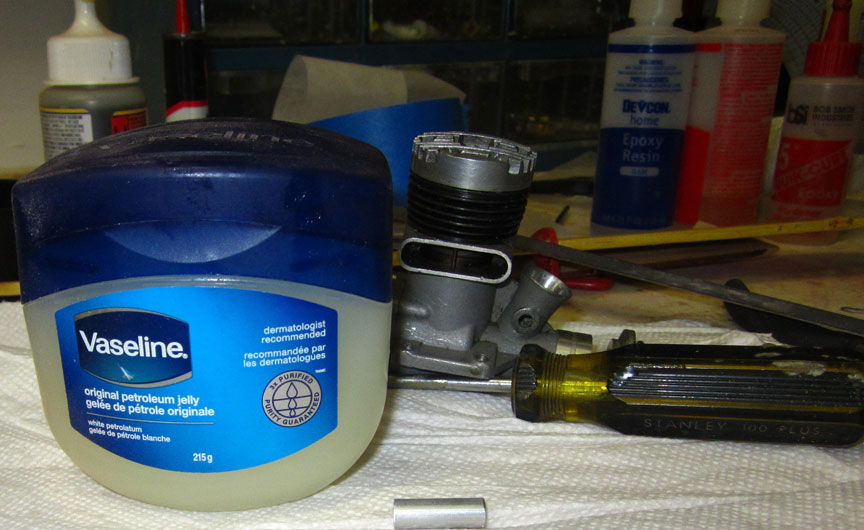
Vaseline is one of the materials needed.
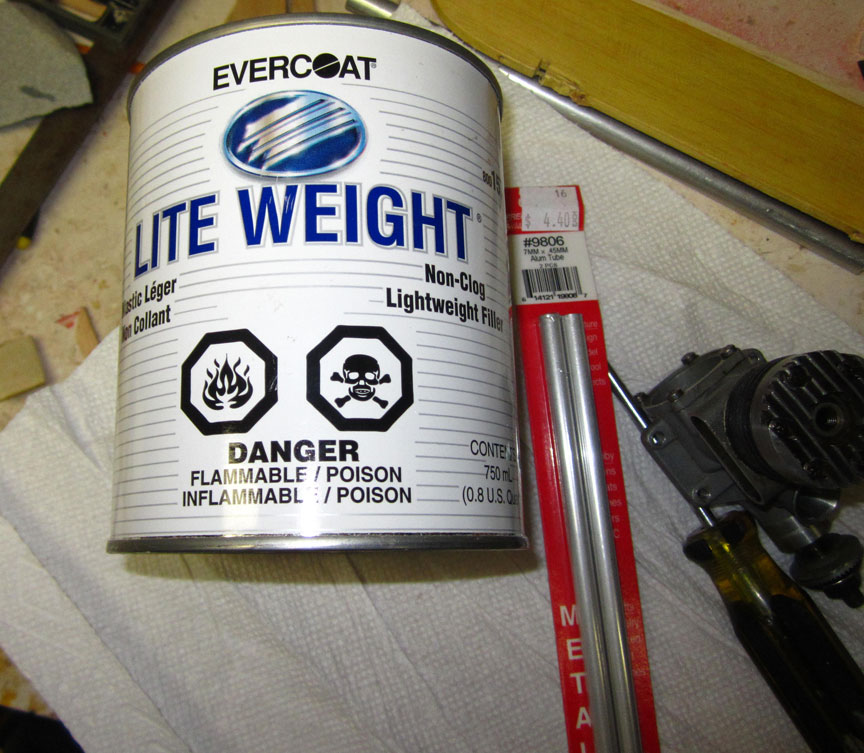
Automotive filler to hold in the venturi and the tubing to make it.
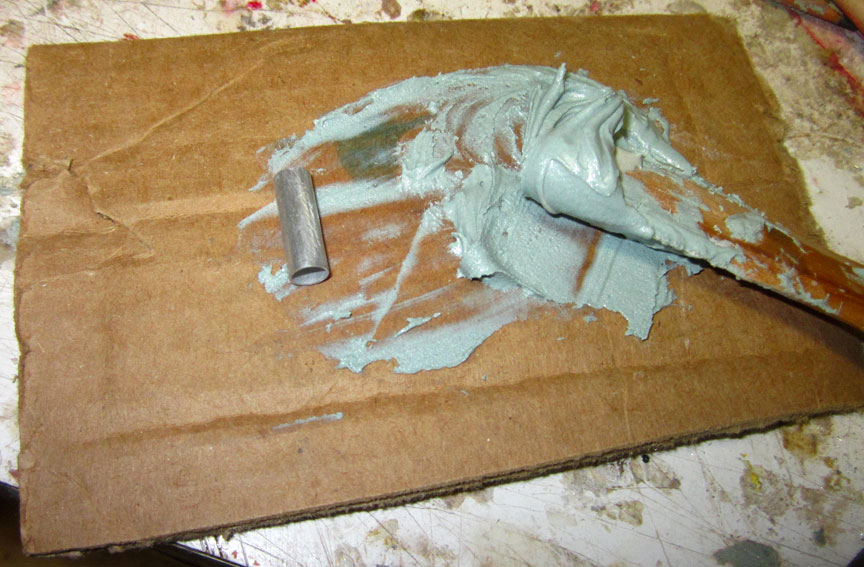
The filler mixed and ready to apply, and the venturi tube.
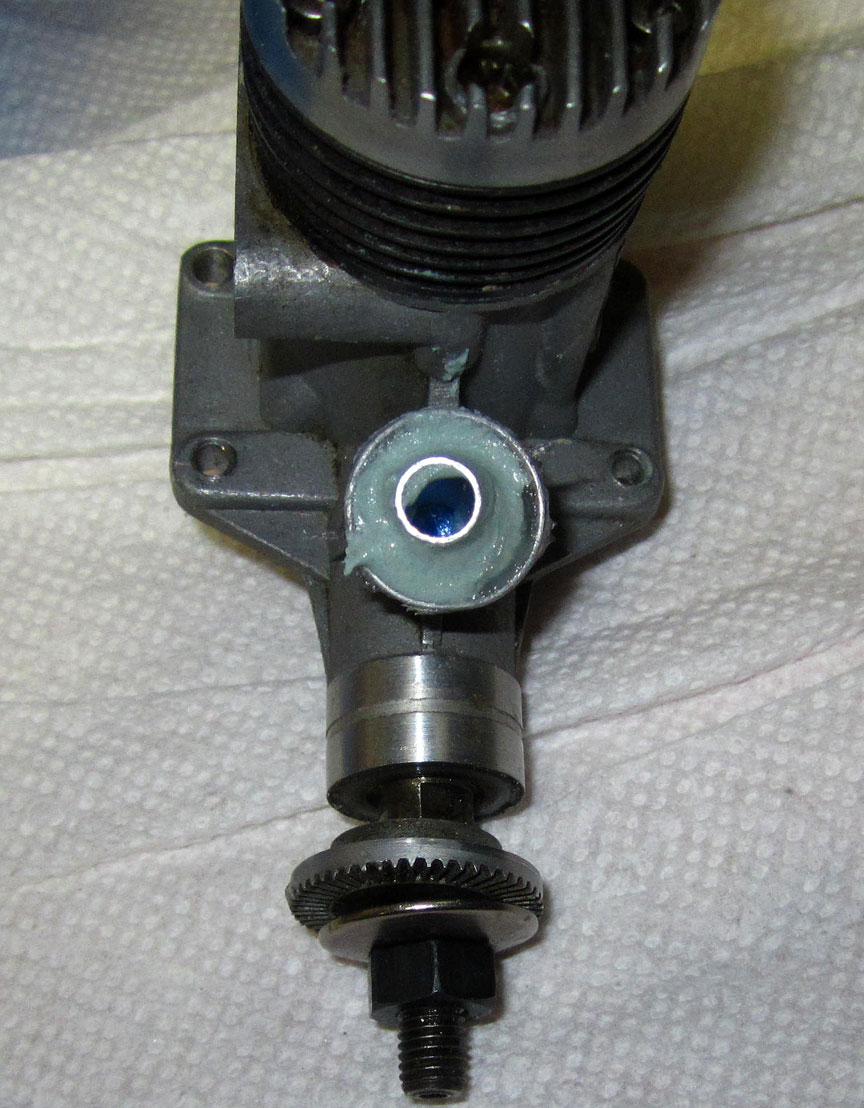
The venturi and filler in the engine, wet.
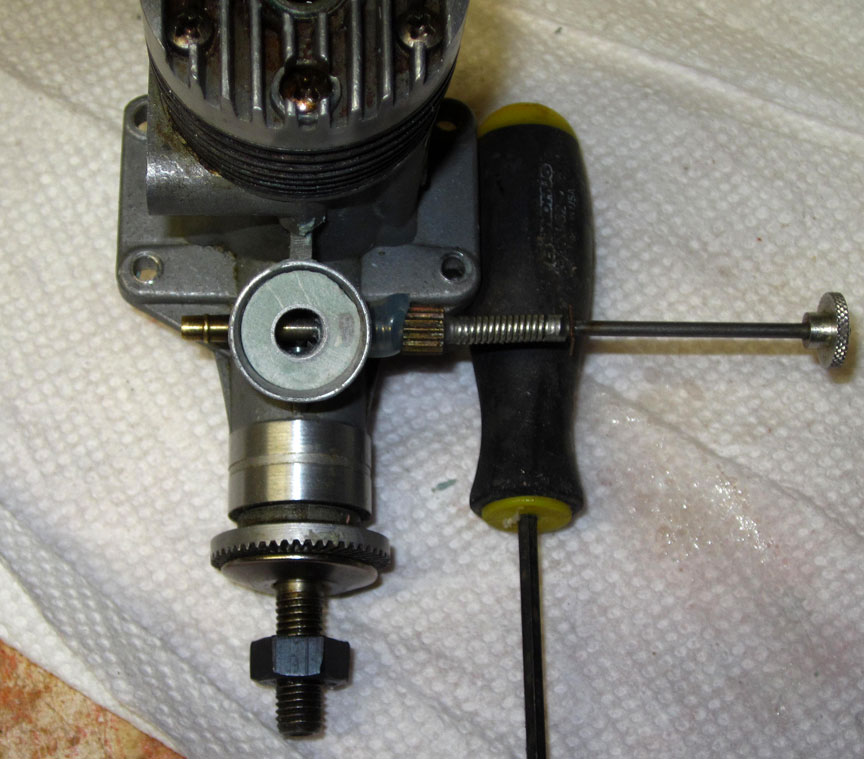
The new venturi, finished and in the engine.
There you have it, lil' geezers, a homemade venturi without a lathe, just goo and a tube.
-- Kennyb
Back to Bod Busters main page
Back to Combat main page
Flying Lines home page
This page was upated May 9, 2018