![]()
Walker on Stunt
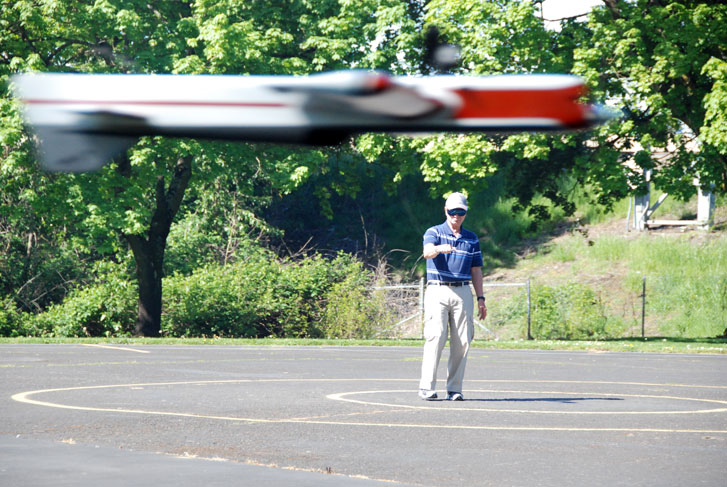
Alan Resinger shows steady form in Expert Precision Aerobatics on the windy final day of the 2016 Jim Walker Memorial Spring Tune-Up in Portland, Ore.
Flying Lines photo.
Flying in the Wind, Part 2
By Paul Walker
April 2016
Now that you have the correct attitude and desire to fly in the wind, it is time to discuss the finer points to flying in the wind. There are several critical factors to flying in the wind. They are: 1) Placement of maneuvers in the wind, 2) Timing of maneuvers, 3) Sizes of the maneuvers, 4) Shapes of maneuvers, and 5) Speed of the flight. In general, many of the following statements apply to all maneuvers when flying in the wind. If your goal is to maximize your score, you need to place all the maneuvers directly downwind. Why is that you ask? First, it gives the judges an undistorted view of each maneuver. If your maneuver is way off from downwind, the judges can't see the correct geometry, and even if it looks correct to the pilot, it will look distorted to the judge. This is not the judges' fault, nor their task to interpret what it looked like from the pilots' perspective. Move it downwind to give the judges a clean view. Secondly, it makes it easier to maintain the correct shape of the maneuver, thus making the judges job of giving you a good score easier! It's a win-win situation.
Timing in Maneuvers
In the wind, your timing in maneuvers can be very different. If you are the type that flies to a metronome in your head, then flying in the wind is going to be more problematic. Consider the square eight, and what the plane is doing in that maneuver. As the plane turns up to start the maneuver, all seems well, until the second corner when the plane now is headed back into the wind. It has now turned two corners, slowed some, and then pushes into the wind and slows some more. The speed I am referencing here is the planes' speed relative to the ground, which is easy for the pilot to see and respond to. So, in the second segment, it takes the plane longer to get to the same point in space to make the third corner. If you are flying to a metronome in your head, you will not fly the second leg out far enough before the turn down to the ground. Then things get more crazy, as when it turns down it will pick up speed quickly, and the fourth corner gets there real fast. Then the fourth corner is turned and it rockets towards the next corner and the first “intersection." By this time you will be well past the established vertical and the next vertical segment will be obviously to the left of the first. On the outside segment, the same thing will happen only this time the vertical segment will be to the right of where it should be. This happens VERY frequently to a lot of pilots. The way to get around this issue is to learn to fly to the shape, and ignore the timing metronome in your head. This takes some practice, but is the only way I have been able to overcome this issue. I always envision the shape of the maneuver and then try my best to put the plane onto that shape.
Size Decision
When the wind is strong, you will have to make a decision as to the size of the maneuvers you will make. If you force the maneuvers to stay at 45 degrees, it will make everything happen very fast, and push your plane to its limit, or past that point. You have to know your plane, your abilities, and your practice level. If you can keep the maneuvers to 45 degrees, without destroying the shapes of the maneuvers, do such. If not, consider opening the sizes to give you a bit more time in the maneuvers and to keep the shapes good. This is an obvious tradeoff, as 45 degrees should score better, but if the maneuvers are misshapen as a result you could lose even more points that opening sizes up a bit. Now, what is a “bit”? If you open maneuvers by 10 degrees, then the top of the vertical eight will be 20 degrees past vertical, and that is easy for the judges to see. Opening up 5 degrees translates to 10 degrees past vertical on the vertical eight and that is more difficult for the judges to see. Consider what you are willing to risk on the scoresheet.
Maintaining Shape
Shapes as discussed in the timing discussion are harder to maintain. The round eights have the same issue as the square eights, and I have seen MANY egg shaped loops in the wind on the round eights because the pilots “timing” wants something different than the wind will allow. I have to consciously push the round eights out on the top part of the loops to maintain shapes and intersections. This can be difficult for the pilot to see sometimes, and a coach who can watch this and assess what you are doing is very helpful. I have been guilty of this, and my past coach (Don McClave) would easily see it and tell me. It would take a flight or two to adjust, and once adjusted, I could see what he was saying. Practice making the shapes correct, and many of the other issues will disappear.
Power
What do you do about “power”? A quick discussion here for the purist! Power is work done over the time it takes to do the work. For a given flight at the same speed and the same flight time and the same size, the work to do that flight is the same. The time is also the same so the average horsepower is the same, even if it was an FP 40 or a PA 75. The PA 75 obviously has more maximum horsepower capability, but it is not used. The FP 40 obviously has enough. So where is the difference? When a high drag situation occurs, i.e. a corner, the drag goes up, and if no more power is available, the plane will stay slowed down until the drag is gone and it stabilizes where it was previously. However, if the engine has extra horsepower capability, it will simply power up briefly to keep the speed up. This is where people feel the difference and claim their motor has more horsepower. However, when you average that out over the entire flight, the difference in average horsepower is not much, but that “feel” in the corners is nice. So, where do you want to be in the wind? Me, I don't want to be caught with the low horsepower engine. I want all that extra capability to overcome high drag situations. In the past, we didn't have such good motors, and the only way to get this extra bit was to fly faster. Check out the video of my semifinals and finals flights from the Lincoln Nat's in 1978. I have watched it on YouTube, so you should be able as well. I was flying a ST 60 powered BadNews at 4.8 seconds a lap in that bad wind. There was little choice then, as without that speed I wasn't getting through the overheads. You are going to have to experiment with what speed will be required to do a “quality” pattern for your setup.
With this in mind, a maneuver-by-maneuver description follows.
Takeoff
The first challenge is the takeoff. Many a prop has been lost by taking off in the wrong place. So where is the right spot? Choose either an upwind or downwind location, and I base that on the speed of the wind. If it approaches 20 miles per hour I give up and choose the downwind location. I simply don't want to risk being pushed in just at release and lose control. Bad things can happen that way. Instead I go downwind and move it so it has a slight headwind component. This might be around 10 degrees from dead downwind. Again, I don't want to risk getting a gust of wind under the tail and grinding a prop down. The problem here is that the plane will easily lift off and not roll out smoothly. My approach in this situation is to take off at full cruise power (yes, electrics can take off at different power levels) and “fly” the plane directly from release. In this case I don't assume that it is going to roll like a normal takeoff, but instead I imagine that it is already in flight and I simply fly it from the ground to 5-foot altitude as smoothly as I can. Watch out for any unevenness in the takeoff strip, as a small bump will “launch” it into the air suddenly. When the wind is 15 or less, I will execute an upwind takeoff. Like the downwind takeoff, I make sure the plane has a slight headwind component at the release point. Like the downwind takeoff, around 10 degrees is enough to make sure there is no tailwind at release. Also like the downwind takeoff, I use full cruise power and make sure it has ramped up to that level before release. This gives more instant control authority and is less susceptible to wind gusts that might be an issue at low speed. Once moving it will quickly have a tail wind component, but it will have plenty of speed quickly and it is very unlikely to jump into the air, so the roll out can be more “normal”. Note: The previous discussion is for takeoff on pavement. If on grass, I always use the downwind takeoff unless the grass is like a putting green. If attempting an upwind takeoff in thicker grass, the drag on the wheels can make the plane nose over and damage the prop, and or other pieces of the structure. There is too much risk there, so make a downwind takeoff. Now that the plane is in the air, focus on the takeoff maneuver. It doesn't end as soon as the plane is in the air. Make sure to make a smooth ascent to level flight in one lap, and then fly two more laps before the takeoff maneuver is completed.
Reverse Wingover
Once the takeoff is completed, read the wind to determine the exact upwind spot for the start of the reverse wingover. At the appropriate time pull up EXACTLY upwind. If you enter too soon, it will be very easy to do the first half. If you wait too long, it will have an anemic climb, and have a definite crab angle over the top. Crab is when the fore aft axis of the plane is not co-linear to the flight path. This is very easy for the judges see, and downgrade accordingly. The key to this maneuver is finding upwind exactly in the right place. The entry into the vertical climb is also important. This is NOT the time to show the judges a “rulebook” corner entering the climb. It will accentuate an error and show a crab angle even more so. Your best bet is to make a softer entry and any resultant crab angle will be less noticeable if the wind is missed. In that same vein, don't automatically hammer the second and fourth corners of this maneuver. It looks really cool when done right, but your probability of completing it perfectly in the strong wind is much reduced. Make all four corners as close to the same radius as possible, that way nothing will jump out to the judges as being different. Instead, put your focus on making a great turn and stop on all corners in this maneuver. Doing that does give the judge something to GIVE you points for as opposed to subtracting for other “differences.” The absolute hardest part of this maneuver is finding the correct location to turn up on the return pass over the top. Sometimes there are obvious objects in the background (i.e. trees, buildings, etc.) that make it “easy” to find where you turned up initially. Be aware that judges sometimes move in the middle of a maneuver, so focusing on them is not always the right answer. Break down and buy a bright colored T-shirt and have your helper put it on and stand upwind, and use them for the mark. Again, remember to make the fourth corner the same radius as the others, and have a flat pullout.
Inside/Outside Loops
As discussed previously, place the round loops directly downwind. This may seem a bit strange the first few times you try it, but it can become natural with practice. In this position, wind-up can become an issue. This is where the trim on you plane can help, as discussed previously. Also, how your motor reacts also affects the wind-up. If you plane does tend to wind up, be prepared, and expect it ahead of time instead of reacting to it. Controlling the size of this maneuver is also a “tell all” to the judges for what is upcoming. Keeping these rulebook size, and round, tells the judges you are under control, and deserve more points. Out of control here sets a bad precedent to the judges, and will likely follow in subsequent maneuvers. Likewise, be prepared for the different timing in these maneuvers. It becomes very easy to make oval shaped maneuvers (long side vertical) as you are turning into the wind to start and that tends to make it turn easier. Then at the top, the plane is headed into the wind and it is very easy for it to descend too fast, changing the radius of the loops. It takes practice to keep this round, but it can be done.
Inverted Flight
There is not too much to discuss here. The focus is in maintaining the exact level flight height, and heading into the wind sometimes makes it climb, and then with the wind it wants to descend. Be aware that this can happen, and be on it before reacting to it. The climb/descend is a generalization. At my flying field, when the wind blows from the southeast, my plane tends climb into the wind, yet when the wind is from the northeast, it tends to descend heading into the wind. The only difference I can see is the general terrain that the wind came through to get to my field, and it might be rolling one way from the SE and a different roll from the NE. This is where a bit of practice at the site you are going to fly at; in the wind can be helpful. Once again, be prepared before it becomes a reaction on your part.
Inside Square Loops
Once again, position this maneuver directly downwind. As with most maneuvers in the wind, the size of the maneuver determines how hard it is going to be for you to execute this correctly. The bigger the easier, however the size may hurt your score. In this maneuver, all the corners will feel somewhat different, as the plane present to the air at quite different angles. Each leg will also feel different than normal. If you do this maneuver with the same cadence that you do it in the calm wind condition, it will be quite distorted. The first leg of the maneuver will take longer than normal as there is some headwind component it flies into. The second leg can be similar to calm conditions, however the wind is trying to push it down, and this has to be resisted. The third leg can happen very quickly as you have wind and gravity working on the plane making it accelerate. This is turn makes the fourth leg faster, which in turn makes the fifth leg faster, etc. The stable speed will be a function of your plane trim and motor capability to resist speeding up. Since every leg is different, standard cadence is out of the question, and you have to develop an “eye” for the shape of this maneuver, and fly to that shape. Again, practice flying in the wind will help develop this skill.
Outside Square Loop
This maneuver is somewhat different from the inside squares due to the entry method. As you all know the entry of this maneuver is one of the most difficult to do correctly in the wind. The second you input the down control to start it, it can hit warp speed instantly! There are a few “tricks” to help mitigate this, but all are Band-Aids. Many try to slow the plane before entry by feeding a bit more up just before starting. This helps, but the judges can see this a mile away. Another technique I have seen the Chinese team members do is to stay in level flight (5 feet high) until about a quarter of a lap before the maneuver starts and abruptly pull up into the 45 degree elevation, and then start. This really strains the plane to climb that hard with a significant tailwind, and does slow the plane making the entry easier. The key is good trim and a motor that helps brake during that downhill dive. I have also seen some enter this maneuver as if it was the start of a reverse wingover. I would not recommend that approach. Instead, make sure the maneuver is dead downwind and start with a nice tight corner. The tight corner creates a bit more drag helping to slow the plane. It further gives you more time as there is a longer straight segment before the bottom corner. Again, this maneuver in the wind requires you to “eye” the shape, and a simple cadence is out of the question. By the time the third corner is done, it seems to settle down and the second down leg is easier.
Triangle
This is another maneuver that has the potential to really wind up in a good wind. Place it directly downwind as it keeps the differences in the corners less, and gives a proper view to the judges. If this maneuver is offset any significant amount, it become quite distorted to the judges, and it will look like it is misshapen even though from the pilots perspective it is “perfect.. Don't let this happen to you! Keeping the corners all 120 degrees is also critical to a good triangle. It is too easy to make the first corner only 110 degrees, or less, as you are remembering the squares. The wind makes it difficult because the input to the first corner is different than in perfect air, and you need to recognize this. Entering this maneuver there is some additional airspeed which makes it corner a touch easier. This corner then can easily be overturned, hurting the geometry. As mentioned earlier, this is another “eye” maneuver. The second corner is not too much different, but the third corner is quite different. Because of the slight headwind, and gravity, it starts the corner easier, but as the corner progresses; the headwind becomes a tailwind, and all of a sudden the turn rate slows, and the drive out of the corner more difficult. This sometimes results in a drop in the bottom, or a lower pullout because of the changed turn rate. Flying a touch faster helps this problem. Be aware of the differences in the corners, and don't become reactive.
Horizontal Eight
As with the other maneuvers, it is very important to enter this maneuver directly downwind. If it is not entered downwind, the shape can easily be distorted. As the plane goes over the top of the insides and outsides, if flies into a headwind. Many fliers then create egg shaped loops as they are using more of a “timing” approach to the maneuver. Then on the bottom of the loops, they tend to make them round, and the result is a criss crossing intersection. The “simple” solution it to make sure you fly the top portion of each loop out far enough to make the loop round. This does take some practice to do, and can feel strange, because it messes with your natural rhythm in that maneuver. The next problem area is setting the intersection with the first pass and then pulling up short on the next pass through the intersection. This can happen if too much focus is applied to the intersection. That seems strange, because if you are focusing on it shouldn't it be correct? Well, what I see too often is that the pilot will tighten the radius of the first loop three quarters of the way through, thus ensuring that the plane pulls up short of the first intersection. And as we know, even your elderly grandmother can see bottoms and intersections, as well as the judges. Pulling up short can occur on both the inside and outside portions of the eight. The solution is to practice making concentric loops of the same radius regardless of the wind. Then place them together in the form of the horizontal eight and the intersections will improve. As these maneuvers get more complex, there becomes more and more to focus on in the maneuver. There is the height of the maneuver, the shape, the intersections, the bottoms, and any deviations from these made by the wind. I still find it hard to manage all of these in the wind at the same time. This is where you are going to have to pick what your primary focus (or two) is (are) and let you many practice flights guide the remainder. Remember what grandma can see, and work on those. However, it is easier for the judges to see any of your deviations, but make it harder for them to deduct points by doing the “basics” well.
Horizontal Square Eight
This is one of the tougher maneuvers to do correctly in a strong wind. The same issues that apply to the round eights apply here, but the timing is even more affected. It takes even longer to fly the tops out to make the squares “square,” so that many pilots don't fly them out far enough, and then the intersections go to pot. The next issue then is that the bottom legs of the squares happens very fast, and after an extended time top leg, the bottom leg seems VERY fast. Most don't pull up into the vertical portion soon enough and this causes crisscrossing intersections. I also find that the bottom leg of the outside square portion is harder to get turned back up vertical in a timely manner, and surmise that it has something to do with the mechanics of my wrist and not having a strong enough muscle for that quick motion. Because of this I pay close attention to flying out far enough on the top of the outside square so that I can still meet the correct intersection in the middle. This is also applicable to the inside square portion as well. It takes real focus to watch and make sure the tops go far enough out on both sides. However, I feel this is one of the real keys to getting this maneuver correct.
I also find that tighter corners gives me more time in the flats, and easier to keep the geometry correct. Just don't mess up one of those corners though. On the other hand, soft corners puts you constantly in a corner with very minimal flats in the squares. If the judges are reading and using the rule book, this should score lower. Again, as in the round eights, there are many aspects of this maneuver to watch. I fly it by “eye” (not a timing maneuver) in the wind, and focus on the bottoms and intersections, for “grandma”! One problem in doing a series of tight corners is the possibility of pushing it too hard in on corner and having the plane roll (hinge) in one of the corners thus distorting the shape of it. This goes back to my general rule for competition flying: Know what the max corner for your plane is in those conditions, and then only fly to 90% of that corner. Yes, in perfect conditions, you can fly to 95% if you wish. This keeps the bounces from happening as well as the possibility of a hinge at an inopportune time. That said a series of nice corners in a square eight in the wind is impressive
The size of the maneuver is also dictates the speed at which things happen in this maneuver. A rule book sized square eight in the wind will happen VERY fast, and you are likely to fall behind and distort some aspect of the maneuver. As discussed earlier, you have to decide where to give a few points to salvage more in other areas. If you maintain the size and race through it, you are very likely to make mistakes that are EASY to see, and EASY to deduct points for. If you open up a touch, and maintain the shape and corners you are likely to score higher than maintaining the size. Myself, I tend to open up a touch in the wind to not make those mistakes that are so easy to see and loose points on. However, if you are really “on” and your plane is working perfectly, go for it and keep the size at 45 degrees.
Vertical Eight
The vertical eight is another tough maneuver to get correct in the wind. The problem comes once you reach the top of the maneuver, and start heading back downhill. As you head up hill towards the top in the outside loop portion, you don't need much input to get the plane to turn. Once at the top, this all changes, and more input is needed to get the same effect. Here, the trim of your plane is critical to get a good score. If it's not correct, it will tend to “mush” and skid down towards the 45 degree intersection and makes the transition hard. It becomes difficult to maintain shape of the round loop and find the 45 degree intersection because of the changing forces on the plane. If more down input is not added soon enough, the outside loop will become egg shaped if the intersection is maintained. Likewise if the down input is not added soon enough and the shape is maintained, the intersection will drop below the set point. This is where many practice flights in the wind will shape how you approach this maneuver. The key to this maneuver is what you do just after you reach the top of the outside loop.
Further, another common mistake is “lingering” at the intersection. This is another item that grandma can easily see, and a magnet for reduced scores. Planes out of trim will often times exhibit this problem. When in correct trim, a quick and easy transition between down and up control is possible, and makes the maneuver look so much more under control. The same goes for the transition from up control to down control going uphill. Don't linger there, or the maneuver will be become distorted. Excess tip weight is generally the culprit here, and easily makes this transition much harder than it has to be. If you watch carefully, you can see the change in roll “angle” the plane makes at the transition. This is another easy place to see excess tip weight. Use this fact in your trimming repertoire.
Hourglass
This can be one of the most difficult maneuvers to get correct in the wind, with respect to what it looks like in ideal air. There are several areas that cause issues. The first is the penetration the plane has as it is in the climb portion above 45 degrees. The line tension can become significantly reduced and make the second corner much harder to do than it has to be. As in previous areas, the trim of the plane is critical here, as correct trim will ease this issue. Once at the second corner, making the correct turn there sets up the rest of the maneuver. The critical point in this maneuver is the third corner. If your plane is not in good trim, it will not want to make this corner easily, and then terribly distort the remainder of the maneuver. The plane has to turn correctly here to maintain the correct geometry/angle of the down leg. The final corner, although being easier on the plane is tough on the pilot. As always, a plane in good trim can make a nice snap corner here giving the judges something good at the end of the maneuver to remember.
This maneuver should form a nice rectangle when looking from the pilots' position towards the maneuver. Imagine each corner of the hourglass in each corner of the rectangle. The point here is that it is a RECTANGLE, not a PARALLELOGRAM. I have seen (and done myself) many parallelogram shaped hourglasses. It is very easy to do a nice parallelogram shaped hourglass in the wind due to the “help” from the wind. Be very careful to make a nice 120 degree corner into the vertical leg. It is all too easy to not turn enough here and make it too vertical. If you do make this leg too vertical, make sure you make the down leg too vertical also, or you will have a badly distorted quadrilateral. Grandma can see this easily.
The key in this maneuver is the top leg of the maneuver. Make sure the second corner turns its 120 degrees, and makes the top path parallel to the bottom path, from the pilots' perspective. With these parallel, the third corner also needs to turn 120 degrees. However, the wind makes this much harder than any of the other corners. Correct tip weight is very critical here. Too much, and the plane will roll out and make the corner mush and skid and lose a lot of altitude before the corner is completed, destroying the overall geometry. Too little tip weight and the plane will tend to roll in, and in the wind this is near disaster. Correct trim is essential here.
It is appropriate to talk about size at this time. If the maneuver is too “far behind your head” (and we all know what that means, don't we) the second and third corners become very difficult to do as the wind is pushing the plane such that it will reduce the line tension in the corner. Putting the top of the maneuver too far in front of your head is MUCH easier on the plane, but is MUCH harder for the pilot to do and maintain shape because of how fast it can happen. After forty-five years of competition flying, and knowing better, I still find myself flying behind my head in the hourglass in the wind as I feel it gives me more time. I know better, but it still happens. This can be a hard habit to break. The only correct way to do this is to put the top directly above your head. This balances the forces on the plane and your “comfort” time in the maneuver.
The most common problem I see is most pilots fly too long of an upper leg, making the third corner MUCH harder than it has to be, and jeopardizing the geometry of the overall maneuver. I envision a rectangle when I do this maneuver and make a point to fly to the corners of the rectangle so that corners 1 and 3 are in a vertical line, as well as corners 2 and 4 are in a vertical line. When doing the third corner, I try to make it tight, but not too much. If it is pushed too hard, only bad things can happen here. Too soft will distort the shape making my rectangle image hard to achieve as with a bigger third cornet radius the down leg will have to be at a different angle than the up leg to meet the fourth corner of the rectangle. My plan on the corners is to make the same LOOKING radius corners from my perspective as possible thus allowing a better shot at the “correct” geometry. For me, the tighter the corners in this maneuver the better it maintains the correct geometry. However, you need to be in great trim to do this. If on softens up the corners too much, it ends up looking like a slightly distorted vertical eight. It's safe to do, but not high scoring.
Overhead Eight
The overhead eights can be very difficult to do in the wind. Penetration in the loops approaching the 45 degree mark is the issue for most. Once again, good trim on the plane is critical to get through this maneuver with a good score. Placement of this maneuver also contributes to the difficulty. As we all get older, it becomes harder and harder to bend back far enough to do and see the maneuver correctly. It starts with the vertical climb to the top of the hemisphere. It is imperative that this climb be placed directly up wind so that there is no side component of the wind at the top of the hemisphere. Once at the top, the inside loop is started and it is carried around until the plane is headed directly into the wind at a 45 degree elevation. This is the pucker moment, not knowing how well the plane we drive into the wind and penetrate and maintain line tension, thus control. The same issue exists on the outside portion. If you are old, it is probable that you started the inside loop too soon, thus saving your back, or that was as far as you could bend. This is problematic, as it makes doing these loops much more difficult as it contributes to loose lines which destroy scores! It's not too much different than trying to do your horizontal eights directly upwind. Not likely to happen on a regular basis. To make things easier, go behind your head some before you start the loops. If you don't believe me, try it sometime. This can be a small compromise you make in your score to make sure you get through this maneuver as opposed to not completing it! However, this involves bending you back even farther than normal. You might go see the Chiropractor before your flight! This assumes that you do this maneuver in the “traditional” way, i.e. you face the wind and enter the eight and bend your back backwards and then twist upon exit. However, I have seen pilots who twist going in and face downwind. This way they don't have to bend their backs as far. You might give that process a try. Myself, I prefer to maintain my reference to vertical so that the intersection is overhead, and to have the difficult portion of the maneuver “in front” of me as opposed to even farther behind me as the alternate method does.
As has been discussed in previous trim articles, I find that the farther aft the leadouts exit the wingtip, the better the penetration is in this maneuver. Likewise, being light on tip weight becomes problematic in this maneuver in the wind. It would be nice to carry more tip weight for this maneuver, but you will have issues with the hourglass and square eight if you do. This becomes part of the art of trim, knowing just how much tip weight to carry for a specific condition. Sometimes, one just has to bite the bullet and speed the motor up to get through this maneuver, and live with the issues in the other maneuvers. Speaking of more power to get through the eight, the entry can save energy as well. In the strong wind I purposely do NOT make a tight corner entering the vertical climb. Instead, I do a very big radius corner so that it is one easy slow turn from level flight to the 45 degree elevation point. This conserves your planes momentum, and keeps the speed up going over the top, all providing more line tension and ability to start the maneuver under control. Another tip I have found is that many times I find it easier to do the maneuver doing loops smaller than 45 degrees. It seems counter intuitive, but it does work most times.
Four Leaf Clover
The clover is “easy” relative to the previous two maneuvers. The hard part of the clover is the very start of the maneuver. At 42 degrees height, you start into the first inside loop. The problem is there is a significant tail wind at that point and if not in good trim the plane will not want to do this. Once again, there opposing requirements on the plane and this maneuver is no exception. If your plane balks at this entry, it's likely your leadouts are too far aft! This is in direct opposition to the overhead eight. This is where the “art” of trimming pays off in finding this happy medium. Once the leadouts are in the correct position entry even in a very strong wing is a non- issue. Focus on maintaining the entry height when completing the first inside loop and then proceed to the first outside loop. If you let the bottom of the first inside drop, the first outside will become “fun” as its size will be too small and require a tighter loop. Climb to the second outside and execute that turn. In reasonable trim this loop is not difficult, but once again be sure to not go below the 42 degree elevation. Then fly inverted to the last inside loop and then climb over the top. Don't get fancy on the exit, and once past the top of the hemisphere do a smooth and easy inside turn to level flight.
Landing
Finally, the landing is here. It's about time! Of course you have your tank (for the IC folks) set up to be able to do a loop kill. I always did a loop kill so that it would stop at the bottom of the loop and I would be facing about 45 degrees to the left of direct downwind. This would provide maximum speed to penetrate the wind at that point. I would have it tracking ever so slightly down into the wind so a gust wouldn't lift it and loose line tension. This gives speed to get through upwind and then bring it around to straight downwind for a touchdown. This can be accomplished with electric power as well with judicious time management or a TUT.
What you don't want is for the motor to shut off at about 45 degrees to the right of direct downwind. At that point you likely wouldn't have enough momentum to get through the wind, and you would be forced to land upwind, which only has downsides. Really, in no circumstances do you want to land anywhere near direct upwind. The slightest bounce can let the wind get under the wind and create a free flight model with it. Instead, make sure you land on the downwind side of the circle so you can control your plane.
Of course, you have you landing gear adjusted into the correct location for the surface conditions you are flying on. Before you fly in the wind, be sure to verify that you can land your plane at speed without any hint of it bouncing. If it wants to bounce, move the position of the wheels back, and retest. Make sure it is very controllable. Once in the correct location, you have the freedom to land the plane at just about any speed without the fear of bouncing. Thus when in the wind, you can land it in the downwind half and keep it on the ground once there. Then it is just a matter of slowing down and stopping. Be careful not to relax once on the ground and let the plane takeoff again. This could be a major problem!
Now that you are through, take your hat off and wipe the sweat away. You made it!
A few articles ago I mentioned the CG locations with respect to % of MAC. As an engineer, I know the importance of setting up a coordinate system and following through with it. Well, I failed to do that in that article. I mentioned having a CG of 85% of MAC. Well, that was measured from the TE of the MAC, not the conventional LE of the MAC. My bad! When using these numbers, be sure to subtract them from 100% to get them into “conventional” terms. Thus, my 85% MAC is really 15% MAC per normal convention. Sorry for the confusion.
The subject for next time is my “favorite”, flying in DEAD AIR. Same bat time, same bat channel. See you there.
Flying Lines home page
This page was upated April 26, 2016