Walker on Stunt
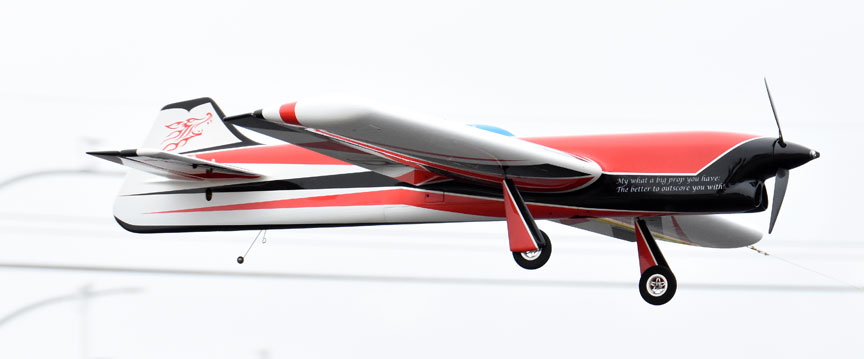
Paul Walker's Predator glides in for a landing during Expert Precision Aerobatics competition at the 2018 Fall Follies in Salem, Ore. Flying Lines photo.
Ball Links
By Paul
Walker
March 2019
You either love ball links or hate them. It is easy to be both. I started using the Rocket City ball links years ago, and when they first came out they were great. I still have old planes with them still in and still working perfectly. They are great, especially in conjunction with a slider unit in the elevator horn. They allow almost infinite adjustability and keep the slop in the control system away. They also have a great grip on the 4-40 rod that it is attached to, and this is a great benefit to me as when adjusting them, they won’t slip and move more or less that wanted. How did we live without them before?
At first they were loose, and stayed loose. The newer ball links degraded for some reason. Maybe they stopped using virgin plastic and used recycled plastic, but for whatever reason, they now have a tendency to get tight. I have a plane currently that has been loose for five years, but now is tight. Unfortunately these links are buried in the fuselage, and only by cutting on the finished plane can I replace them. I still haven’t gone back in to fix it. I have bought MANY ball links from reputable stunt suppliers that claim they are the good ones, but a year later they are tight.
So, this year for my new plane I have eliminated the problem except for the ball link in the elevator. Before I started the project, I wanted to be sure I had a “good” one for the tail. I did, and I put it aside for when the plane was finished. When I went to install that ball link, sure enough it was tight. Now, what was I to do?
I was watching a car show that was discussing what to do with a cracked block in one of the cylinders, and they threw out sleeving the cylinder. It was a “well, duh” moment.
What needed to happen was to push the ball out, and sleeve the clevis! Yes, this removes a degree of freedom from the link, but on the elevator pushrod that rotation freedom is not necessary!
The process started by pushing out the ball, and measuring the hole that remains. Brass tubing was used for the sleeves, and the closest size had a 0.216” OD. It was slightly smaller than the hole, but this allows the JB Weld used to hold the sleeve in place get a better purchase on the clevis as the concave shape in the race is still there. I then had to find how many sleeves were necessary to complete the installation. Since there is a 4-40 bolt going through the ball attaching to the metal slider, that bolt needed to stay. They could not just be stacked up and glued to the clevis, as the bolt would not allow the “ball link” to rotate. Therefore, the last sleeve was glued to the bolt and the rotation was then between the second and third sleeves.
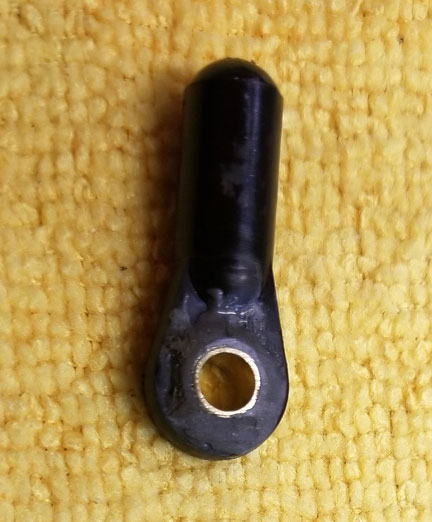
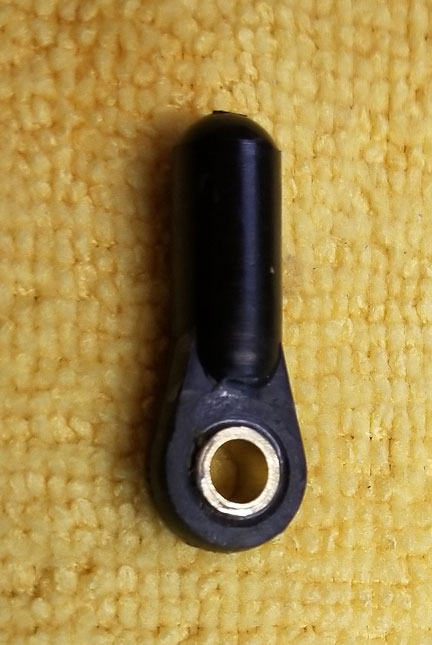
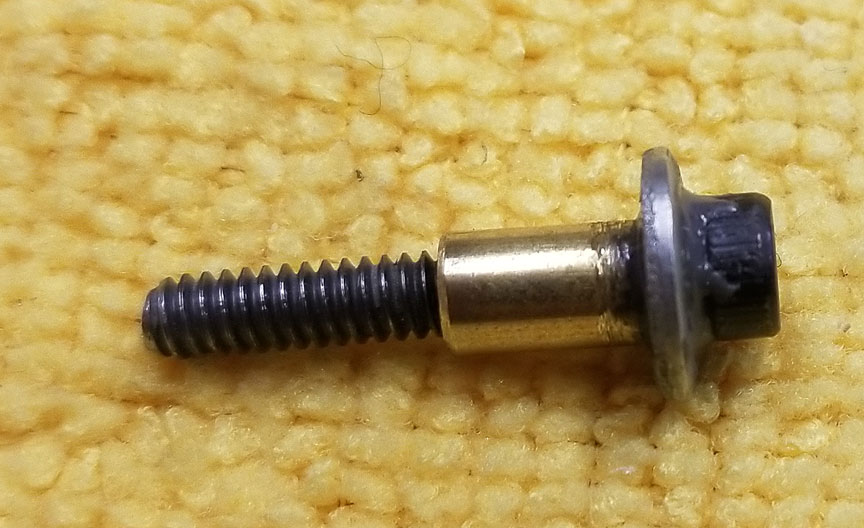
The first sleeve had an OD of 0.216”, and the second sleeve had an OD of 0.185”. These two were glued into the clevis with JB weld. Once cured, one side was faced off close to flush with the clevis, and the opposite side stood proud and was then filleted with more JB Weld. The pictures of the clevis show this, and if the picture is clear ,enough two sleeves can be seen on the faced side that is flush. The picture of the bolt assembly is fairly straightforward. The washer is there to prevent the clevis from falling off just in case the glue fails. The assembly picture shows that a second washer is added between the link and the horn/slider. In this configuration, it is just a spacer.
There is a small clearance between each sleeve, and this provides a small misalignment tolerance, plus plenty of freedom in rotation, which is what this was all about from the beginning.
So, this was my solution to the tight ball link issue. I now have dozens of “bad” ball links that can be modified to be perfectly acceptable. For what it’s worth, a standard ball link weighs 2.1 grams. The modified link weight 1.6 grams! It is lighter to boot!
If you have a plane that has ball links that have tightened up, and have no good ball links to replace them with, now you have a solution.
See pictures below.


Flying Lines home page
This page was upated March 5, 2019

