![]()
Scale Matters
Vacuum molding Part 2: Preparing the canopy plug
By Orin Humphries
February 2019
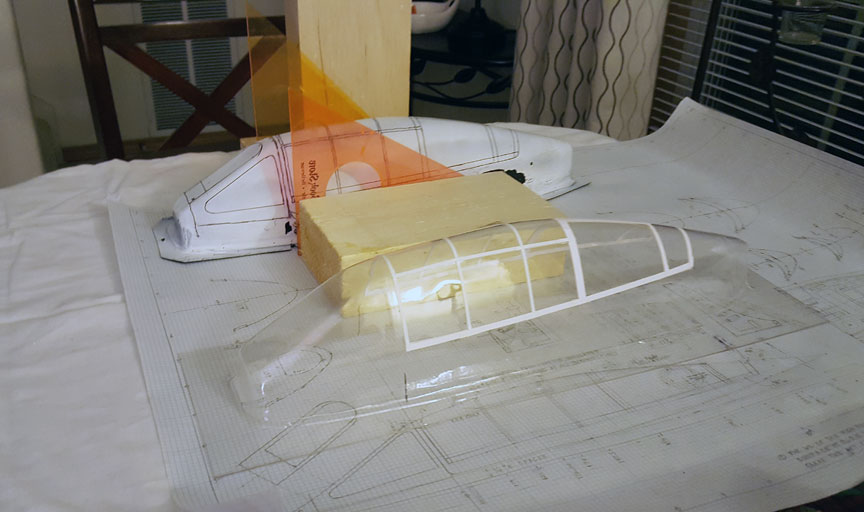
You can make your canopy plug either from balsa or from fine cell foam. Balsa is what I am used to. Get a rectangular block that is larger than the biggest dimensions of the canopy in either view. Draw the centerlines on the block where what will be the top view will go and down onto the front for the front view. Draw the base line on the side next to the top for the side view. Rubber cement the drawings onto the block.
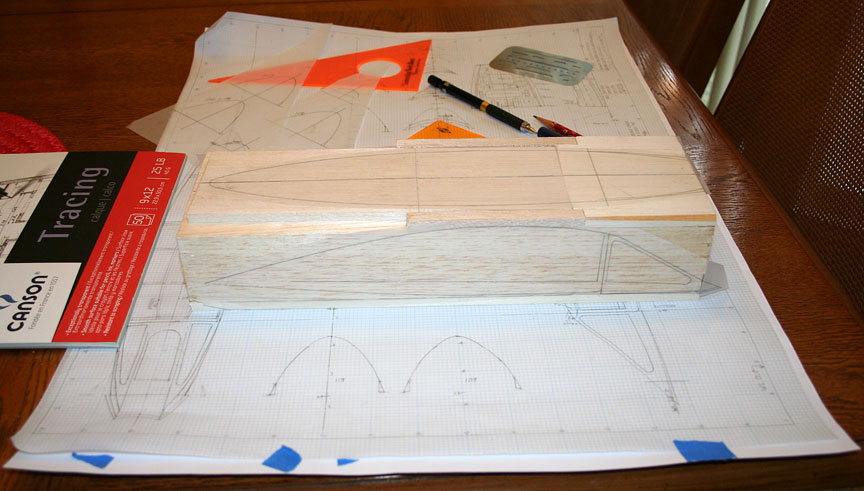
The canopy block templates. All photos by Orin Humphries.
Pick one view to be the first to cut. Band saw the outlines carefully, following the lines; don’t saw up into pieces these portions of the block that you want to remove. Keep them intact. Don’t saw leaving a margin to be sanded later. Preserve the cutoffs for later use.
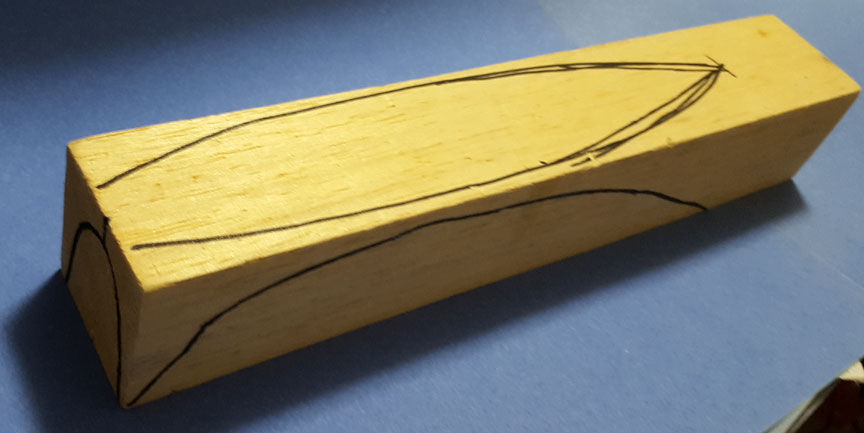
Generic canopy plug, freehanded.
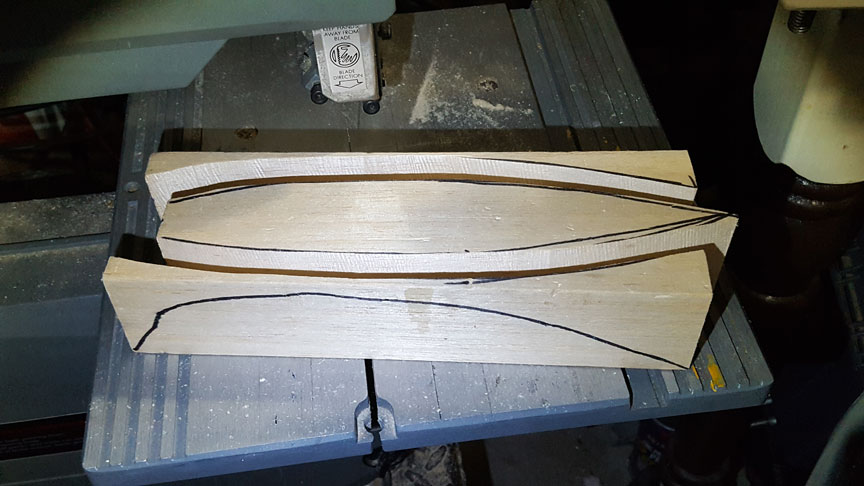
The first cut (either view could be first).
Now tack glue the edges that you just cut off back onto the block. Put the glue at the edges that will later be trimmed off anyway. These temporary pieces will provide a flat surface to support the block while you make the next cuts. Now flip the block 90° and make the other two cuts carefully. Put the four cutoffs aside for later reference. You now have the rough shape of your canopy with a rectangular cross section.
Second cut: Use the cutoffs to cradle the first cut for the second.
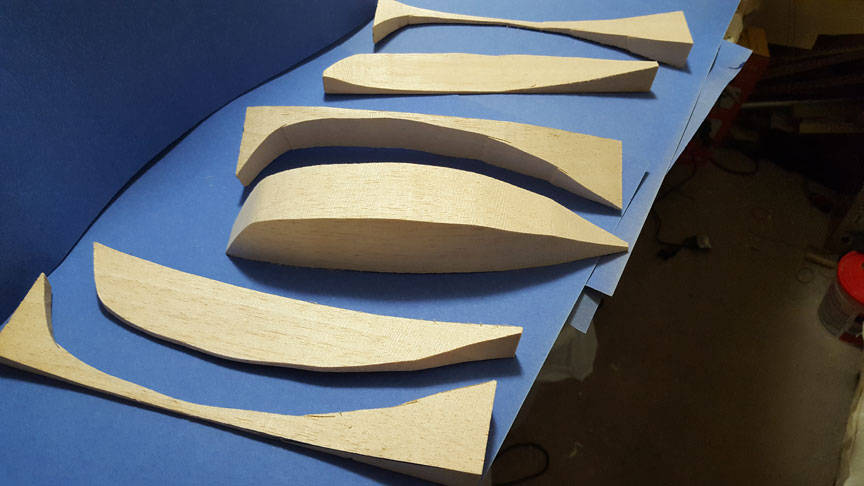
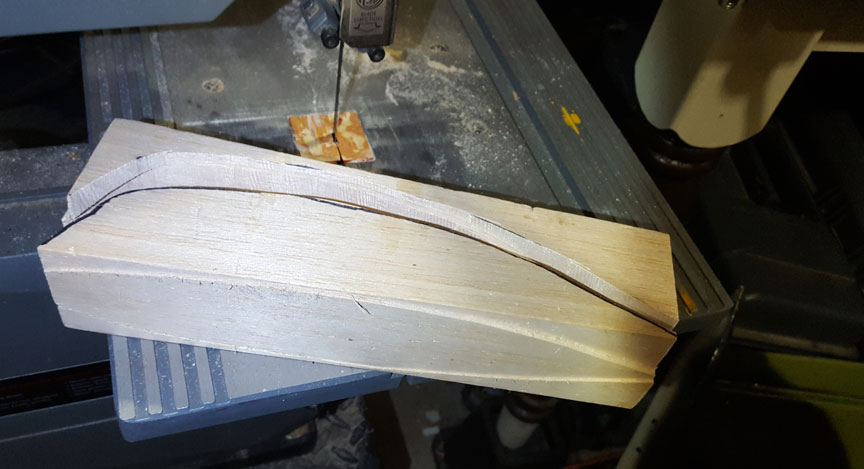
Plugs ready for shaping -- don't throw the scraps away just yet.
Here is where carving skills are needed. The X-Acto medium handle with the long blade is a really good tool. I start by cutting off the top’s edges at about 45°. I then make two, a bit shallower, cuts along either side of the resulting bevel at an intermediate angle between the mating surfaces. I keep cutting in a reducing depth fashion along both edges of a previous cut. Slowly, a faceted canopy emerges from the block. You stop carving when a sanding block with 180 grit paper will do the final shaping best. You don’t want to carve too deep and have to putty the depressions.
Do your final sandings with paper grades down to at least 600 or 1,000 grit. Now you must add ample margins around the plug, as it is called. That is, glue a slab of balsa to the bottom of the plug. This will provide a continuous surface for the hot plastic to lie upon. If you don’t have this margin, when the plastic forms around the plug it will bulge at the edges going around the corner onto the platen (flat supporting surface of the forming machine).
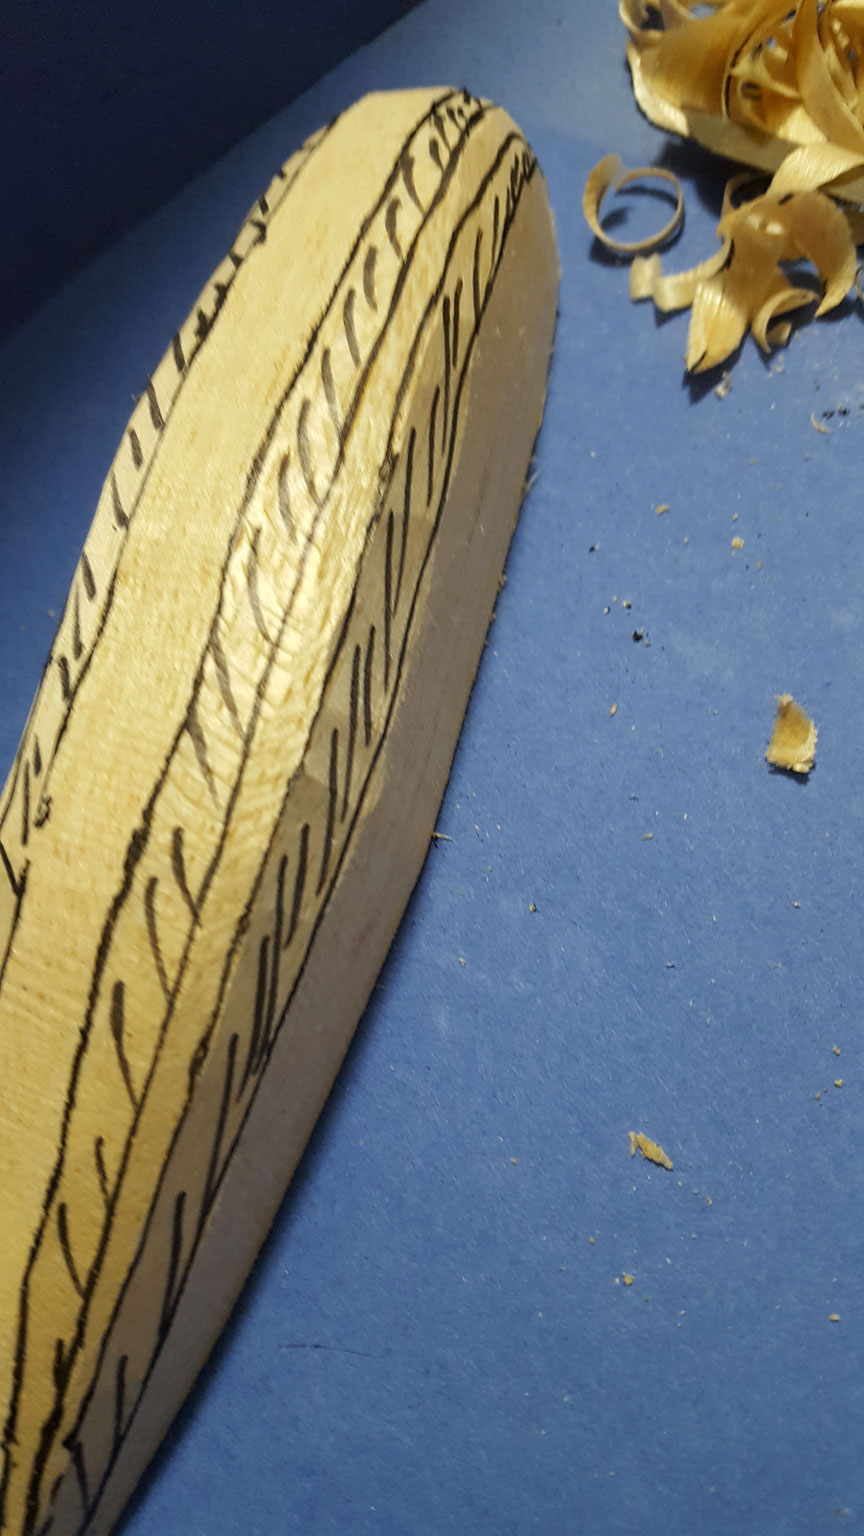
The first cut has been made, and the second cuts on each side of the first are also made. They are marked up for better visibility.

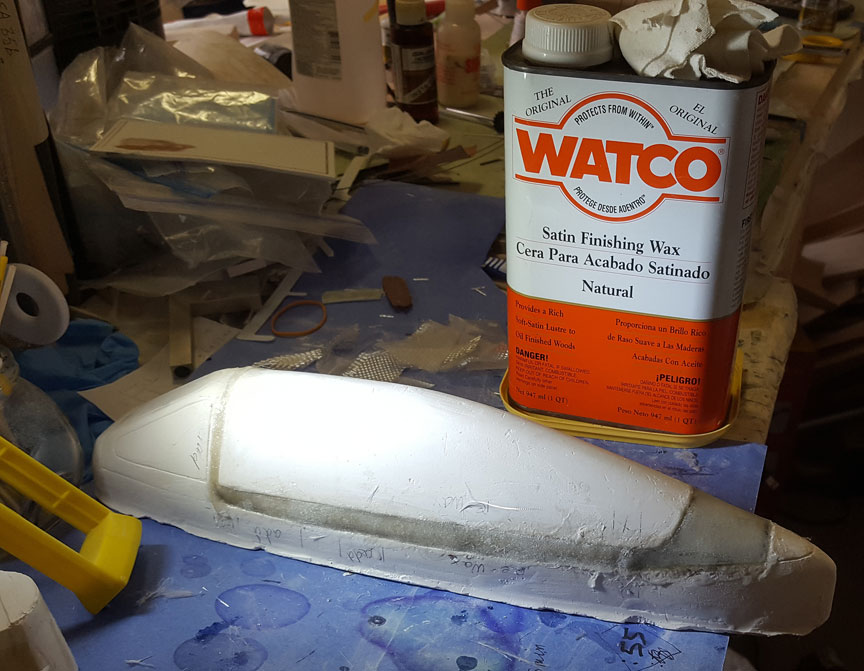
The plug is now ready for 180-grit sanding.
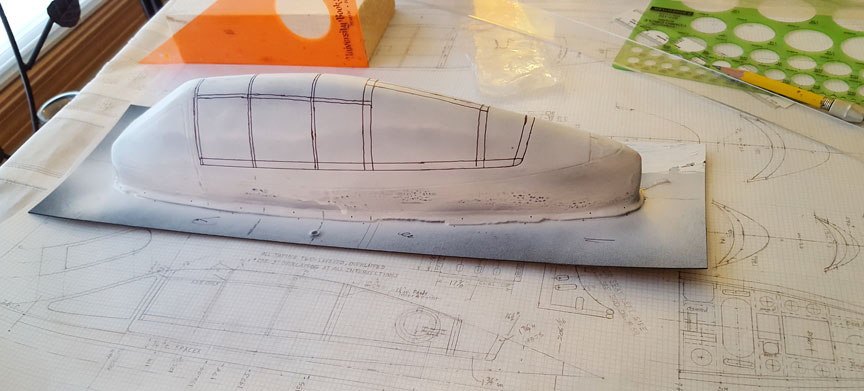
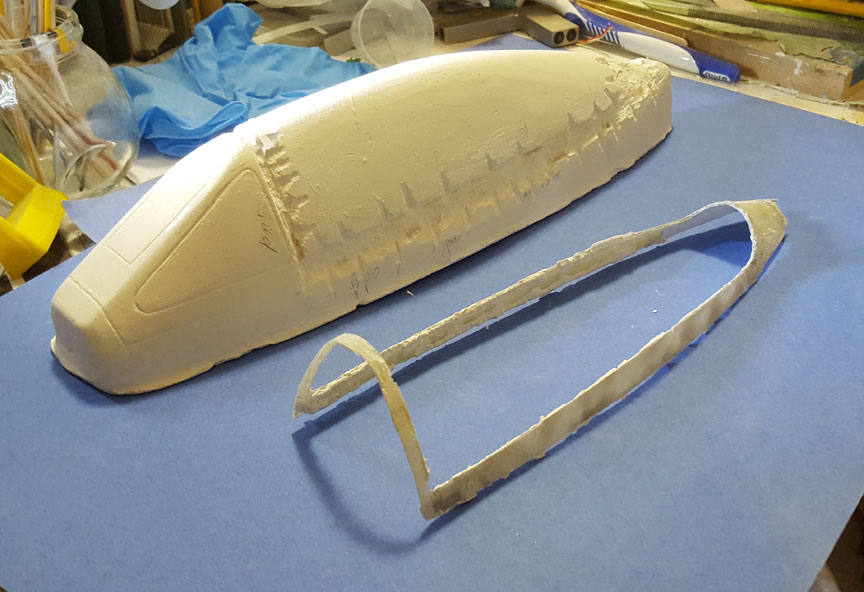
Actual frame lines are now drawn on the piece.
Here, I have sprayed the plug white after the vacuum forming so I could mark it up for framing details to follow. You can see the additional material below the canopy’s bottom edge. The one thing I would have done differently is allow for draft angle at both ends. On this plug I took the edges straight down because I was trying to shoehorn the plug into my largest forming rig. Even at kitty-corner, the plug was too long, so I sent it to Lauren Ziroli at Nick Ziroli Plans.
The surface grain must be filled to a glass-smooth finish temporarily, because wood grain and blemishes will appear in the molded canopy. Don’t waste your life with the older, thin butyrate balsa fillercoat. That takes seven applications as a minimum. Modern fillercoat from Sig might work okay. (Some make their own fillercoat from clear dope and talcum powder.) I fill the grain as follows. Brush on a coat of nitrate dope from Sig to seal the balsa and keep the next liquid on the surface where it will fill better. When dry, lay up a single ply of lite glass, ½ or ¾ ounce per square yard, with finishing resin, not structural epoxies. Finishing resin cures to sandability in about eight hours at room temperature. Sand with 220 grit just down to a smooth surface; don’t get into the cloth. One sanding usually does it. One coat of epoxy filler coat from Klass Kote will take care of the tiny blemishes. Painting the plug with black epoxy instead of white is the way my acquaintance, Dave Platt, does it. Black shows up tiny imperfections best. Once these are addressed you are ready to roughen the surface.
You see, a perfectly smooth surface won’t vacuum form acceptably. The hot plastic has too much friction with the finished surface and the plastic won’t flow evenly over the plug. One way around this problem is to give the plug a light dusting of talcum powder. In 1968 or 1969 when I made my A-26’s canopies this way, I got the right amount of talc on the plugs for the first two attempts. On the third try I got too much and it showed up in the formed canopy. Yes, plan on making several runs before you get the temperature and the timing right. Once you get it down, make several spares for contingencies, too.
Another way to cut the friction is to lightly sand the plug’s finish. Ask Lauren what grit to use. When my plug proved to be too slick, Lauren vacuum formed a thin layer of some black plastic over it and then sanded that.
What plastic to use
You can’t use vinyl as it will melt in the sun like the old phonograph records. The most commonly used material in my time was ABS plastic, Acetate Butyrate Stearate. Today there are others that plastic film suppliers can advise you about. Another film is Styrene. ABS melts at a lower temperature than Styren.e
Films
If you check with plastics suppliers you will find that four out of five of them deal only in much thicker materials than we use for canopies. They can refer you to the one that deals with “films,” is the term.
Thickness
As the plastic draws down over the plug, it is going to get thinner. You have to start with sufficient thickness. It is rather easy to figure how much you need to start with. The governing factor is like a Natural Law for Solids, let’s say. “The volume of the cold, flat plastic just above the top view of the canopy before the draw will equal the volume of the hot, spread out plastic afterward.” You see, plastic sheet out away from the top view of the canopy will not pull inward, over and draping the canopy. Only the area of plastic above and very close to the plug will be involved. The outlying material is basically going to drop straight down and be thinned by the stretch down the sides of the work area, the platen (“platten”).
The thickness will decrease by the ratio of the surface areas before and after the draw. Let’s say the area of the canopy seen in top view is 5 sq. in. After the draw, say the area on the formed canopy is 15 sq. in. The ratio is 5/15, or 0.33. Then if the original thickness of the film was 0.045” the final thickness will be 0.33 x 0.045”, or 0.015”.
Canopy framing
You cannot paint butyrate dope on ABS plastic. Once the sun gets on the paint, the plastic will soften and sink a bit due to the residual solvents in the plastic and in the paint. Butyrate seems to go onto Styrene, but when you come back in a month the plastic may have curled a bit. If your project is electric, then fuelproof paint is not an issue and you could use plastic paints. You can use Monokote Trim Strips, perhaps. I think a good paint for this would be Klass Kote epoxy. There is a rubber masking film at large hobby shops or at Micro-Mark that you can spray on in a Badger spray rig with a larger-diameter nipple than you could use of paints. I drilled out one of my Badger tips. The rubber liquid has to be first strained through something like old panty hose. Do remove wife before using.
The setup for canopy taping, using Chart Pak tape from Amazon. The plane is Orin's F-84E.
Dave Platt puts mold release on the inside of larger canopies and lays up Lite Glass and epoxy in there all over. (A good floor wax from the supermarket works for mold release.) After removing the cured shell, he trims out the glazing areas and leaves the frame portion intact. This can then be glued inside. I use a thin diamond saw in my Moto-Tool, a blade I found in the X-Acto rack at Galaxy Hobby in Lynnwood, Wash.
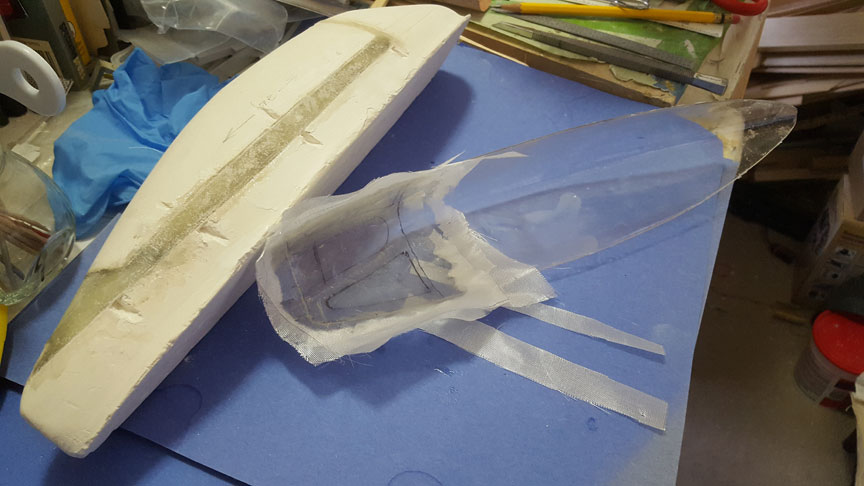
The windscreen layup.
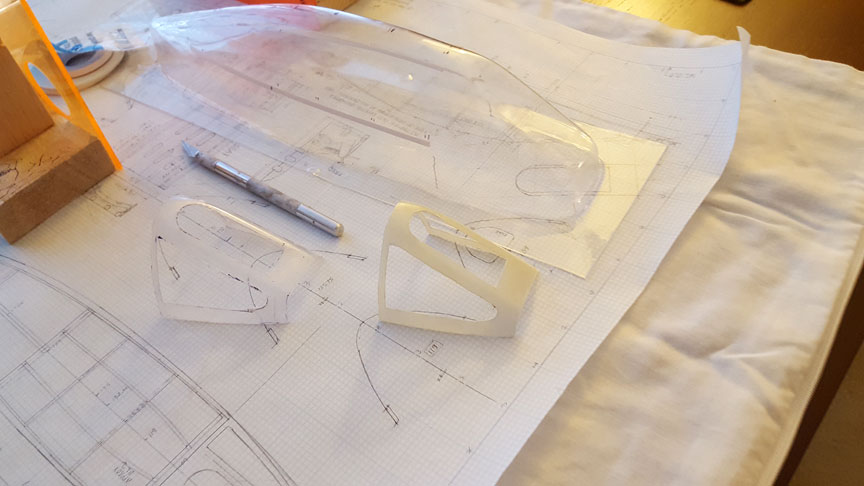
The windscreen frame.
For super detail on my F-84, I had already made a plaster copy of the canopy from the rubber master mold. I then inlaid grooves in the plaster plug where the frame was to be laid up. I used floor wax for the mold release as tests of the Rocket Release showed that it doesn’t work on plaster.
The frame is filled.
Here is the fiberglass frame that was removed from the plaster cast with some coaxing from my 1/8” chisel.
Let me say a few words about laying up this frame. When epoxy came to us as a surfacing material in the 1970s, we didn’t have finishing resin. We thinned the structural epoxy with a little alcohol for spreadability. We squeegeed it on with old credit cards or playing cards and blotted up the excess with tissue. When I tried to put the light glass in the plaster’s grooves first and then brush on the epoxy, the brush made the glass tend to come apart. This was so even with thin fiberglass mat. I thinned the epoxy with alcohol for spreadability. I expected the fiberglass to set up rigidly. It didn’t. The frame was flexible due to the alcohol. I had saved the epoxy remnant as a check of the cure.
After removing the frame from the plaster copy I tried to stiffen it up by adding an inner layering with uncut epoxy. I also saved that remnant. The procedure didn’t make the frame rigid due to the very long, thin nature of the frame portions. I had saved that straight mix as well.
The remnant of the thinned epoxy is still rubbery more than a month later, while the straight epoxy remnant is very hard as expected. I think it was the presence of trace alcohol that made the windscreen and canopy frames shrink a bit and be narrower than the mold surfaces.
I changed the order of layup after that when I made the windscreen frame. I brushed on the straight epoxy and then laid the lite glass over it, tamping it down with the end of an acid brush dipped in alcohol so the brush wouldn’t stick and pull up the glass. A couple more layers of lite glass went on before blotting. This was repeated until I had the necessary thickness. My windscreen frame is rigid.
I put the formed canopy back in the rubber mold and then inserted the frame. When it came time to mount the slider frame in the glazing I applied a thin line of Formula 560 glue with the applicator set I found in a Model Aviation ad: Deluxe Materials. This is a wonderful, affordable product from England.
I first mixed the 20-minute epoxy and then the 5-minute. The 20-minute went on first, then the Formula 560 and finally the 5-minute as follows. I applied a fine glue line of Formula 560 canopy glue to the canopy where the skinny front bow of the frame would soon be going, using my Deluxe applicator. I put a small, judicious amount of 20-minute epoxy on the rear of the frame. The fiberglass frame was inserted into the plastic canopy in the mold.
I pried the front corners of the frame away from the canopy and applied a small amount of 5-minute epoxy. I then stuffed the assembly with radio foam rubber to hold the frame tightly to the canopy. After the adhesives were dried or cured, I pried the sides of the frame away from the canopy and put in some Formula 560 in between the long frame sides and the plastic.
The foam rubber holds the parts together during curing.
Use the Deluxe Materials set for precision glue applying and especially for putting on glue rivet detail. Order extra tips. Clean your used tip first with a fine wire and then warm soapy water. This Formula 560 glue is the current version of RC 56 from times past. As you may know, this product is held by many to be the best canopy glue available. It is white in the bottle and it dries clear.
Do yourself a HUGE favor and go online to Dave Platt Models Inc. He sells DVDs of every Scale technique there is. The discs are invaluable.
Journey's end
I have had useful consultation with a world Speed guru regarding Cox engine parts. The chain of events, about which I knew, was that Cox Industries was bought by Estes in the early 1990s. Estes-Cox then sold the line and stock on hand to Cox International soon after the Millenium. The big majority of the parts Cox International received were made by earlier manufacturers, Estes-Cox’s stock on the shelf. Thus, Cox International was never responsible for quality issues with materials previously made elsewhere. 'Nuff said.
Flying Lines home page
Back to Scale Matters column main page
Back to Scale main page
This page was upated Feb. 18, 2019