![]()
Miscellaneous Stuff
Trainers and test stands

It doesn't get any easier than this: This is Gene's version of a trainer plane made from Coroplast, ready for the rough-and-tumble of beginner flights -- and they're also fun for just casual CL sport flying. All photos by Gene Pape.
By Gene Pape
December 2020
Shortly after I finished my last column, I posted pictures of what I believed was an engine out of a Cox car on one of the ½-A collector Facebook pages asking if anyone was interested in having this engine as is before I tore all the car specific bits off it to use it in an airplane.
A gentleman from Florida, Cal Leggett, responded and after a bit of correspondence he traded me two very nice airplane engines for my car engine. While I thought this was an extremely good deal for me, it got even better.
Cal was into 3D printing and asked if anyone had a Firebaby fuselage he could copy. One thing led to another and some engine mounts for making Cox-powered Coroplast models magically appeared in my mailbox. About that time modeling things got totally crazy for me and I must reluctantly admit I still haven’t sent him the Firebaby fuselage to copy.
I have, however, built Coroplast model using one of his mounts and some Coroplast I had left lying around from some yard signs. By the time you read this, these mounts should be available on eBay. You can find them by using this search. Cal is into Cox cars, so you will have to sort through various other things to find the mounts.
If you want to duplicate this model, the basic wing is 18” span, 8” root cord, 5” tip cord, 6” elevator span, and 1½” elevator cord. The whole thing was cut out in one piece using a straight edge and a utility knife. The model was built using the mount with the larger amount of offset of the two he sent me. The mount is made in two pieces -- one to attach to the model and one to attach the engine to. The two pieces are held together with rubber bands to absorb crash impact. Screws and rubber bands for assembly were supplied.
While it took me a bit over a week to build this model, actual working time was somewhere between one and two hours. The only gluing involved was attaching the leadout guide made from a paper clip to the inboard wing and a nickel to the bottom of the outboard tip. Hot melt glue took care of that. There is a hole in the middle of the mount to attach the bellcrank, which made this part a snap.

The tail is hinged by simply cutting the bottom layer of Corplast away between the wing and the tail.
I have not flown this model yet, but my experience with this type of model has shown that it will be a fun flyer and it was a cinch to build.
Since a lot of my normal activities have been put on hold lately, I’ve been killing way too much time on eBay. I must admit that I’ve bought way too many engines in the process, but I’ve also met some really nice people, learned a lot about modeling, and come across some very interesting ideas. This one is from Bob Mears.
He is selling some of his surplus F2D Combat models with engine mounts to accept your vintage Combat engine of choice. The way these models fly with modern F2D 15s is simply scary. If you put an old school .35 in the nose, the now further-forward center of gravity makes them easy to fly and you can set them up to go as fast or slow as you want.
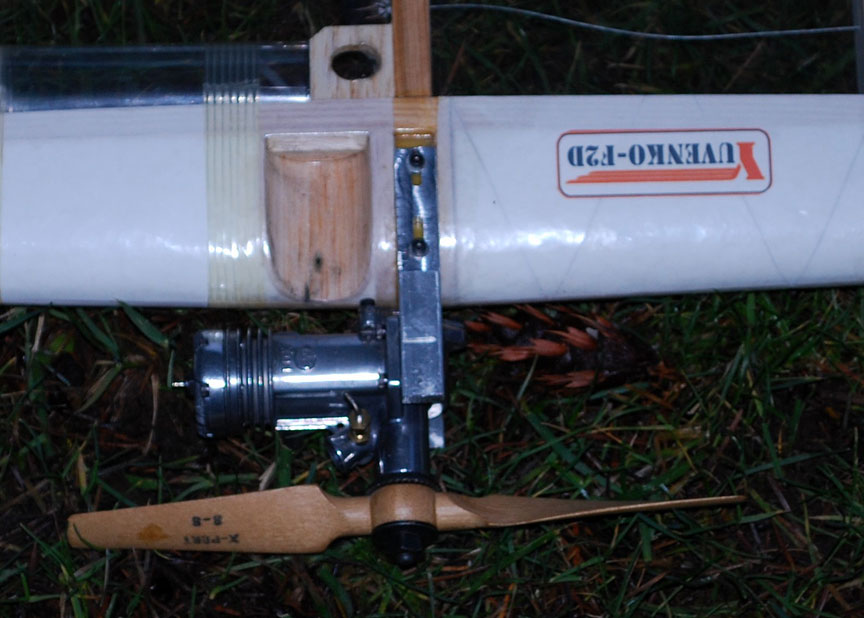
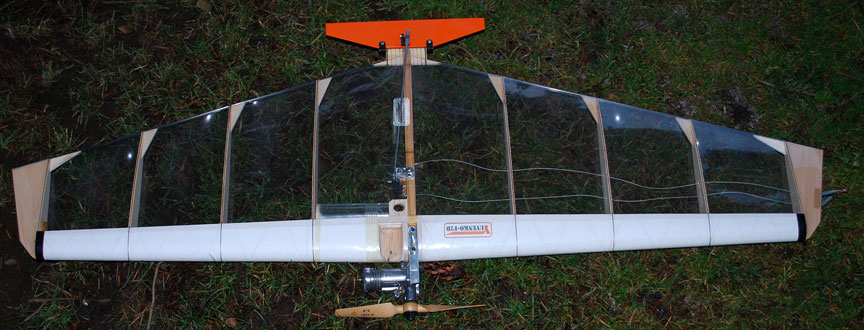
A Yuvenko F2D Combat plane transformed into a fun-flying plane with a Fox .29 engine.
The planes are available from Bob Mears via eBay.
While Bob is showing a Johnson Combat Special on the model he has on eBay, a Fox Stunt .35 or a McCoy .35 Redhead would make a wonderful model to sport fly with. At the speeds those engines would produce on 60-foot .015" lines, you could pound it into the ground all day and never hurt the model.
Visit Bob's store -- or you might be able to scrounge a model from one of your local Combat fliers for a reasonable price. You would then have to make the needed custom engine mount. I’ve shown pictures of a model I set up with an old Fox 29 Stunt engine. It appears to balance perfectly without any lead required anywhere.
A few years ago Mike Hazel brought his Keter portable workbench to a flying session and I immediately knew I had to have one. You’ve seen mine in this column before as the basis for my Combat model launcher. Now I’ve come up with yet another use for my Keter workbench. I will be using it to mount my engine test stands.

Three test stands mounted for easy on-off of the Keter workbench.
The workbench comes with clamps which allow easy mounting of a 2x6 with the engine mounts screwed to them. The mount on the left is the small size of the old E-Z-Just engine mounts. The center mount is the standard E-Z-Just engine mount. On the right is one of the Cox-specific mounts now available from Cox International.

The bench folds up for easy transport to the field.
Back to Miscellaneous Stuff main page
Back to Regular Columns
Back to Combat section
Flying Lines home page
This page was upated Dec. 15, 2020