![]()
Miscellaneous Stuff
Covering with exam table paper
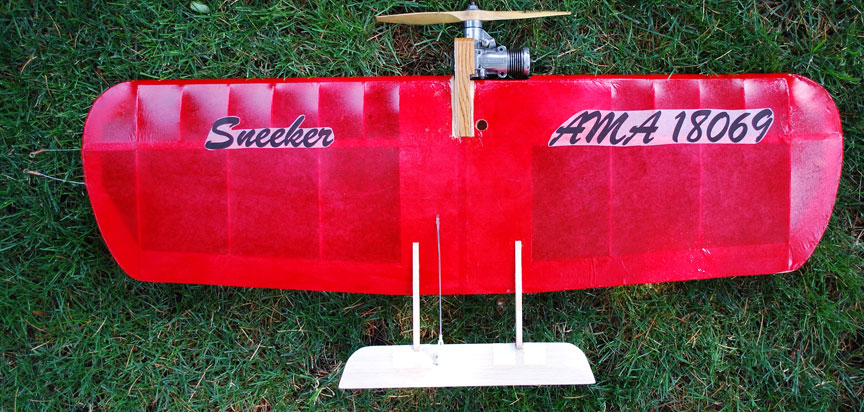
The Sneeker, covered in dyed doctor's office exam table paper, a material being used in construction of more and more CL planes. All photos by Gene Pape.
Climbing the learning curve!
By Gene Pape
September 2020
Have you ever tried something the first time and everything didn't go perfect? And then got frustrated and made things even worse? That's me and using exam table paper for covering a model.
I cut a sheet of material barely big enough to cover the model. Then in the process of stirring the material in the dye I started a tear which ended up tearing the whole thing apart lengthwise and ruining it. Since a big part of me really didn't want to mess with having to dope the model anyway, I dumped the dye down the drain and let the paper dry.
Unfortunately, the dyed paper turned out really nice and I was inspired to try again. The material itself seems just like I remember silkspan being.
I 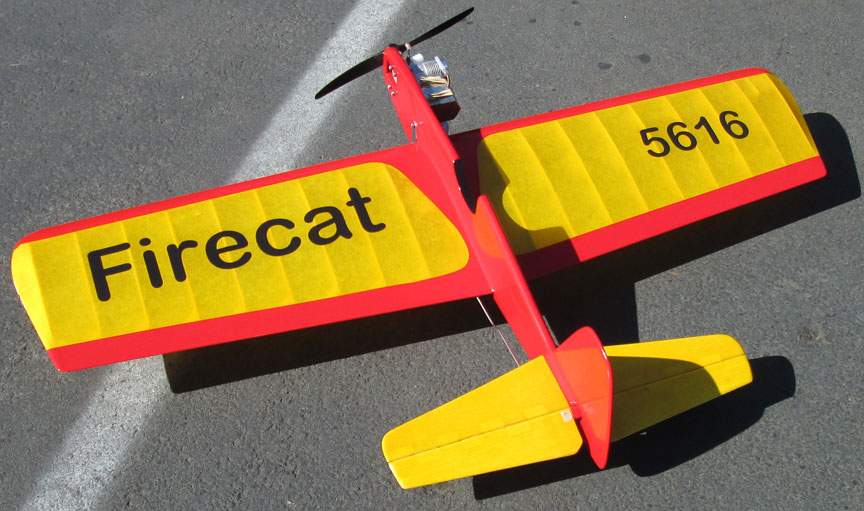 guess I should back up and begin from the beginning.
About two years ago a beautiful Firecat built by Dave Royer appeared on the Flying Lines home page (photo at right). I contacted Dave and in the course of our emails I learned that Crepe Exam Table Paper could be used for covering control-line models as a substitute for silkspan.
Since I already had more silkspan on hand that I will ever use in the rest of my life I did what any self-respecting model airplane enthusiast would do — I sent off $30.00 to Amazon for enough exam table paper to last me and everyone I know who builds models the rest of our lives. My plan was to dye the paper then use it to cover a Vintage combat model.
Did I mention that I hate to finish models with dope? When the time came that I wanted to build a Sneeker as a home for a Johnson Combat engine I decided now was the time to do this. As you read in the opening paragraph, things didn’t start out very well.
After I calmed down and ignored the project for a day, this is how I got started again. Since the paper I had done the previous day came out dark red as desired and a nice even color even though it was folded several times, I decided I would next try doing five sheets at once. I cut off five pieces of paper about 40 inches long. I got out our very large pot filled with water and set it up once more on the side burner of my barbecue grill.

The pot and tools on the barbecue grill.
I fired up the burner to high then stirred in a packet of Rit dye and a cup of salt.


Rit dye and a cup of salt.
I turned the heat down to medium then put in my five folded sheets of exam table paper and stirred thoroughly.


The raw exam table paper, ready to go into the dye (right).
After an hour of simmering with stirring every 10 minutes, I was certain all I had left to do was rinse the paper thoroughly and let it dry. Lacking any kind of patience, I rinsed the paper for about two minutes then even though the rinse water was still coming out very red I decided it was time to hang the whole mess up and let it dry until the next day.

The dyed paper hangs to dry.
When I took the dry sheets apart the next day, I discovered that the outer sheet was covered with black botches because I didn’t rinse things thoroughly enough. The other sheets got progressively lighter as I got to the sheets that were folded on the inside. No problem, I said, I’ll just rinse the outer sheet again and all will be well. Wrong again. That outer sheet disintegrated when I rinsed it.
Moving right along, I selected the sheet that was the next-darkest and set out to cover the model. The paper that had been 20-3/4 inches wide before I dyed it was now only 20 inches wide and I needed it to be at least 20-1/2" wide to be able to cover the wing. Because the wing is tapered, I was able to do some creative layout and got four pieces that would just barely cover the wing. I decided to cover the wing with the paper dry as previous attempts to handle it wet resulted in destroyed material. I did an OK, not great, job of covering the model then sprayed it with water hoping it would shrink. As expected, dyeing the paper used up all the shrink it had and the covering job still looked pretty terrible. Fortunately, tautening butyrate dope came to my rescue.
Now that it’s finished, the model is what I wanted. A proper early 1960s era combat model. It looks right, but it’s nowhere near perfect. I learned enough from this adventure that if I really wanted to, after finishing another model or two with this method I would be able to make some first-rate models. But, at least for me, one was enough. Using butyrate dope is something I can no longer tolerate. Add to that that this method is much more expensive and time consuming than using laminating film I see no reason to ever do it again.
For those of you who can still tolerate using butyrate dope, there truly is no way to match the appearance of a model finished in this manner.
Back to Miscellaneous Stuff main page
Back to Regular Columns
Back to Combat section
Flying Lines home page
This page was upated Sept. 15, 2020