![]()

The tiny reed valve .049 engine is a versatile power source for small airplanes, such as the many 1/2-A class sport planes shown off by Roseburg, Ore., area control-line modelers at the 2017 Northwest Control-Line Regionals. But the small size also makes the little reed valve engines cranky and troublesome. The author provides some suggestions for having great success flying reed-valve-powered airplanes. Flying Lines photo.
I have spent a lot of time in the past decade flying with Cox read valve engines (r.v.e.) and I thought it high time to share with the rest of the Control Line community what I have learned. I do this as I have heard from many that Cox r.v.e.’s are frustrating, to make run correctly, and so they have moved on. I have witnessed many a beginner get highly frustrated trying to get a good engine run from these little engines; and as the saying goes: Cox took more people out of the hobby than they brought in.
 The simple truth is that they require a very high degree of skill to operate correctly, and to achieve peak performance, on a consistent basis. The reason for this is because there is not one setup, or recipe, that works for every engine. The reason for this are: A) The engines are not all exactly alike, and a very small difference in a .6 c.i.d. motor many not have much effect, but on a .049 c.i.d. motor, it will have a much larger effect; percentage wise, so to speak. B) The user, has different requirements for the engine they are using. High load, low load, straight and level flying (like in racing) or all over the sky flying like in stunt or combat. C) The atmospheric conditions when the engine is being run, are variable from hour to hour, day to day, and month to month.
Before I begin I will need to digress to discuss some basics of internal combustion engine operation, so you can better diagnose the problems that may be limiting the fun you are having with your Cox r.v.e.
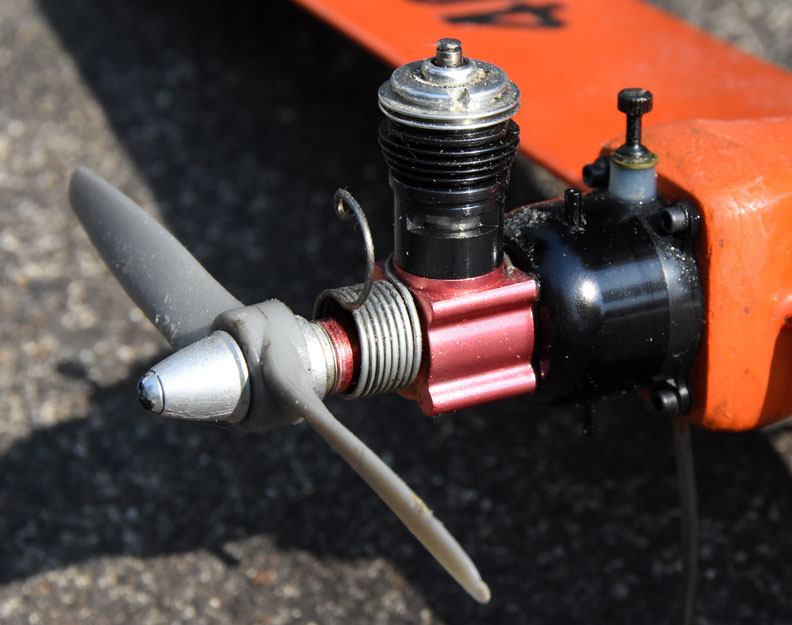
The Cox Black Widow is one of several reed-valve engines that can work well in many small airplanes such as the Flying Lines mascot Lil' Dawg at right, if the user figures out some of the "magic" involved in their care and feeding. Keeping everything spotlessly clean, as the author suggests, is one of the first steps. Looks like the Lil' Dawg's engine could use a bit of a bath! Flying Lines photo.
With any internal combustion engine, there needs to be heat flow. The fuel is burned, the gases inside the cylinder expand, the piston moves downward, and does some sort of work. The moving parts develop a great deal of friction, that creates heat, and the engine dissipates the heat, with cooling fins on the cylinder and head, and with the latent heat of methanol/nitromethane vapor formation inside the engine. To put it more simply, our glow engines are not air-cooled, they are air- and liquid-cooled — the liquid is the fuel introduced into the engine, to be burned in the cylinder. This heat flow needs to be in balance, the engine must heat up to its operating temperature, but it must dissipate the heat it generates to run correctly. Too much heat, and the engine, will slow (sag), and in severe cases be damaged to the point of being ruined. Too little heat, and the engine, will gradually slow and die, I call this: Going cold and winding down.
The modeler has three ways to control the heat flow of the engine, beyond, say, putting a cowling on, or wrapping the cylinder in something:
So, let’s look at several situations that I have experienced over the years, and I will give the cure.
Okay so far, I have assumed that the engine you have is in good working order, and there are no problems with the tank, needle or reed valve, all the screws are tight, and all the gaskets are sealing. One of the keys to getting a good run from a Cox reed valve engine is to make sure everything is nice and clean, before you bring it out the field. On more than one occasion, I have encountered people at the field with equipment they purchased on the Internet, that looks like it was run about 20 years ago, and set on a shelf in the garage, and forgotten about until it was sold. The new owner bolts the engine on the plane and then is frustrated to exhaustion because of a stuck reed valve, or a gummed-up fuel line. Cox engines do not clear away old congealed castor oil well, so you need to do it for them.
 The first thing you as a Cox reed valve engine owner, need to get used to is that before you run an engine, either new or used, is that you need to take it completely apart and assess the condition and cleanliness of the parts. I know this sounds like a lot of work, but when running right, a Cox reed valve engine is a lot of fun, so it is worth it. I mention that a new engine also needs to be taken apart, and assessed, but in reality, you the user can do one simple check without taking the engine apart — check the connecting rod for excess play. All you have to do is put the piston at top dead center and turn the crank while watching to see when the piston starts to move downward. Any more than 10-15 degrees of play and you will need to reset the connecting rod.
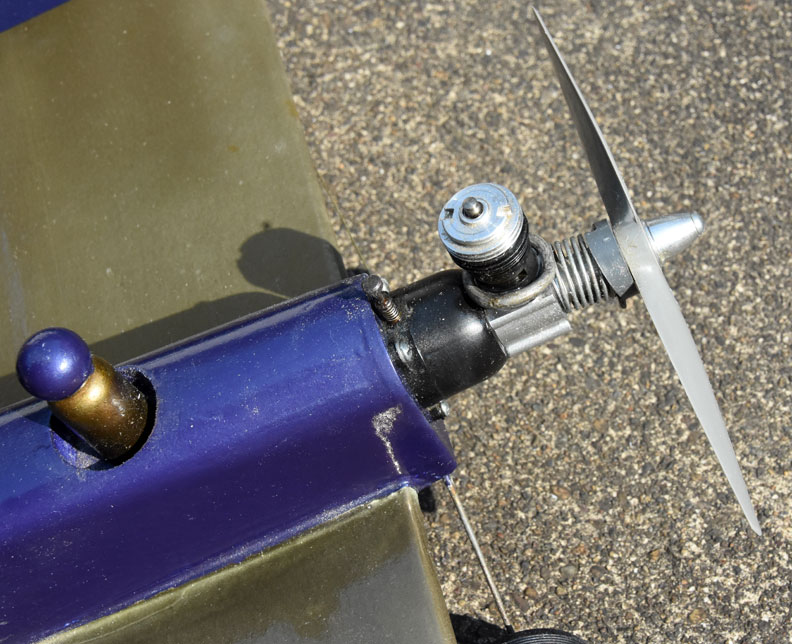
The Cox Venom .049 was a limited-production racing engine, shown mounted on a Streaker for Class I Mouse Race. It needs the same careful handling as any other .049. Flying Lines photo.
Allow me to digress at this point to give you a tip for resetting the rod. Common wisdom says to put the little anvil provided in the rod reset tool kit on a hard surface and pound the tool with a hammer. I do not like this method. I prefer to use a bench vise. Put the anvil, piston and reset tool in the vise and squeeze them. You get better control, and in time you can learn the amount of force to apply for rods of different amounts of play. It works like a charm.
Once you the owner have assessed the amount of play in the rod, you will need to take the engine apart and prep it for either break-in or in the case of a used engine, running on the plane. Remove the tank via the four 2-56 screws through the backplate or the intake body, remove the reed retainer clip, or plastic gasket/basket type retainer, check the position and type of fuel line connected to the back-plate of the tank, and remove the needle valve.
About 50% of the problems I have encountered have come from the tank, fuel line, and needle valve. They must be spotlessly clean, especially in the groove that mounts the tank to the backplate. Clean them in fresh white gas (Coleman fuel), then with ivory soap and hot water. Dry them with compressed air. Blow air through the fuel pickup and out the needle valve seat, make absolutely sure the screen over the intake is perfectly clean, and make sure there are no burrs around the holes the mounting screws pass through. When all this looks good, you need to make sure the fuel line is in the correct location. Looking at the backplate, with the needle valve at 12 o’clock, the fuel line needs to be at 9 o’clock. Not 8:30! This is extremely important, if you are planning on flying inverted, as the needle setting will change from upright to inverted if the pickup is not in the 9 o’clock position. Cox in all their infinite wisdom, removed the cast in fuel line retainers on the new plastic backplate, so now the fuel line is free to move around of its own accord. I have been frustrated by this more than once, and the solution is not an easy one. After a particularly frustrating session of flying where the engine died inverted about a dozen times (yes insanity is defined as doing the same thing over and over, expecting a different result), I came home and set about creating a solution to this problem. I came to the conclusion that if Cox did not put a retainer for the fuel line in, I would. I drilled a small hole (.019” in diameter) though the backplate, and pressed a pin made of .020” music wire, at 9 o’clock and ran the fuel line's free end over it. Problem solved.
Moving on to the engine proper. There are really three things that will frustrate your endeavors:
I have come up with a way to keep the crank busing from ever wearing out, but it may not be available to everyone as it requires a special lubricating compound not commonly available — Molybdenum-Di-Sulfide (MoS2, Also called molly-lube). I use this lubricant in camera repair, and it works well, where parts need to slide with little friction, and low loads. Because of the anodizing of the crankcase on a Cox engine, molly-lube sticks to the surface of the bushing/crankcase, and creates a chemical barrier between the crank and bushing. The steel of the crank never contacts the bearing surface, it contacts the molly-lube and therefore the crank has no way to wear away the busing. Hold on, isn’t this what oil is suppose to do, stop the parts from coming into physical contact? Yes, it is, but the oil we use is a liquid and can flow upon high loads or sudden impact. But, I digress again. I have tested this substance on engines on trainers that have hit the dirt hundreds of times, when the crank finally broke (just behind the drive washer), the molly-lube had formed a dark gray coating on the bushing, and there was no wear, to either the crank or busing/crankcase.
Okay Paul, this sounds like a winner for Mouse Race, right ... . Sorry, the control-line general rules section specifies that all the lubrication of an engine be in the fuel, and that the lubricant stay in solution. Molly-lube is dry, and will settle out of solution. So, not legal for contest flying, but for sport flying it will give you a crank bushing with almost unlimited life.
So, the engine is apart, the fuel line is in the right place, you have set the rod up, the cylinder is tight, the crank is molly-lubed, and you are ready to put the little guy back together. Well this is the part that will cause problems. Everything must be sealed up and not leak. I recommend that you get good new gaskets. I use Teflon, but I made them myself when I worked in laser cutting and they are not generally available, so get the paper gaskets from Cox and use them.


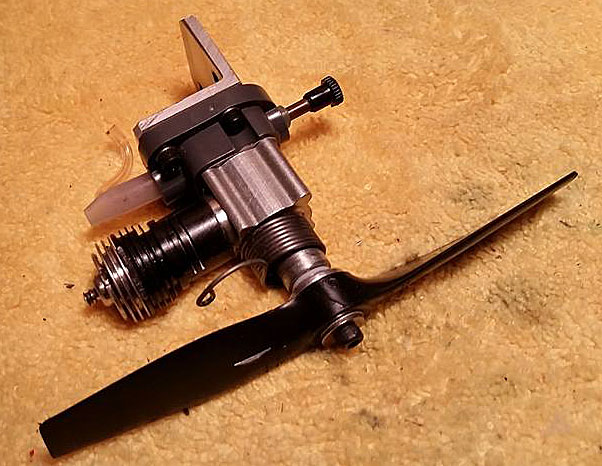
Mark's special backplate mount is shown on a Cox Venom reed valve engine. This engine also has a Klause Kustom Oilite crankcase, backplate and fine thread needle valve and a Galbreath Nelson plug adapter. Mark Hansen photos.
One thing that can cause problems is the back of the crankcase not being perfectly smooth. I lap it smooth with 600-grit sand paper. When it is nice and flat, you can assemble the back of the engine. Now there is a problem with the new plastic backplate.You cannot tighten the screws enough to actually seal the tank. They just don’t work. There is a reason the product motor comes with a throttle body, not a tank. I have been experimenting with ways to make the plastic backplate work, and I have found several solutions that work well. The best is to put a flat 1/16” piece of aluminum against the backplate and run longer 2-56 screws though the plate, and torque them good and tight. If you cut the plate a bit bigger than the mounting lugs then you can drill holes for the mounting screws and this will make for a very robust mount, indeed. When you use this reinforcing plate on the back of engine, you will need to seal the screws so I use 1/8 O.D. fuel tubing to inserted into the recesses in the backplate and cut them off flush with a razor.
So, now you have the backplate, tank installed with a good gasket at the front, around the venturi, and the screws torqued down nice and tight, and all is sealed up, your crank bushing is molly-lubed, but the head is still off, and you don’t have a prop on yet. You need to select the prop you are going to use, and the fuel for the proper you have selected and what head you are using.
When I lived in Portland I did a great deal of lying at Delta Park, which is 12 feet above sea level. So, the air there is thick and heavy. I like a 5-3 black Cox nylon prop, the one with the lugs for the zero-friction spring starter. Jeff Rein calls this prop, the Cox “Rubber Ducky”, because it is so flexible and hard to break. In truth, I cut the Rubber Ducky down just a bit to 4.75-3, by taking 1/8” off each tip and balancing it. The ¼ inch seems trivial but in fact in the heavy air at near sea level, it lets the engine rev up better and run more consistently. Also at the sea level of Delta Park, I like to use two or three head gaskets on the low compression head, with not more than 15% nitro, on days where the temperature is above 45 degrees F. When it is colder, I might go to 20%, or take out a head shim. The key to this setup is to experiment at your flying site until you get a consistent engine run, at peak power.
There is not one solution to the problems described earlier in this article. You the engine operator have to use multiple working hypotheses to resolve whatever problem the engine is presenting to you. Just keep in mind that you should only change one thing at a time. Changing many at the same time, may fix the problem, but you never will know what actually cured it.
Finally, in closing, I don’t read Internet forums much, and I rarely rely on them for recommendations of how I should run my engines. You the user need to determine how to run the engine for the application that you are using it. A person in Denver may get awesome engine runs with a 6x4 on a free flight plane, and running one head shim and 35% nitro. This setup will not work in Portland, Orego,n at Delta Park. Swallow your pride, ask the local guys what they are using, and observe if their engines are running consistently at peak power. If so, follow suit. If not dismiss their advice and come up with your own.
I hope the reader has found this advice useful, and will spend more time building and flying 1/2A planes, powered by Cox engines.
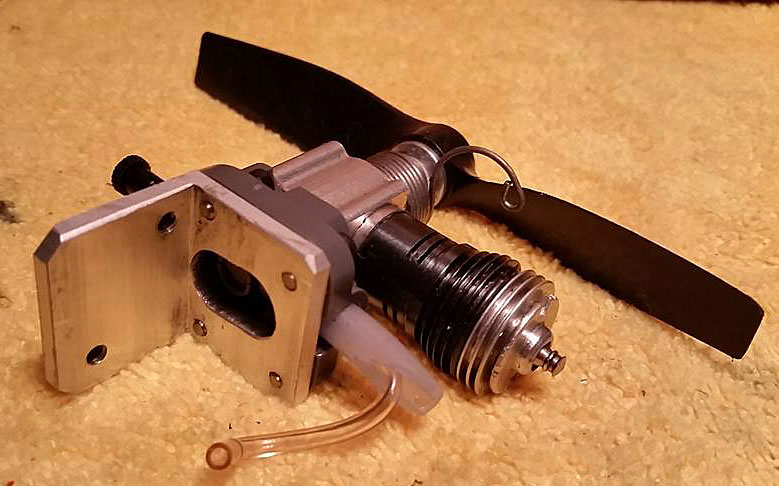
Another special backplate mount, this one on a Cox reed valve engine that uses an external tank. Mark says the engine has about 10 hours of running on it. Mark Hansen photos.
This page was upated Aug. 30, 2017