![]()
A View from Broadway
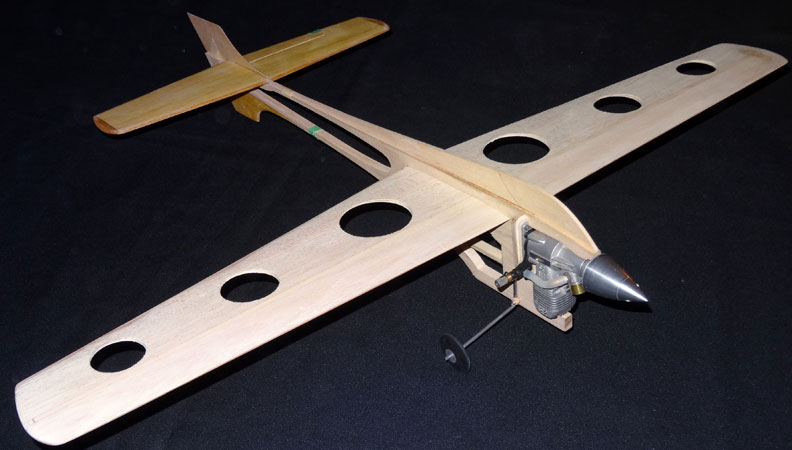
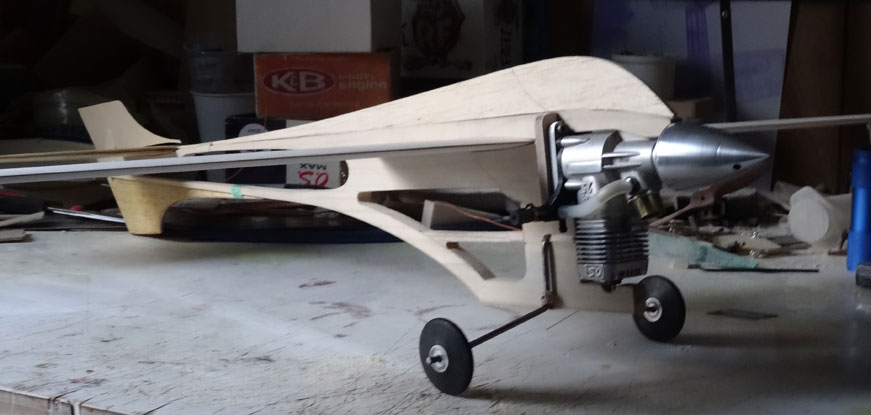
Marty Higgs' Northwest B Proto Speed model ready for finishing. More photos below. Ken Burdick photo.
The Speedy Geezer
By Ken Burdick
Yes folks, it's true.
The G-speed project has been fun as a primer and the Pro Kit Blondie showed herself off nicely at the Jim Walker Memorial Spring Tune-Up in Portland. The first run was exciting to say the least. For those of you who missed the debacle, I'll do my best to describe it.
A test run in the pits showed Batman and myself two very important things.
- The clear finish by Rustoleum, was NOT fuelproof!
- The engine has more torque than I imagined, but was ignored.
Not much to do about the first one so we will take the Rustoleum clear off of our material list and use polyurethane. The second was pretty cool.
Scene: Kennyb at the monoline handle (not leading the model). Batman fiddling and tuning the engine. Batman looks to Kennyb who nods ... Batman puts model down and releases it.
The model instantly lifts its outboard wing and turns left. Kennyb watches as the G-speester approaches and notices it's got some possibilities.
"I was horrified to see the thing turn left and come visit me, fortunately it didn't wind up in the lines but rumbled on past me on the correct side of the circle. Nice ground handling I thought. When it reached the end of the line, I acted like a shock absorber and cranked in full up. The Geezer speed ship took off nice as you please and flew out the tank. I landed as instructed by Partner and flared it out at the last second -- smooth landing”
Well, that was exciting. I added some lead and on subsequent launches made sure I was whipping it into the air.
What happened next Kenny?
Batman (Bruce Tunberg) and I decided on a different prop, this one was a 7x8 with an official flight that may have been timed wrong with too many laps at a mild 92 mph or so, but we had one more attempt. Batman tuned a very nice run on our last flight. The engine sounded strong out of the hole and by the end of the first lap was on note. Our little project ran 98 mph. Not bad!!!! Partner put up a flight on a Blondie that was a profile as well but could not catch us. He then blew the doors off by using his fully cowled model at 104 mph. I don't think we had much more speed than the 98-100 range and we were out of attempts. Batman asked me what I was going to do about competing with a fully cowled model. I said I had an idea and will share it with you now lil Geezers.
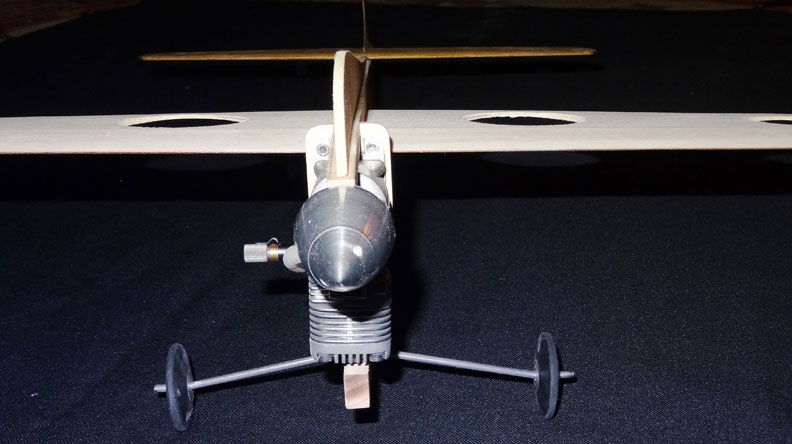
The Paper-cup-cowling
There is just no way to keep a Bod Buster down. We are going to make a cowling for the profile Blondie model.
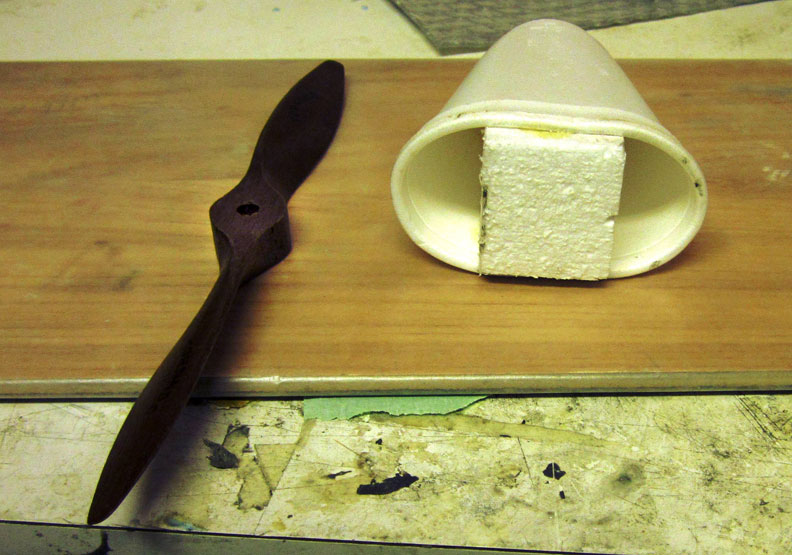
At the contest, I had been drinking a cup of coffee out of a Styrofoam cup when I realized that if I squeezed it, it looked like a cheek cowl -- bwahahahahahahah!!!!!
The larger of the two cups has a round base of 1-3/4” and the smaller one has just over 1-1/2", which is our spinner size. This styro cup is going to be our mold for a cowl. For the Blondie, the smaller cup worked out well.
YOU CAN'T DO THAT!!!!
Oh yes I can -- let's begin, OK?
Make the Styrofoam cup the right shape. To do this I glued a chunk of foam to the inside of the cup to make it oblong. Gorilla glue was used as in all Bod Buster combat wings. The cup was taped but didn't work as well as squeezing it in a vice, so that's what I did.
Next the working surface had to be slippified and to do this I used wax paper taped to a plank of flooring material.
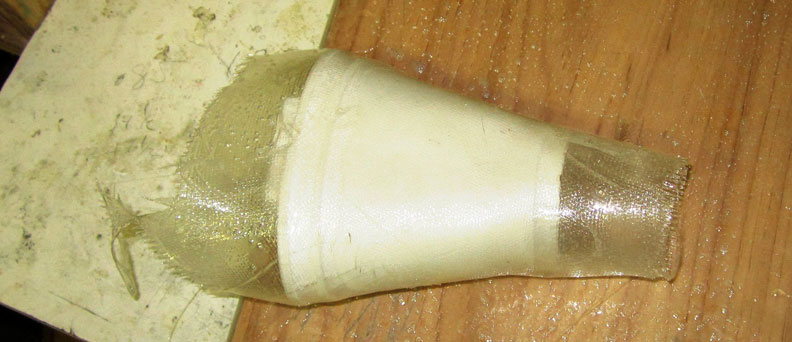
Using some paper as a template, I made the right size piece of glass cloth to wrap around our mold. I have some 20 min epoxy and that was great for this project. It was squeezed into the cloth by using a smooth prop and spreading the goo over the piece ontop of the board covered by the wax paper. I worked it completely on the flat so any excess could be squeezed out leaving us with just the right amount of goo in the weave. Oh -- I used rubber nitrate gloves to -- ya know, keep me from wrecking the house.
Using the prop/squeegee, I lifted a corner of our impregnated cloth, flopped it over onto the mold and wrapped it around with excess material on both front and back of the mold. It's drying now so shhhhh don't wake it up.
Well it woke up and sort of -- it changed from my pristine vision of what it should look like. Sure, there was a lump -- I sanded it off right through the matt. Okay now it has another wrap on top of the original so it's drying again…..shhhhhh.
After getting both front hooves into the fabrication of this cowling, it might be easier and cleaner to just carve one out of balsa. I, however, am not ready to give up so stubborn mule that I am I shall continue on with it. It sure looked better when I just squeezed the cup and envisioned the cowling!
Beyond Blondie
Let me start by saying what a pleasure it was to build this great kit. It flew as advertised and was darn light. One of the best features is that the designer has included everything you need except wheels and engine.
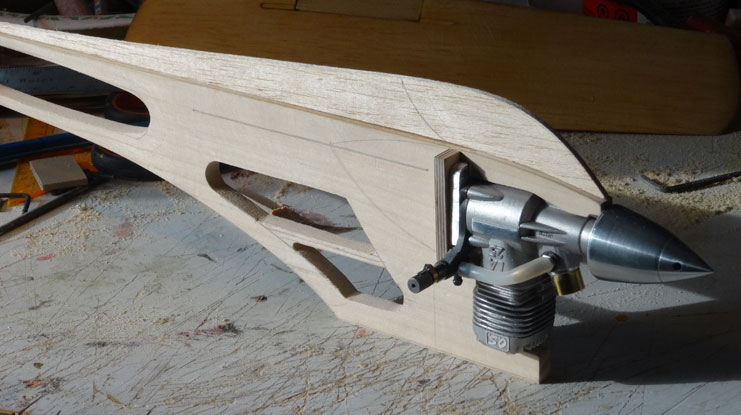
Now for the more serious Geezers, I will share with you some of the cutting edge ideas from none other than our favorite radical, the Hippie (Marty Higgs). Yes, he's gone round the bend as they say and is building what Partner described as “Impossible.” Believe me dear Geezers, it's not. To the Hippie and to all Bod Busters, there is nothing impossible, just stuff we haven't gotten round to yet. These are ideas to inspire you and help you get some fun out of your own thoughts and ideas for this Geezerly event. This will be the next generation of G-Speed ships so start your sketches now and plan your building time. I will share all my ideas with you both good and bad as my own ship becomes real. Meanwhile enjoy what the Hippie has envisioned and is building (photos below).

Ten reasons Speed is Better than Stunt
I received this in my email from Vancouver B.C. Having said that, it could be from a number of people so we'll “round up the usual suspects” as they say at Rice Mill road.
- Speed planes use less paint. The world is better with less paint.
- With a speed ship, you don't have to worry if the engine quits when your inverted. If you're inverted, there are bigger things to worry about.
- Speed ships use one line. That makes us "green," wouldn't you say?
- With speed ships, you don't have to sit around and listen to people going "Oooowe" over the finish, cause they always have an "Ooowe" finish.
- You can fit more speed ships into a car.
- With speed ships, you don't have to worry about someone poking fingers through the silk.
- With speed ships, at the end of the day, it takes less time to clean them off. And they take less paper towels to do so. "Green Planet."
- With speed ships, you use less fuel. "Green."
- With speed ships, flights are only seconds long. Not 8 minutes. More time to BS between flights.
- And best of all, speed flyers fly longer. Who's flying competitive stunt into their eighties like Carl Dodge is in speed?
Wing numbers
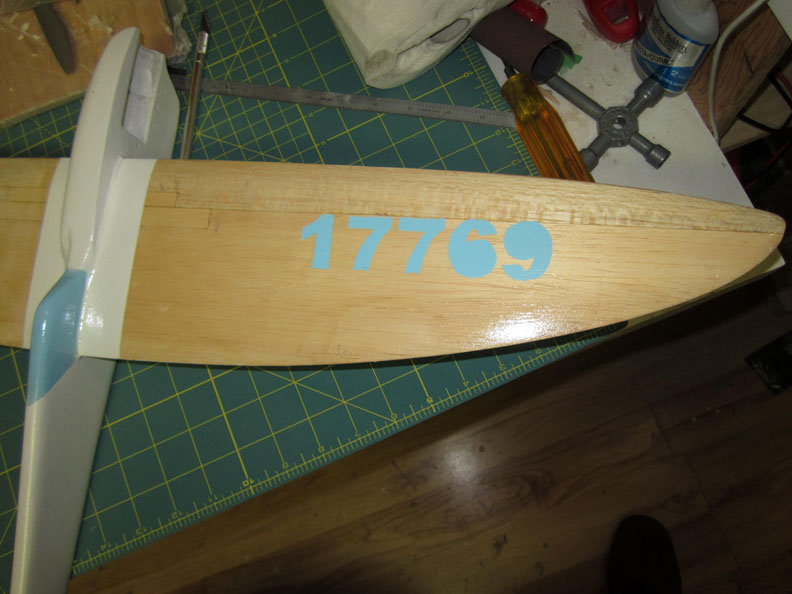
When he's right, he's right. Partner sent me a note in the mail -- took the time to actually mail a letter and suggestions of how to get my AMA numbers on my G-Speedster. Partner is of the mind that something should be done and done right. He as many of us have a healthy respect for lawyers and how insurance will or will not work in the case of an accident. His note said that the underwriters require the MAC or AMA license numbers on the aircraft, specifically on the upper right hand wing panel. Without this, you may not be covered.
While at the warm up at Portland, I noticed that most did NOT have numbers on wings. My reason is poor and I waited too long and discovered that my decal paper was too old and would not stick! Boo-Hoo, poor me. I think the primary reason is lack of an easy and Geezer friendly method of making theses numbers. Here is a Geezer friendly step by step way to paint yer model's rump with the numbers.
- Buy adhesive shelf paper.
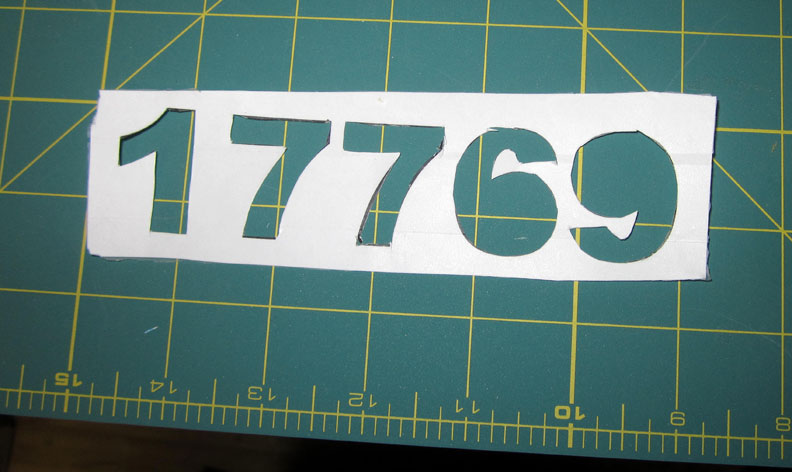
- Open a Word document and print your AMA number. Highlite the number and then type in a new font size of 125. This will not be on your list of font size so be sure you type this in over the 11 or 12 point the doc shows. (Highlite the font size then enter 125) This will give you a slightly larger than 1” numbers. Use caps and bold of your favorite font.
- Cut out the rectangular block of numbers on the paper, and using 3M spray adhesive or scotch tape, attach the block of numbers to the back side of the shelf paper. If you put it on the top side of the paper….it will read backwards. You can correct this with a “mirror image” but hey…this is Geezer friendly, right, so just do it this way.
- Cut out the numbers then peel back the liner. This should give you a stencil that will stick to your g-speedster wing. Smooth out any bubbles and what-not. Mask as needed and spray using your favorite stuff. Peel off the stencil and there ya go Geezers, your AMA or MAAC numbers.
-- kennyb
Back to Bod Busters main page
Flying Lines home page
This page was upated May 13, 2015