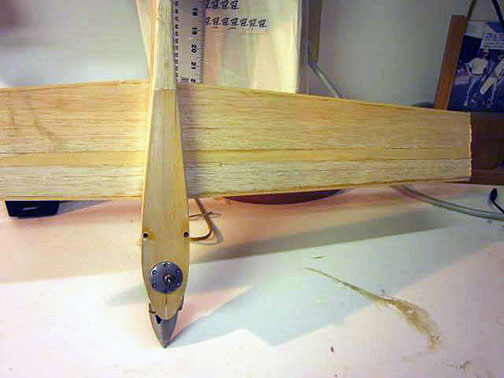
A speed plane ready for finishing. Ken's article details how to carve the wing. All photos by Ken Burdick.
Carving a speed wing
By Ken Burdick
Yes folks, it's true.It's bad enough that most model builders are old now. What's worse is they don't pass along what they know. Maybe it's because the only people building models nowadays are in Asia someplace in a factory.
Who Cares?
Awhile back I was attending the Salem speed and racing contest, when a young man asked a simple question. "How do you carve a speed wing?"
I believed that I was too busy at the time to answer the question in any way that made sense. Instead, I sent him to a master modeler Chris Sackett, aka Partner, of Partner products for an answer. I am sure that Partner answered in a complete way, but so much can be stored in one's head over the years, that it may come out as overwhelming. I'll try to answer the question now with pictures and a better explanation than "Go ask him."
First Things First.
Letis do a little background; it will explain some of the reasons for what are in the pictures.
Lay out the wing: We will detail a balsa composite with hardwood built into it.
Figure out what it is you want, and draw it full scale.
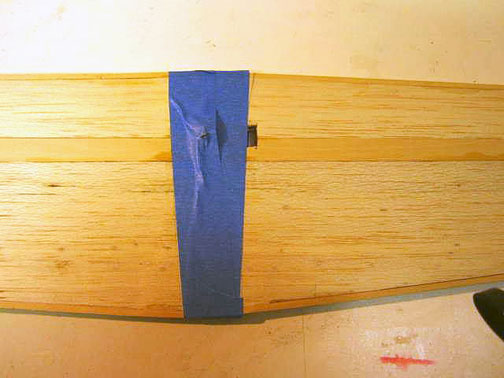
Whatever controls you use, monoline or two-line, be sure to put this on your drawing along with where the lines will be inside of the wing. Draw in a piece of hardwood to mount the bellcrank, or hardwood to mount the monoline unit.
You might not realize it, but where the line(s) exit the wing means a lot. You can determine where they should be by going to www.nclra.org and looking at helpful programs/line rake calculator.
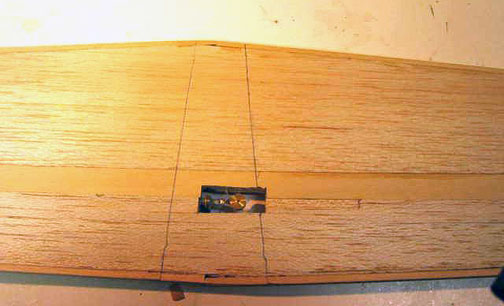
A nice looking wing will have the control lines inside of it, unless it is specified external controls. It's just a matter of pride more than anything else really, 15" of line on the outside of the wing won't hurt a thing. If you put them inside, make sure you can easily get the line(s) through the wing and onto the bellcrank. Button bellcranks are a must for this. Contact the North American Speed Society for suppliers of button bellcranks.
The solid wire lines terminated in a loops per AMA to connect to a button bellcrank, may be difficult for some. You CAN put the line through the slot(s)in the wing, then form the loop (s) ant then attach to the bellcrank. This means the lines will stay on the airplane because the loop cannot be pulled through the wing.
I'M BORED, ARE WE THERE YET????
Sorry dude, we're just getting warmed up. Unnecessary to performance, but important to include, are 1/8" bass or spruce strips on all leading edges, trailing edges and wingtips. Without adding much weight, it will keep all your hard work in shaping compared to fragile balsa that is sanded to a point.
Ok.We have a layout that includes bellcrank mount, leading edge, trailing edge and wingtip strips, location of the bellcrank and exit point for the lines inside the wing, and where to make line slots inside the wing.
(Phew -- Why don't I just buy a park flyer?)
Cut out all pieces; carefully make the slots in the wing thickness for the line(s) to go through.
To assemble a balsa wing, I like to use CA and hold the pieces in place, letting the thin CA to wick into the joints. A few applications like this will produce a nice looking and strong wing. Once all pieces are in place, I block sand the top and bottom of the uncarved wing to even things up .I use a power sander, but a block of wood with sandpaper glued to it will work fine.
YEAH, BUT HOW DO I CARVE A WING???????
Hang on, we're just about there.
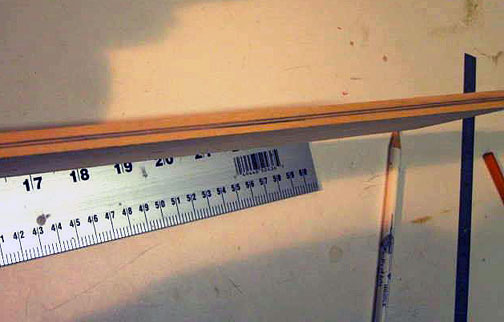
Measure the thickness of your now assembled wing. Using a pencil, not a pen and especially not a sharpie, draw a line that is a centerline of the thickness. Make the line all along the leading edge, wingtips and trailing edge. If you use ink, your finish material will make the lines run into the wood and won't go away. The line you just drew is what you will be carving to. One airfoil will work close to any other at our subsonic speeds, it is generally accepted that a symmetrical airfoil is what we want to carve. On the top and bottom of the wing, use a pencil to draw a line showing the highest point on the airfoil. If the wing chord tapers, then the line will not be straight, but will angle towards the leading edge if the L.E. is straight and the T.E. tapers use this line when you are shaping the airfoil.
Tools
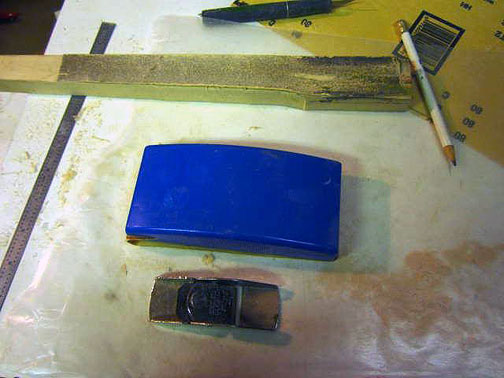
Make some tools that you will need. Get a straight 3/4" piece of fir about 15" x 3". Neck it down so you can grip it without your hand getting tired. Using spray adhesive, attach some coarse 80 grit sandpaper to it. Make another with medium sandpaper, and yet another with fine. These will be your shaping tools. I like to use these as well as a plastic sanding block from the hardware store.
A small plane is also a good tool, but don't get lulled into using it too much as it can take too much off where you didn't intend it to. I have found it best to use the sanding blocks to get the right shape. Use the plane to take just the initial wood off and create a very rough shape.
Let's get this straight
Alignment of the centerline of the airfoil to the centerline of thrust can be tricky, here is one way to keep things aligned so your wing is not pointed up or down.Where the wing mates to a crutch, or in the case of a profile, a slot in the fuselage, do not carve this part of the wing. Leave it full thickness on top and bottom. This will align the airfoil centerline with the thrust line of the engine and prevent the airfoil being nose up or down.
CARVING
(YAY!)
Let's carve this sucker! Using the plane, remove a small amount of wood along the L.E. and T.E. at the most half of the material you ultimately want to remove, and hopefully in the rough shape of the airfoil.
Wear a mask and use your sanding tools to get the shape of airfoil that you want. Be careful to NOT get too close to the reference lines as they the final point and that should be done with fine sandpaper. If you're not careful at this step, you will find your wing changing shape in ways you don't want. Take your time and walk away from it when you get tired or frustrated. Work slowly down to the marked lines. To actually see the profile of the airfoil, you can put a straight edge such as a ruler, across the chord of the wing, and sight down the span.
It bears repeating, take your time so you don't wind up with a funny looking thing thatÕs flat on one panel and airfoil shape on the other. Leave the final trailing edge thickness for the very last. You can put the T.E. on a flat surface and using fine sand paper and a block, bring it to the point you want.
Now you too are armed with enough information to begin making a carved speed wing. The best advice is stay away from short cuts like a belt sander and you'll get a quality product.
-- Kenny-b
This page was upated Jan. 14, 2014
Flying Lines home page
Back to Speed page