![]()
A View from Broadway
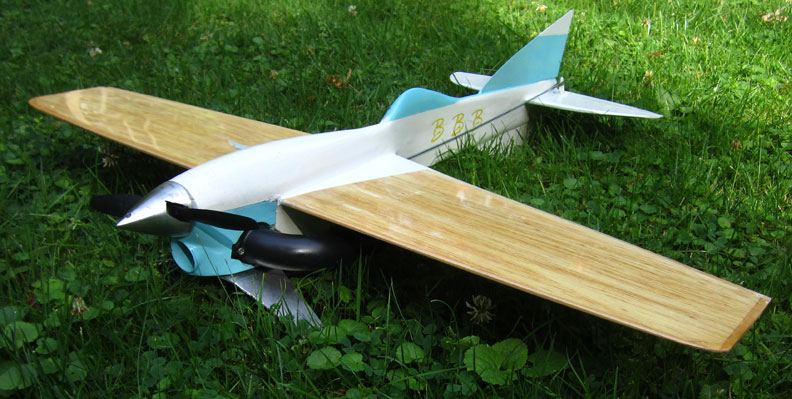
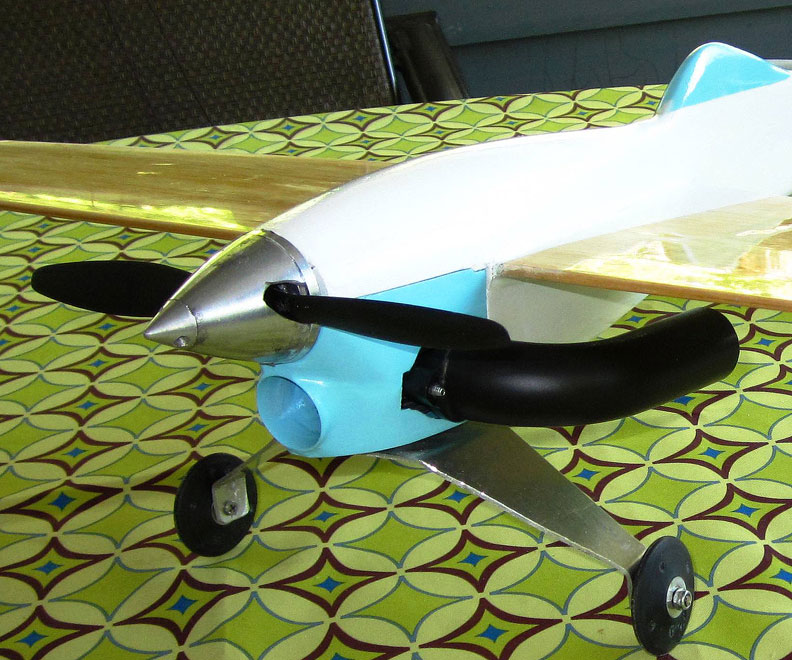
Ken Burdick's new Northwest B Proto plane, the Lagwagon. All photos by Ken Burdick.
Beyond Blondie
By Ken Burdick
Yes folks, it's true.
There is a part of me that has always loved proto speed. I remember being a little kid watching the speed guys with their Dooling .29's and cool looking airplanes …the smell of exotic fuels they said smelled like shoe polish, and everything so perfect looking. Fast, they were so fast you could hardly see them when they flew! Now that was something. The Navy hosted a AAA contest at Sand Point Naval Airbase in Seattle and I would go just to watch what the pros did. Don (McKay) and I watched Dr. Ralph Brooks land a beautiful RC carrier plane on a Carrier ship in Lake Washington, saw the pylon racers that were delta wing without fuselage, and the prestigious RC pattern fliers. We just knew that someday maybe we'd know what they knew.
That was the 1960s and I guess I was most smitten by the proto speed planes than anything else because here I am honking on about Northwest. B Proto Speed.
OK! Back to the Future
So today lil' Geezers, we're going to look beyond The Blondie as has the inventor of that cute proto ship, and make one that hopefully is faster. Lighter and stronger? Not sure about stronger because of a little known strength test, I gave Blondie at the 2015 Regionals.
I am going to write this article as the airplane progresses so you get benefit of my ups and downs, success and failures. To me anyway, it's just more fun to include you in all the jive that goes on.
Control issues
Strength test
At the Portland warmup, Partner (Chris Sackett) was helping me set the controls on the Blondie for its maiden flight. He knew my ship was a little nose heavy so he advised me to use all up and almost no down. “Whaddya gonna do with down Kenny?” so I did, and it flew very well when I was ahead of it. By the way, I removed the 1/2 ounce of wingtip weight I had taped to the wing and just led her out of the release -- no left turns, so I introduced a new set of issues. What I did was reduce the up and to what looked reasonable. Big-o mistake-o!
That thang, as they say, wouldn't take off, but instead of flying, ran several laps hopping up and down. This was OK on the uptake, but once it came back down would remove about 1/4 inch of prop! After what seemed like an eternity of this crap, the now screaming LA .25 ran out of thrust so Mike (Hazel) could catch it and shut her down. The controls were quickly returned to where Partner said to put them and once again flew fine. I do not recommend this as a break-in technique but hey -- it went faster after that!
Let's build, Kenny!
OK!
The rules allow us to use a cowling, so let's make it easy on ourselves by putting the engine in the inverted position. What I want out of this project is a very streamlined, light but strong Geezer Speed ship. If you look closely at Partner's record holding Blondie 2, you will see that he has had similar thoughts. The Hippie (Marty Higgs) has gone over the fence in left field and cut the lugs off his engine, mounting it radially to get his in the inverted vertical mode. Way cool -- like something Henry Nelson would do. Maybe it's the water in British Columbia. But we'll try for somewhere between Partner and the wild man of Vancouver. I want a clean, cowled profile with inverted engine. Let's honor the roots of Proto Speed and mount the landing gear on the engine head, OK?
Wait, weight -- don't tell me!
I think a weight of 16 ounces would be a good goal for this thing.. The engine weighs 7, mini pipe slightly under 1 oz., so that leaves us 8 ounces for all the rest. We'd better get busy!
Finding a wing
F2C is team race and its builders are the most advanced when it comes to building carved models such as speed planes. Honestly, I do not have the equipment, or knowledge to produce the ultra-light balsa wings that some still use. Nowadays, serious wings are molded from carbon fibre, but there are, however, still some balsa wings out there for sale. I bought one from eBay a few years ago and made a very light F2D proto from it, let's do the same thing for G speed shall we?
Finding Fred
In a previous life, I used to source and qualify suppliers for manufacturing systems. One thing that served me was this thought, “it's out there someplace, I just don't know where.” It was the same for the ultralight's wing. I first tried eBay and found nothing. Next I contacted Steve Wilk of Eliminator props because he flies F2C. He thought there might be a couple selling balsa wings but had no contacts. The same for Bill Lee, who seems to know about everyone in the world, but no luck.
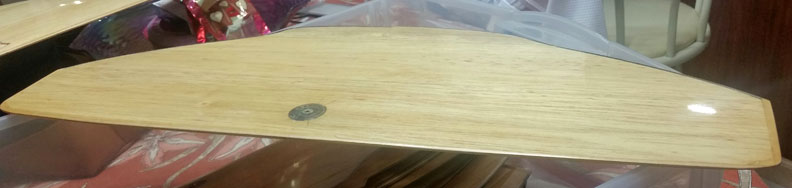
No luck with Charlie Johnson either, but I think it was Bob Whitney who finally remembered a flyer in Florida who might be selling a few wings. “Ah-ha!” The hunt was on and his first name was Fred, no last name was given. Steve Wilk produced the email for a Fred in FLA who turned out to be Francisco Fernandez, and who was involved with F2C. After sending some emails, I received a message from Fred that he did indeed have some wings for sale, but some may be warped. After pictures were sent, a price was agreed on and the wing shipped to me. It had a bellcrank installed but for our Geezer speed, I wanted monoline, so it was removed. For those of you using two strings, this would be an optimum choice. Remember, F2Cs fly around 120 mph and get more abuse than a 30-second speed flight, so the hardware they use needs to be well made.
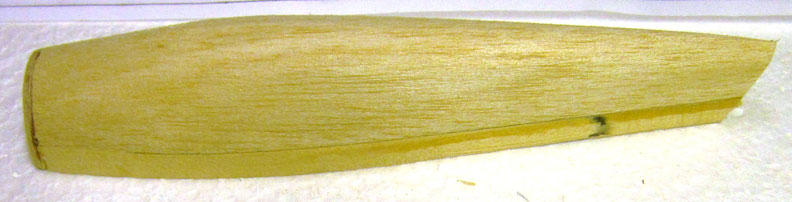
The wing arrived well packaged and without damage. It was very well made but as Fred said, you could see a slight deformation in the paper thin carbon lined trailing edge which might cause some concern in flight. The wing was finished in epoxy and light glass cloth, obviously applied in a vacuum bag, it was near perfect. I weighed it at 104 grams or 3.67 ounces, which is heavy by current F2C standards, but nice and light for what I have in mind. Since current F2C ships are flying wings, the beautifully crafted assembly also contained the elevator, hinges and a control horn all hooked up, BONUS! I could have made my ultralight look like an F2C ship, but wanted a more conventional proto appearance to my project --- soooooo.
CHOP SHOP!
Oh no!
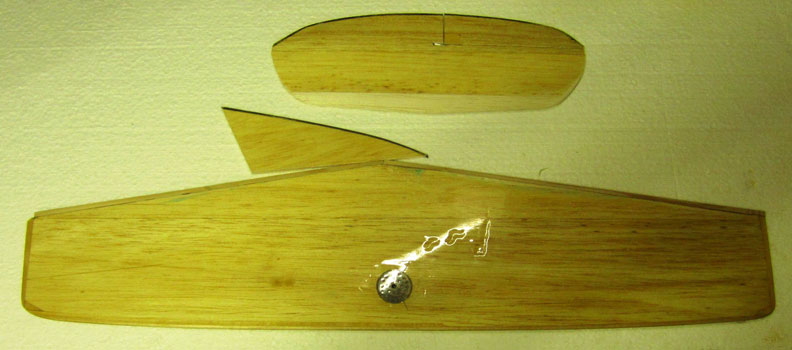
I suffered terribly from guilt after cutting into this beautiful piece of work, but when I was done I had wing, stabilizer, elevator, rudder and skid fin! It all weighs the original 104 grams, too. I did add a trailing edge to the wing and a leading edge to the stabilizer.
(Installing a monoline unit)
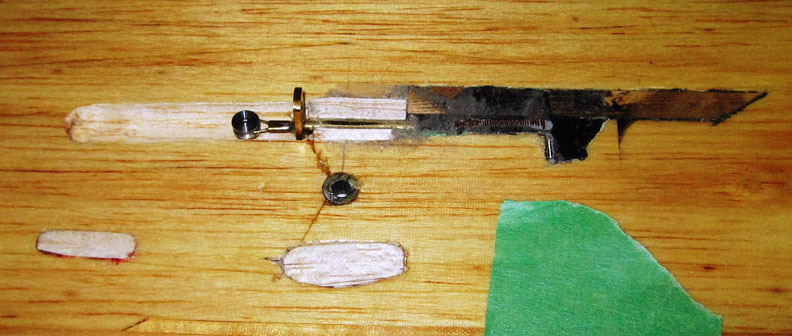
Next I will install one nifty Fast Hippy G-Speed torque unit he made for this project, and he'll make one for you too lil' Geezers.
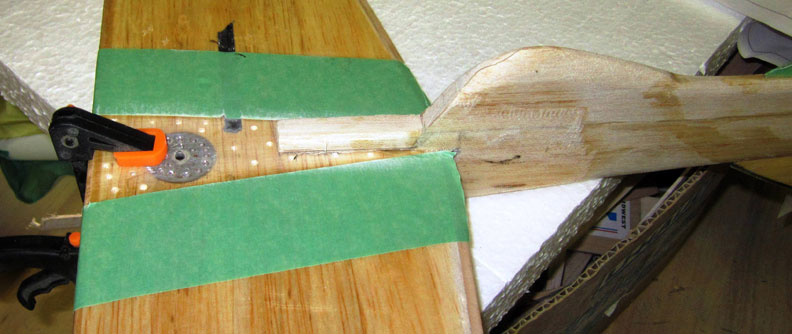
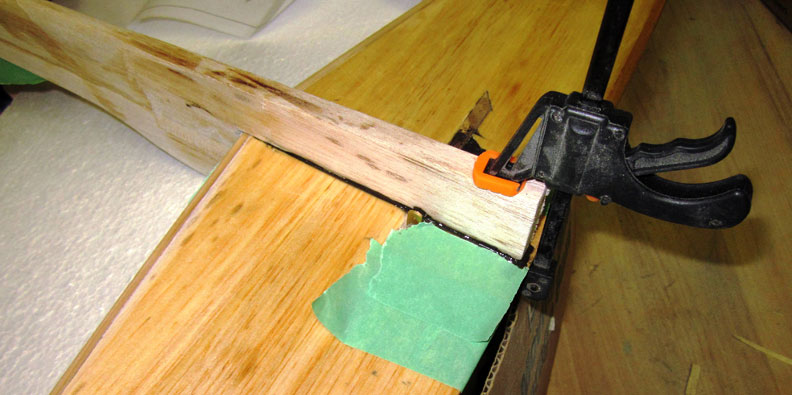
To do this, I need to insert a basswood spar into the wing as an anchor for the t-unit. The t-unit will be epoxied into the anchor but I will create a space that will be filled with balsa closer to the moving sleeve of the t-unit. I do this to be sure no epoxy goo gets into it. Do not use CA anywhere near these things. A slot is added that will line up with the internal channel for the rear most control wire in the wing. I have put a balsa plug into the front line connection point as well as the bellcrank pivot hole. Although the slot in the wingtip is too small for a looped and soldered .024 wire to fit through, it is large enough for a single wire so we will loop and solder out line after we thread it through the wing leaving it permanently attached in the wing.
Design stuff
I know that I want an inverted engine to make the cowling and landing gear easier, I like a high wing so there is room for a tank below it, but in this case a metal tank might be used and seamlessly put in the pan. I really like the idea of putting the wing on a flat surface along with the thrust line of the engine. I suppose this means that the top of my fuselage needs to be flat with the mount and wing all set to 0.00 incidences and then we'll put the curvy stuff on da top of our flat surface. Our good friend Jerry Bangs wrote what he called “Bangs Law” before being killed racing an unlimited hydroplane.
Bangs' Law #1: Anything that starts f'd up, stays f'd up.
It has taken me 35 years to really appreciate that statement but now I do so let's not f this up. The wing will sit on a flat surface as will the engine mount and stabilizer.
Pan and fuselage
This part is pretty cool. We are using some rigid F2D engine mounts that weigh roughly .2 ounces each. There is a 4-40 bolt, nut and epoxy not to mention a 3/8” piece of basswood and chunk of light balsa wood with a shim of plywood at the nose for the spinner shape. All this will be fabricated into a speed pan that would otherwise weigh around 2or 3 ounces if it were Harter's or a DARP magnesium pan. I think we can do better and still get a rigid strong platform for the project. I am, however, not convinced that this kind of construction is any lighter or better than a conventional profile fuselage. It will allow me to mount the landing gear to the head and look cool, though.
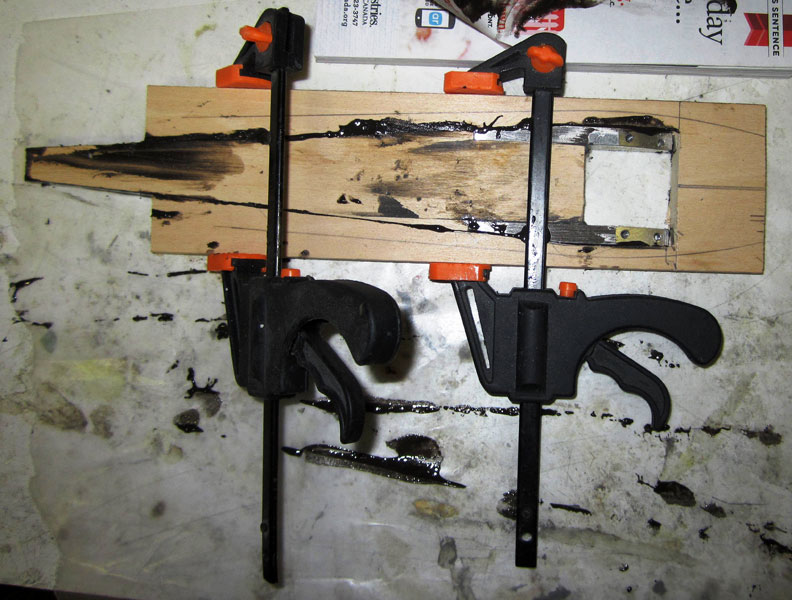
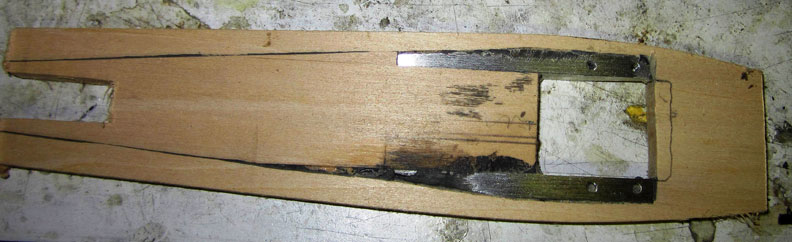
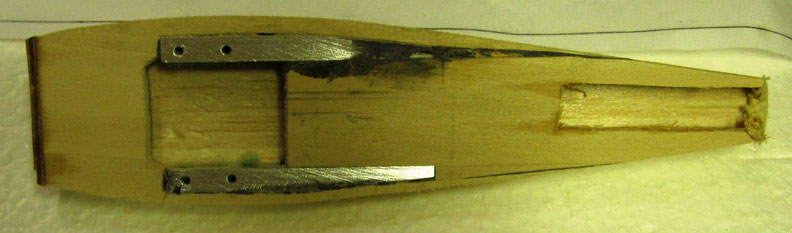
I built the pan and it came in at 1.4 ounces without finish, phew! Epoxy and basswood really add the weight, but this worked well. The fuselage back end will “T” into this piece I call the pan.
With the fuselage piece in place, our weight gain is now up to 2.25 ounces. We still have some more parts to fabricate though, such as a cowling and base for the cowling. This is getting fun, lil' geezers, we have so many cool components -- let's toss them all on the scale and see what happens, OK?
Wow! 7.25 ounces including the Fast Hippie torque unit -- we're right on track for our 16-ounce goal. When I hold all the parts in my hand, they feel pretty light, so it must be good, right?
Landing gear
This is the part I am truly dreading. Without a CAD program to lay out the flat pattern I am left to my own devices -- a rock and a stick.
It was pointed out to me early on that I was never meant to be a draftsman -- that's why trial and error was invented, for people like me. Another challenge is finding aircraft quality sheet aluminum in Kamloops -- well, one thing at a time I suppose. One of the guys who know about this stuff wrote where to place landing gear wheels for racing, it was 10 degrees in front of the wings' center of gravity. How you get there is your problem -- just put 'er there mon and you get no bouncing on the landings. With the landing gear head mounted, I can see that the gear will need to be angling back.
As it turns out, I used the rock and stick method to design the gear. The local hobby shop had a sheet of .070 K&S aluminum sheet. I hope it's stiff enough. The layout for the head bolts was a .75” square and I left a .50 hole for the glow plug to be accessed through. All this was first drawn on graph paper and an origami model folded -- looked pretty good so on to the aluminum!
The gear needs to span at least 6” so we'll keep that in mind. While in its stance, it also needs to be 2” or so tall when bolted to the head for prop clearace. I angled the bend lines on the graph paper so they will angle back slightly and not straight down when the struts are bent. Once all this had been drawn, I cut out the graph paper and glued it to the .070 aluminum. No fancy tools here in the wilderness, so a vice and hacksaw are used with much cleanup work of a sanding belt and file.
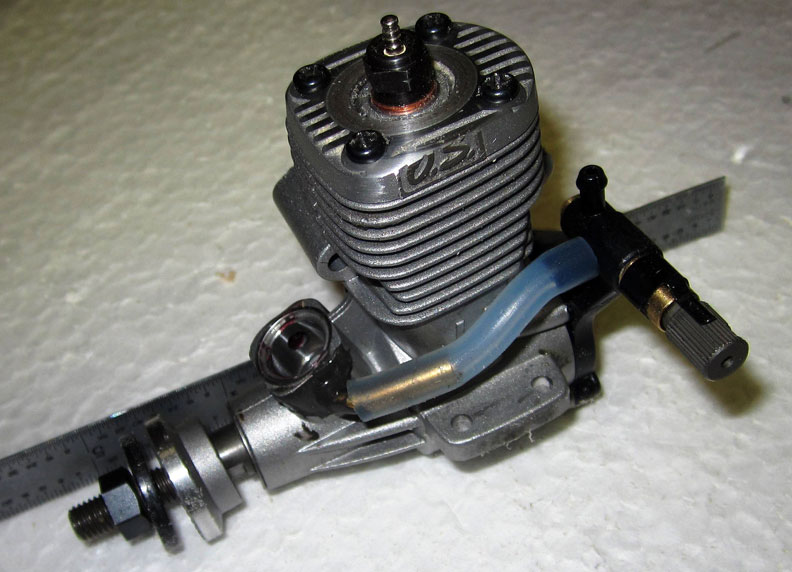
A Flat Head Engine
 We are introducing all sorts of nonsense with this project, like remove the head fins from our Batman (Bruce Tunberg) head (I can hear him groaning already). I refuse to indiscriminately hack on an engine because I saw it that way once when I was a kid. In this case, I do need a flat surface to mount La Landing gear to, so the head was taken down just to the surface the head bolts seat on. Then we can find some unknown metric screws of a longer length to go through the aluminum sheet and bolt to our engine. Taking fins off could be done on a belt sander, and a drill press. So away we go. I made a tool out of a 1/4-20 threaded stock, washer and jam nut to clean up the belt sanding. Just chuck it into the drill presto and here ya go -- .no mo head fins. Now I'll fabricate the sheet metal landing gear to attach to it.
Cowling
For me anyway, there are two surefire ways of making things more complicated.
- Put a cowl around it.
- Add a third line.
Since we are flying with just one string, let's opt for door No. 1 and put a cowl around it, OK?
There are many reasons why the cowling is not a simple idea on this project. Leading the way is the head mounted landing gear. To remove the engine from the airplane, I will need to take the gear off. (sigh).
I'm stubborn and am moving forward with this simply because I want to. I can't think of a better reason than that, so moving on, let's see what sort of difficulties I can conjure up this time. Cowlings take some abuse only because they do -- on mine I have usually found I need a strong front base for mounting and the exhaust port, I am making one out of basswood. The back tapering part will be made of soft balsa and glued to the fuselage sides. From the bottom of our engine lug to the bottom of the exhaust stack is just over an inch so two pieces of 1/2” bass are just right. I put in two diagonally placed mounting holes for attachment to the “pan,” one in front and one in back. I think for purposes of getting the mini pipe on and off, I will not add the very upper portion of the cowing until much later after some flight testing.
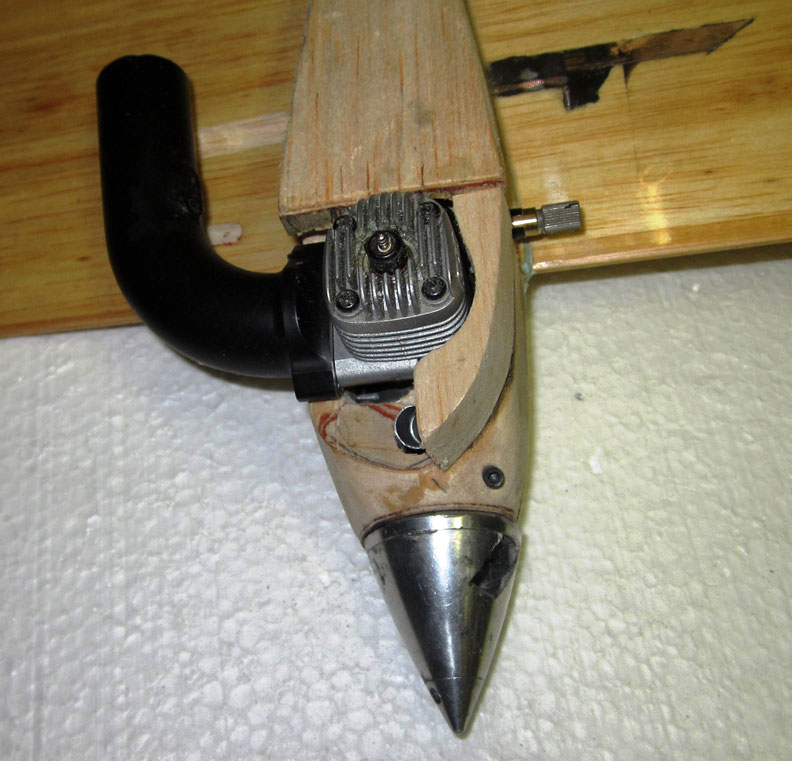
Put that in yer pipe n smoke it!
That phrase has taken on a whole new meaning in the State of Washington lately -- man.
But in this case it means that I finally attached a mini pipe that will hold its shape when it gets hot. My super light carbon fibre one sort of got gooey around the manifold at high temperatures. I found this one as part of a Macs muffler and it was pretty close to the I.D. was recommended by The Grate Cagun calculator.
I did, however, need to drill and tap one hole for the engine mounting because the muffler was made to fit an OS .25 FX and not our mild mannered LA .25. Macs does make a nicer looking header assembly that I may also try. It is much more streamlined but a smaller I.D. than the pipe shown here. I would like to say that I really know which pipe will work best, but I don't. All I know is they help increase RPM and I trust in Luke Roy's calculations.
 It's never finished
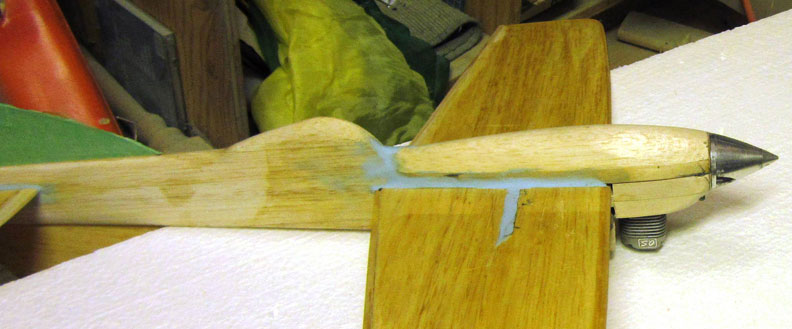
The finish for the ultralight will be clear wings and a white painted fuselage, stabilizer and rudder. Once again I will use Rustoleum over nitrate on bare wood with a top coat of MinWax clear polyurethane. This seems to be a good combination for my rattle can objective of The Home Depot store finish. Currently, the weight is just less than 17.5 ounces with the mini pipe. So when we add the landing gear, wheels, the 16 ounce goal becomes a pipe dream -- pun intended, but hey, we're going to get close.
 Well, that's all folks!
The picture at the top of the article shows the finally painted model, and now you have the nuts and bolts of the project. Hopefully it will inspire you to make your own Geezer Speed ship.
This pretty much concludes the Geezer Speed series and I have shown how the engine can be modified to get high performance, reviewed and built Partner's excellent Blondie Pro kit, and now have shown how a very high performance model can be constructed. Is there more? Yes, but that will need to wait while I go fishing 'n' stuff. To conclude this, I would just like to say that this event is pretty fun to fly, gets the old grey matter working on what to do next, and is very inexpensive.
This was and IS a good idea so big thanks to Marty Higgs (The Fast Hippie) the secret society called “The Aces” and especially ol Partner who just kept flying that thang until people began to notice.
-- kennyb
- (Fred) F2C balsa wings
- Carbon F2C wings. Mike's shop (Mike North)
- Macs Products (Header)
- F2D engine mounts
- Luke Roy's calculators
- Fast Hippy speed parts (torque units, tanks bellcranks)
- Partner Products (Proto kits)
- Eliminator Props
- Northwest B Proto Rules
Back to Bod Busters main page
Back to Speed main page
Flying Lines home page
This page was upated July 16, 2015