
Barrie Hobkirk is a speed flyer from a way back, when the Tee Dee was still king of 1/2-A speed but was beginning to feel the heat from the odd homemade “Special.” Barrie flew most classes off and on from 1964 to 73 but concentrated on 1/2-A. He became Canada's Junior National Champion for 1966 supported by wins in 1/2-A, B, C and B Proto. A chance meeting with Bill Wisniewski at the 1967 US Nats, assisting his crew to the first unofficial 200+ mph test flight inspired Barrie to focus his efforts for the '68 US Nats at Olathe, Kan. This culminated in a U.S. Nats Senior 1/2A win narrowly beating out Danny Wakerley and George Brown III.
A Canadian Senior 1/2-A record followed, and a year later, a Canadian Open 1/2-A record.
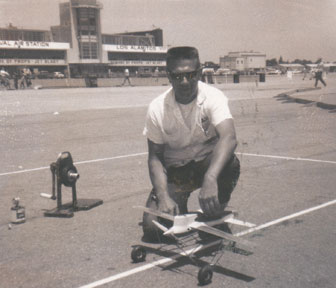

At left, Bill Wisniewski with his piped Pink Lady C Speed plane after his unofficial 200+ mph flight in Los Alamitos, Calif., an inspiration to Barrie Hobkirk, seen at right with "needle man" Chris Sackett, another British Columbia flier (left) at the 1968 U.S. Nationals in Olathe, Kan. Barrie is holding a 1/2-A Pink Lady. Barrie lost a few engines in the Kansas heat but was rewarded with a win in Senior 1/2-A.
The Tee Dee 049 went into production in late 1960. Although it appeared unchanged for the next 20+ years, there were a number of minor performance enhancing upgrades. The biggest taking place in the early 1970's with revised crank, rod, head and porting redesign.
Interesting that, the 1960s innovative technology of precision micro-machining and simple design that made the Tee Dee stand out among the rest, became it's limiting factor by the early 80s. As horsepower demands increased, so did the fragility of the Tee Dee's fine bottom end and simple ball/socket piston design.
In this article we will be discussing how to clean, inspect and reassemble an “out of the box” Tee Dee 049 without any high tech equipment or high cost. Just the basics, to get perhaps another 1,000 RPM without pushing it too near its limit.
Most of what follows can be easily applied to the Black Widow 049 to enhance it's potential for Mouse Racing.
Like most modelers, you most likely have one, two or several Tee Dee's from last year or even longer. Dig them out and lets get started.

Be prepared to purchase a few new parts. $20-$30 should do it.
1. Of particular attention is the plastic carb body that is prone to cracking. Don't scrounge here. Even the slightest crack can compromise performance and proper tuning. If there is a hint of a crack, get a new one. They are readily available on eBay for about $8-12.

2. The fiber thrust washer. A small but essential part between the prop plate and the crankcase that is particularly important if you use an electrical starter. It keeps the prop plate from galling the crankcase. There are also after-market stainless steel ones available but the fiber ones should do the job until your next rebuild.
3. A new glow plug. Another must item for peak performance. An old plug is fine for testing and just plain running but for that all important winning flight, grab a new one, test it and put it in. Note that there are at least two types of #1702 glow plugs out there for Tee Dee's. The old ones with the trumpet shape and four cooling fins and then there are the new ones with cone shape and three cooling fins. The new ones are good for a couple hundred more RPM on your best day.
4. A new prop screw and spinner. A small but important point is engine balance related to RPM. If you don't know the history behind your prop screw and spinner, it may be bent. Get a new one for peak TD performance.
5. For the Black Widow, get an overhaul kit including a new reed.
A note before we get started. If you have several TD 049's, be careful when disassembling or mixing/matching. There are a number of different spec items out there over the years most are interchangeable but some are not. The newer cranks do not fit the old case, in that the flywheel is thicker and when fitted to an old case, do not center the con-rod in the recess properly. Also, I have a couple con-rods that don't fit on some cranks and likewise a couple con-rods that are too sloppy on some cranks. Some cranks that are too short for the case and others that are too long. So check when reassembling multiple engines that you haven't detrimentally cross-bred.
Start by removing the plug, and if you have a new one already, scrap the old copper washer.
Remove the venture, needle and spray-bar housing.
Loosen, but do not remove, the cylinder from the case. Great care is needed here to avoid damage. If you have an old TD without the wrench fitting shaved top cooling fin, you need to insert the wrench across the exhaust ports. Make sure the wrench is all the way in. A slip here and your cylinder will to totaled.


If you have the cylinder type with the wrench fitting shaved top cooling fin, it is still best to set the engine in a vise so you can monitor the wrench action. Although this wrench configuration avoided potential damage to the exhaust ports, the wrench itself is rather weak and is prone to bending even with hand force. If you see the wrench bending stop and try a little heat to the case.
Before removing the cylinder, remove the back plate and the thrust washer. Removing the thrust washer is achieved by using the small semi-circle cut out in the side of the wrench which has the tooth in one side. Slip the tooth in one of the two notches of the carb body aluminum retainer ring and unscrew against the thrust washer. The thrust washer is a press-on fit and by unscrewing the carb body retainer ring, it simply pushes the thrust washer off.
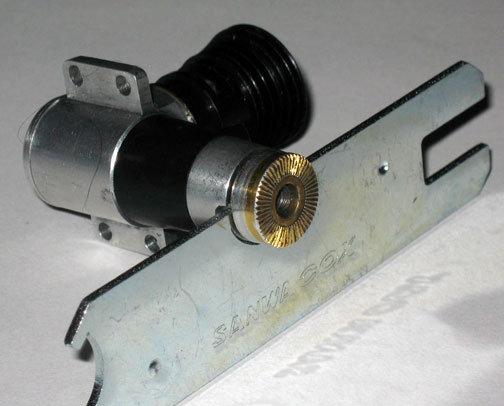
The plastic carb body with most likely not want to come off and it is not necessary to remove it unless it has to be replaced. It is quite a snug fit on the newer TD's. The case can be cleaned with it in place but some chemical cleaners may discolor it or at minimum, take the shine off.
Now the cylinder can be removed completely with the piston.
Followed by removing the crank from the case. If your engine has seen a season of racing or has been stored away, there will most likely be a lot of gummed up old oil around the recess in the crank. This gummed oil prevents lubrication of the from bearing and will damage the case and crank as well as rob you of plenty of RPM.
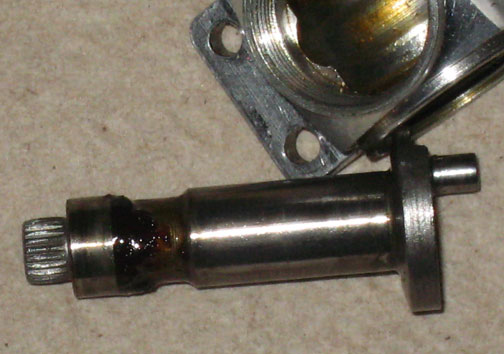
Inspect every item. The most vulnerable part, the plastic carb body has been mentioned before as has the plug and fiber thrust washer. If you see any metal on metal rubbing, like the crank on the backplate, find out why and correct the problem.
Check the con-rod fit to the piston. A precision fit. Any sloppiness indicates a problem.
Check the cylinder for shellac. A yellowy film on the cylinder walls. Read on to see how get rid of it.
Also, all that gunk around the crank and in the case has to go, so on to the next step.
Soak all parts in the methanol overnight. If the cylinder fins are filled with grime, use the toothbrush to wipe them out. If harsher treatment is necessary, use a wire brush. Brass is better than steel but they both will remove some of the blackening from the cylinder so be aware.
Use toothpicks and Q-tips to get the grime and gunk out of all the threaded parts, cylinder top and bottom, case front top and back. Plastic housing retainer, backplate and venturi.

Keep working, cleaning all parts. There is no reason they shouldn't look near new on the inside by the time you are done.
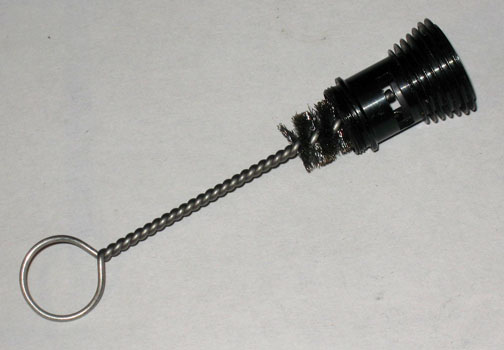
Now about the cylinder shellac. A yellowy film on the cylinder walls. It's from higher nitro fuels. Use the cylinder de-varnishing brush lightly to remove it. Don't over doit.
Clean thoroughly and check the piston to cylinder fit every so often. The piston should easily slide to the top of the cylinder snugging just short of the top. A 1/32” or so below the glow head shelf on a newer engine. Flush, or a bit above the shelf, on a well used engine. If your piston slides too far through, or is scored, you may want to invest in a new piston.
Use a syringe and/or compressed air to clean the inside of the spray bar out after soaking. Make sure there is nothing left lingering inside here that may become dislodged and change a needle setting. Rinse it numerous times in clean methanol. Make sure passages are free in both directions. Fuel inlet to needle and needle to venture ring. Use the syringe and flush methanol through in both directions several times. Same goes for the venturi. Those three holes are really small and can clog so easily changing a setting. Use a short piece of control line wire to poke through each one to check for particles. If you use paper towel to spin down the venture to clean it, make sure the holes are free after.
Now is the time to correct that con-rod to piston fit. Use the tool as instructed. The knock should be down to between 0.001” and 0.003” when finished.
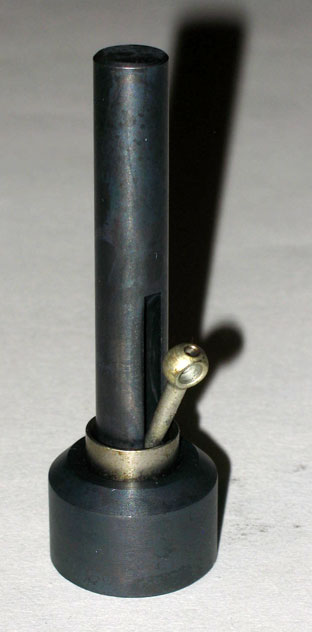
Assemble your new parts and discard the old ones. As mentioned before, if you are replacing the plastic carb body, it may be a bit snug on a newer style case. Make sure it is no more that a really snug fit close to hitting home. Too tight a fit will end in another cracked body in no time.
Assemble the parts basically in the reverse order of disassembly. Take you time. If you feel and hesitation of grinding while threading things together, stop and find out why before proceeding. Don't force. The grinding is saying there is still dirt in there. Take it apart again and clean again. The last thing you need is a chard of aluminum or steel flinging around in there at 20,000 rpm.
Don't tighten the glow plug until your sure you're finished. The copper gasket is at it's optimum after the first compression.
Now that your engine is clean, clean any fuel tanks you might use. This applied equally to the Black widow. Change the fuel line within the tank. It hardens and can get loose at the needle connection allowing air in.
Rinse the tank several times into a clean container. Check for particles. Anything left in the tank can easily plug the venture holes causing a run to go lean and possible engine damage. Same goes for you fueling equipment and lines. Check now and after every flying session.

Balance your prop. It's amazing how far out some props are, so get a balancer and get to work.
Even a $10 balancer will pick out an unbalanced prop and help you to a few more rpm.
The TD was meant to run of about 30% nitro for best performance. Also keep the Caster up to keep it lubed
A couple Web stores I've used are Cox International's Web site or their eBay shop at and another eBay shop called Model Engines and Parts Warehouse operated by California Dan
Have fun and keep those Tee Dee's alive and healthy.
This page was upated July 20, 2011