![]()

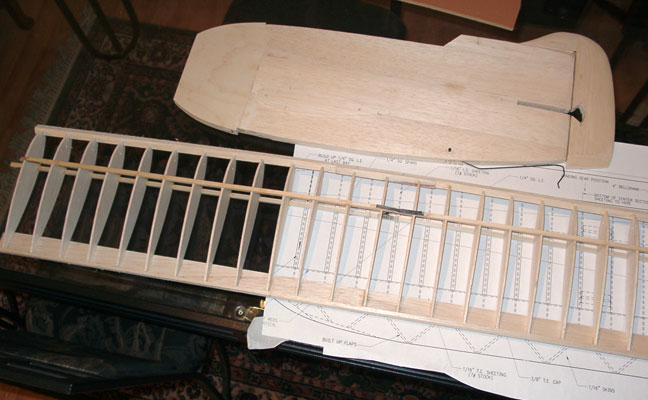
The GeeBee Sport .40 Carrier plane in subassembly state. Ken Burdick photo.
 opus n. pl. opuses, opera
1. An artistic composition
Yes folks, it's true.
The cat's out of the bag and likely through Wacky-leaks, but is out there nevertheless.
The latest creation from the Top Secret Development Lab is a Carrier plane. I know, I know, carrier has nothing to do with speed or combat, but as the saying goes. if it ain't fun, I ain't doin' it. Just how that applies to the carrier event is described below.
The idea of a Gee Bee first came to me as I was beginning to build the Hellcat model as shown on FL previously. It snuck down the streets of my mind and entered in such a way, that I was taken totally and completely. The Rein Man and I were discussing the ins and outs of building our ideas when I suddenly stopped and said, A Gee Bee! Huh? I said, a Gee Bee! Oh no…..oh yes! Pat Johnston made one for profile stunt and with a little help I'll bet I can scale it down to the right size for the carrier event. Stunned but not totally surprised, the Rein Man contemplated it for awhile then said Brilliant!
Next began all sorts of consultation with Pat Johnston, who also loved the idea. I asked what he thought of using a foam core for the fuselage and he completed the thought with some detail on how to do it as he is currently on a stunter. Pat is a great guy and emailed me a PDF of what I figured the right size of wing area would be and thus sent a 78% plan set of his R1 model. The thing is big, it's more like a tabletop than a fuselage. After a few calculations of material weight, we figured it really needed some careful planning of materials. Pat cautioned me that indeed this was the case so being careful was leading the way.
I began at the local copy center where I e-mailed Pat's plan set off to. They promptly botched it by running two sets that were 120% size and not 78%. The following day I spent some time with them trying to get the scale correct. Unfortunately, they could not work with the auto-cad files that had it all in its format.
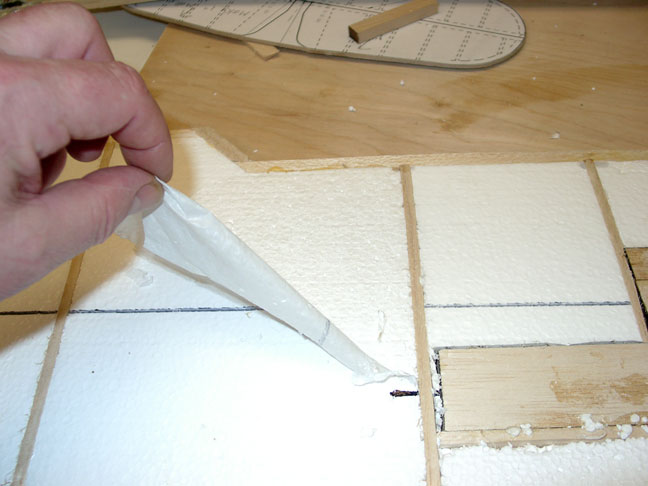
Next was a trip to the Home Depot for some 1/8” hardboard to make templates and a sheet of 1/2” styrofoam to use as the core fuselage. The foam has a plastic sheeting on both sides that would be removed later, and might just come in handy for the template removal.
The tubby fuselage plan was glued to the hardboard with 3M77 and a cut out oversize of the final outline. Next I used the same adhesive to attach the template to the 1/2” white foam with the plastic sheeting still in place. More time on the band saw produced a perfect outine of template and foam.
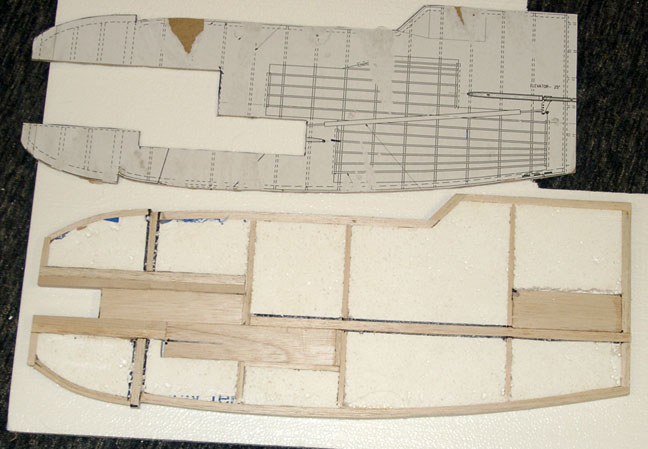
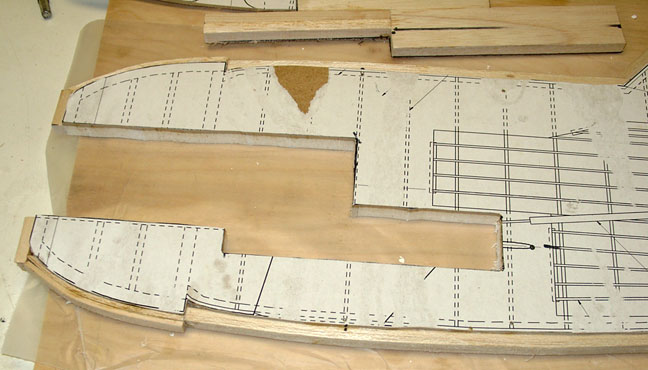
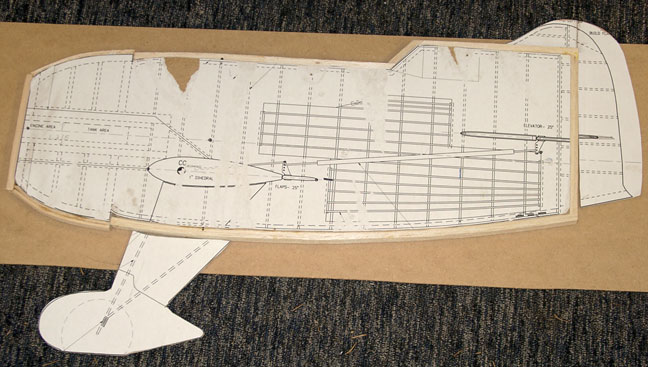
I needed a shape outlined in balsa as the final product, with 1/16" sheeting on it and will need a surface to bond to more than just foam. To accomplish this, I cut up strips of 1/2” thick balsa and made them 1/4” wide. This would make a shell around the shape assuming I didn't crush the fragile foam.The template of hardboard would hold the shape for my sticks as they would be glued to the foam. I used a lot of blue masking tape to keep the things in place while the white glue dried. This process could not be rushed and it took a few evenings to get the complete shape outlined. The curve at the nose proved to be difficult and needed the rear most pieces secure before bending to shape. The final product was a flat and well outlined shape of the R1 fuselage. Before removing the template, I added some bracing to the structure to keep it in the shape I wanted. I imagined it springing apart when the board was removed.
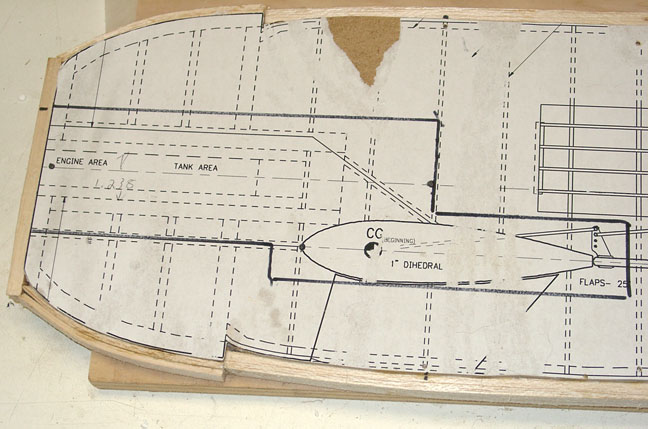
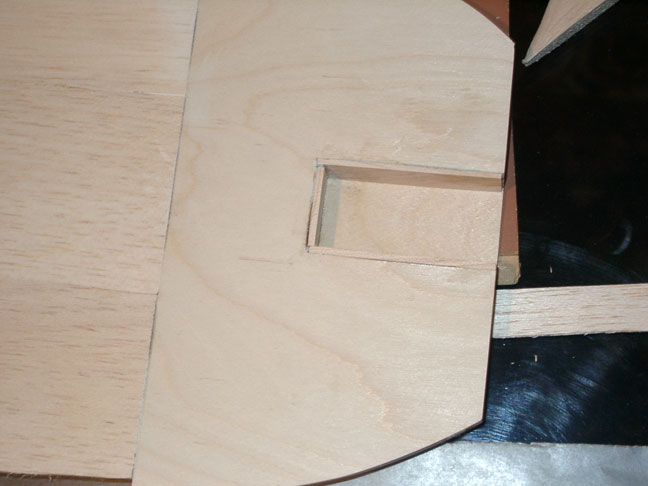
The engine mount, and wing saddle were drawn on the plans with all centerlines drawn on the plan set. The area for this was then cut out and parts fabricated and epoxied in place. Once this was done, I could then take off the template and peel off the plastic coating.

The nose was covered with 1/16” 5 ply plywood. I used 15 min epoxy for this. Next came the 1/16 balsa that butts up to the ply and for this I used white glue spread very thin with a fiberglass took (flat paddle tool) The skin took 3 sheets of 3” wide balsa tacked together for a 9” width. It was put in place and a 3/4” ply sheet was used to press the skin to the form with waxed paper as a barrier. We put as much weight as we had on top of the thing and let it dry overnight.
I can only write this crap for so long ... is it as boring for you as it is for me? I absolutely can't stand construction articles. I'd much rather look at pictures. So here they are!
The Bee is getting the traditional colors of the R1, a Brodak c22 bellcrank and other stuff that I have not figured out yet.
What I can tell you is the event, 40 sport carrier is going to be well attended due to the openess of the event. Several are building for it and others are thinking hard about what they would like to do.
The rein Man has a secret ship that only he and I know about. It has much-o cool-o ideas in it.
Enjoy the pictures.
-- Kenny-b

This page was upated Feb. 16, 2011